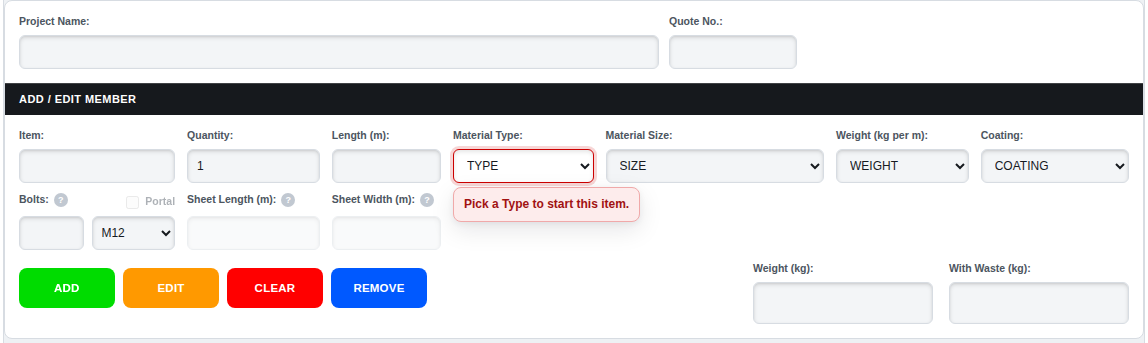
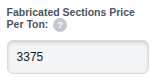
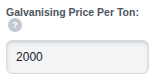
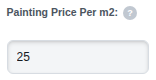
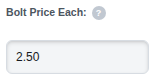
Type the Project Name (and your Quote No. if you use them) at the top of the entry panel. They name every file you save.
Check your rates in Item Variables and Project Variables before the first member goes in. Each member copies the Item Variables at the moment it is added.
Take off the members: fill in the entry panel and press ADD, or load the drawing set on the Drawing page and measure them off the plan.
Add the Site Costs a take-off can't measure: chemsets, transport, crane, hire, installation.
Watch the Live Summary on the right. It re-prices as you go, down to the TOTAL.
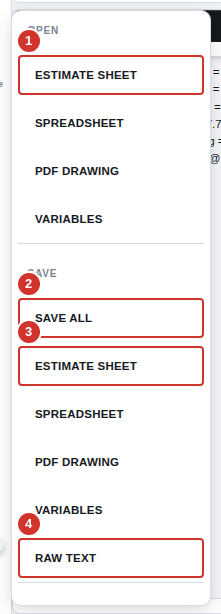
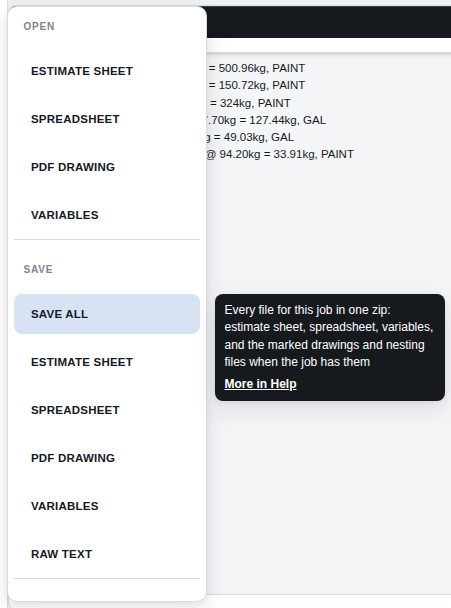
Save the job with Load/Save > SAVE ALL (or any single file). The Estimate Sheet PDF and the Spreadsheet both reopen the whole job later.
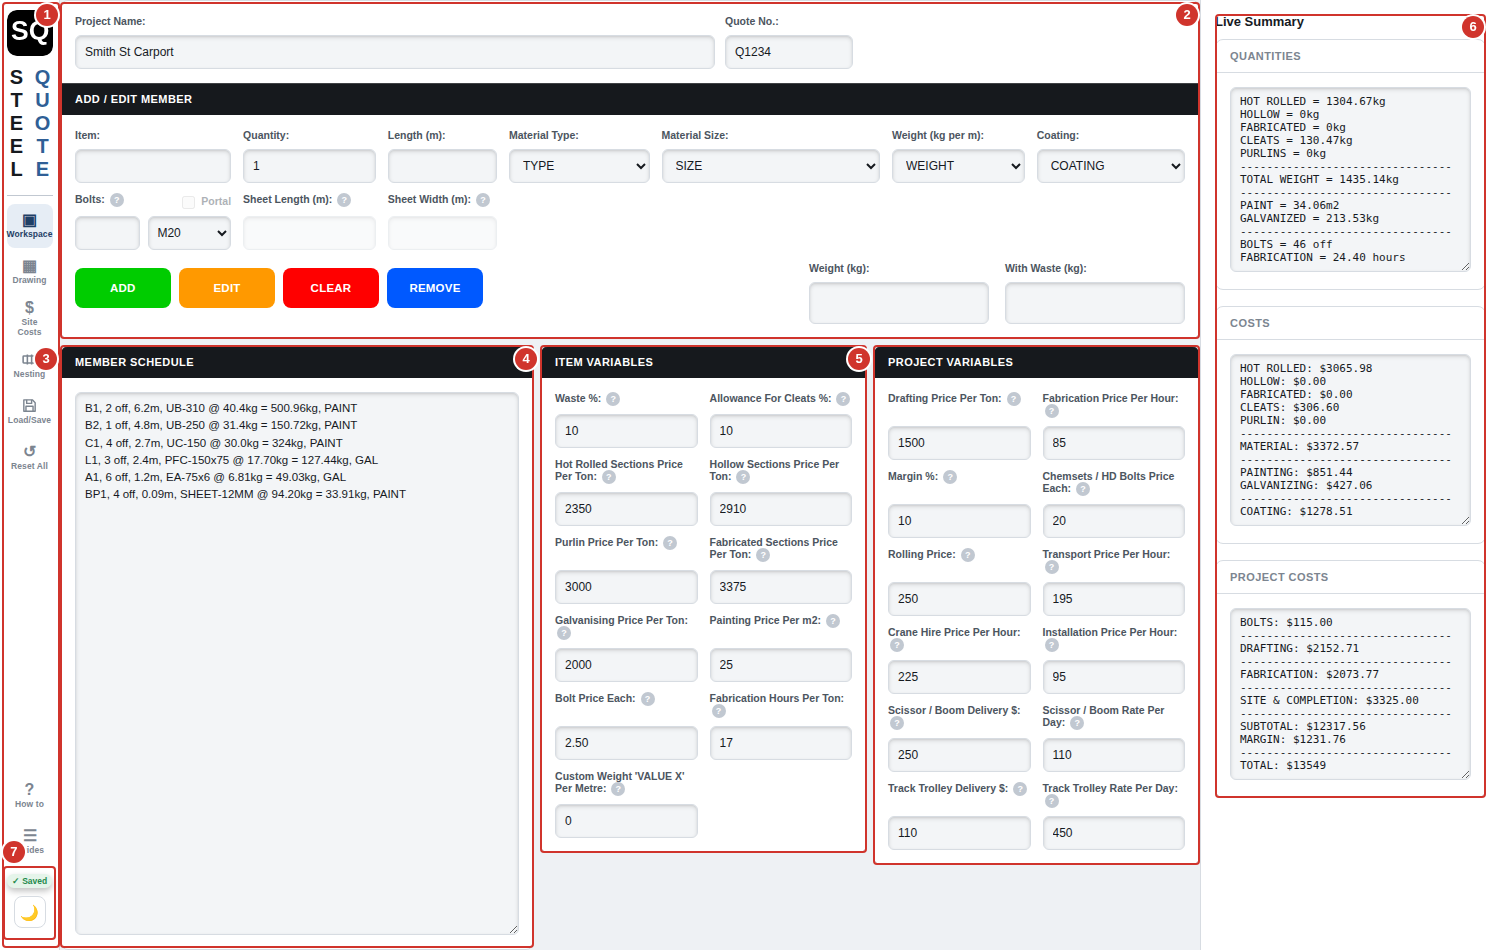
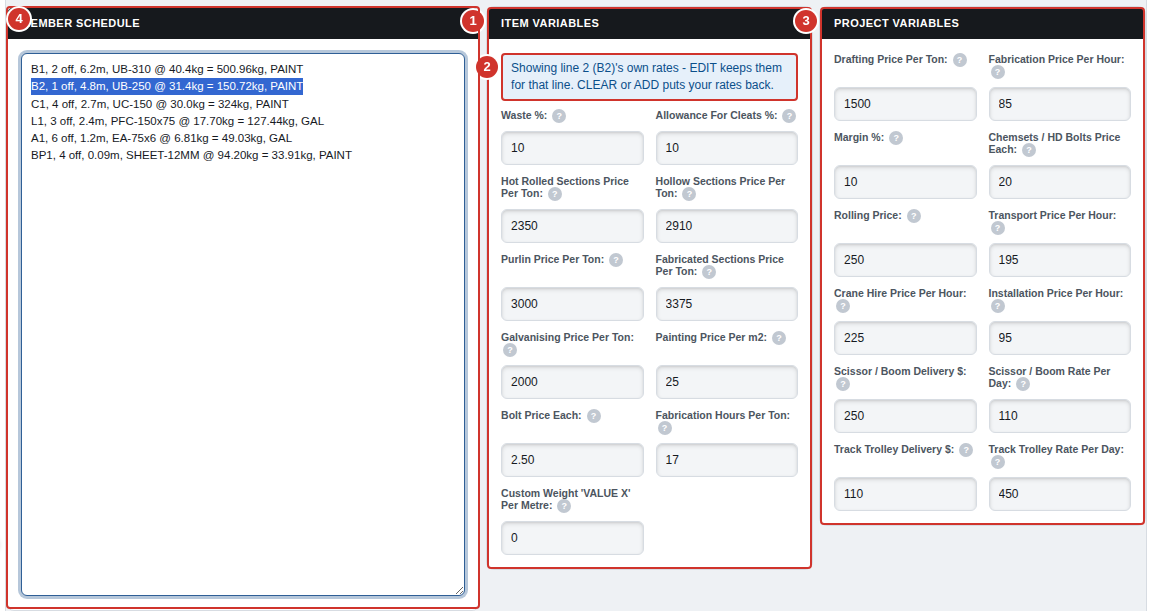
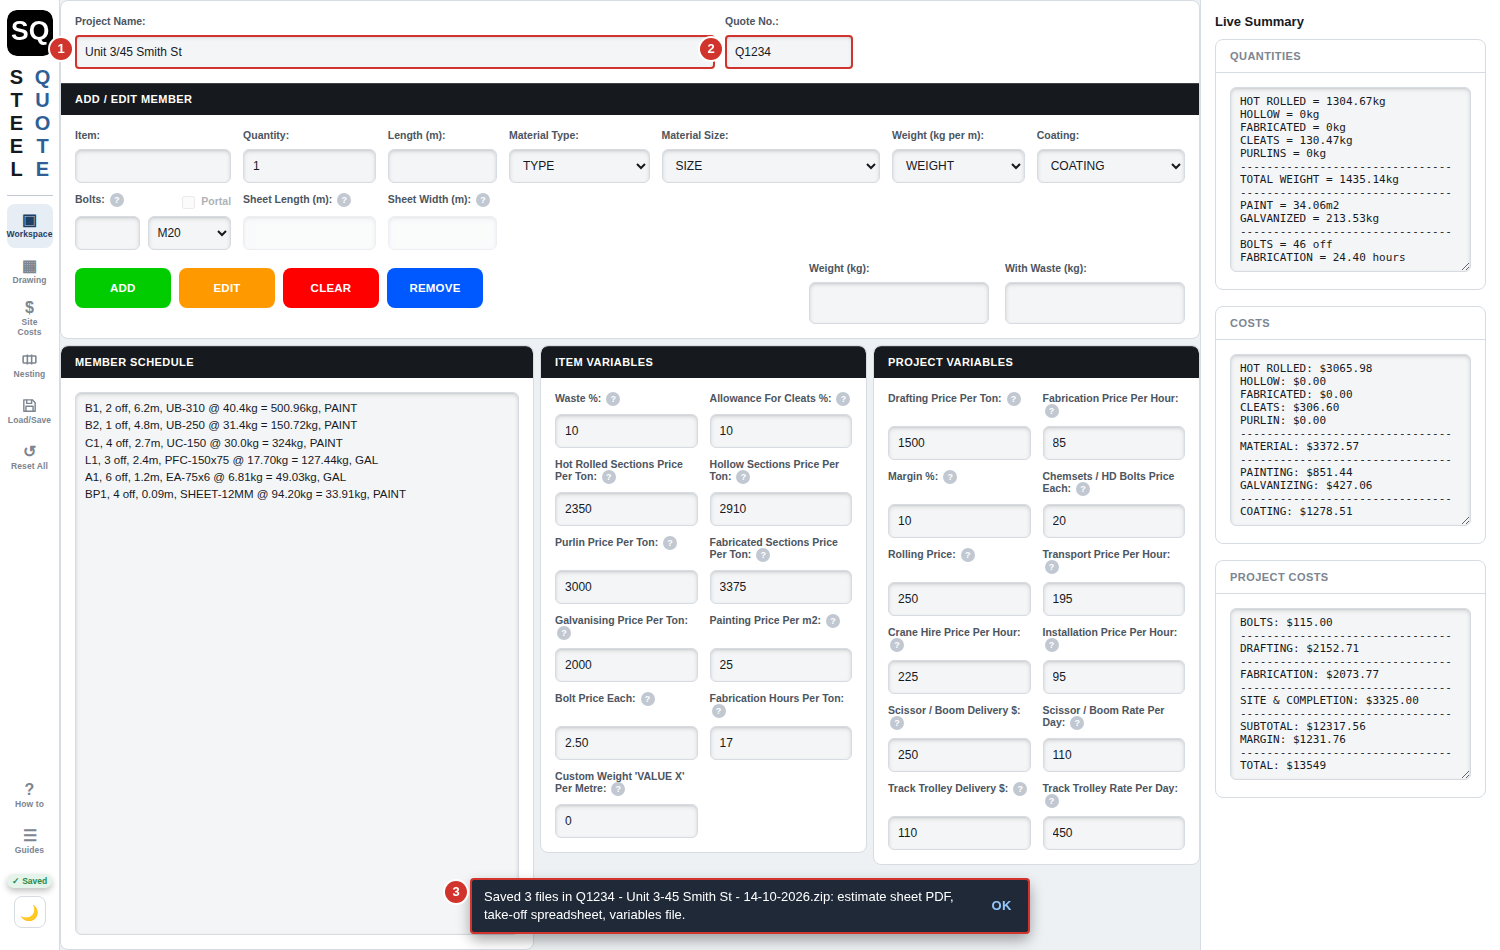
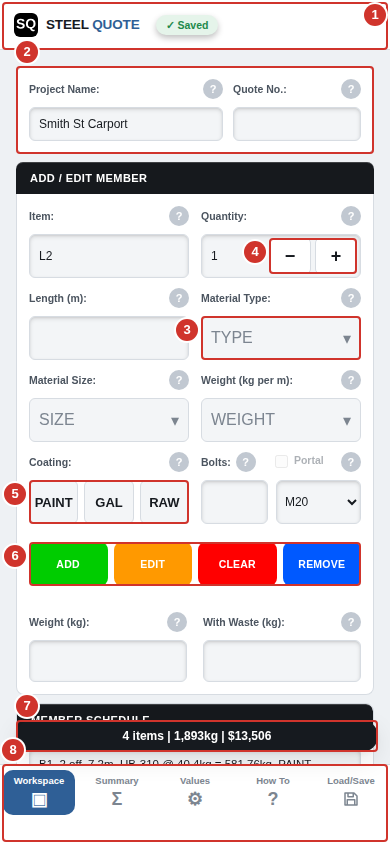
The workbench with a small job entered.
The rail: Workspace, Drawing, Site Costs, Nesting, Load/Save, Reset All, How to and Guides.
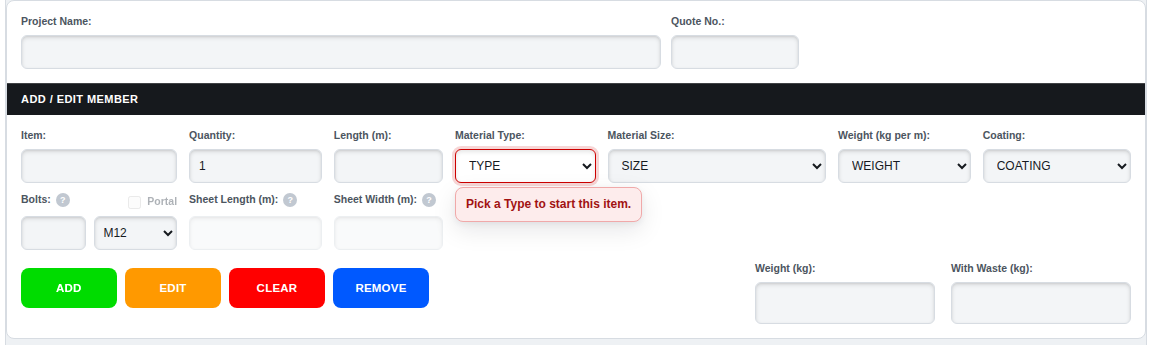
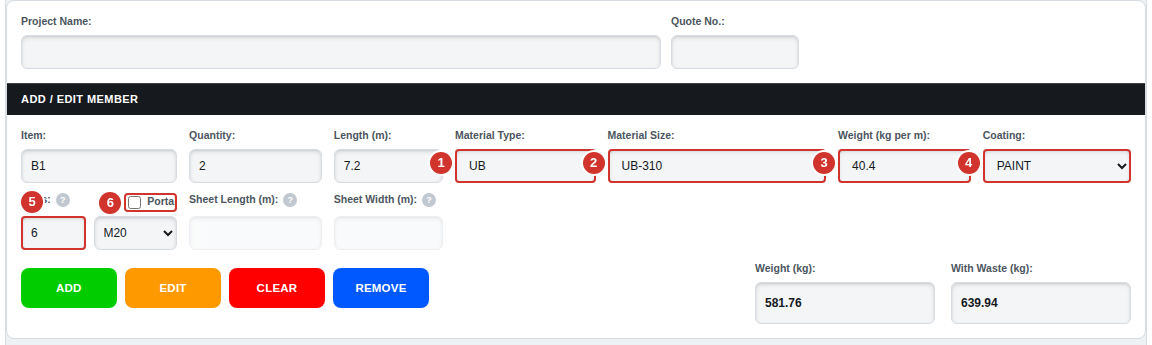
The entry panel: Project Name, Quote No. and the Add / Edit Member form.
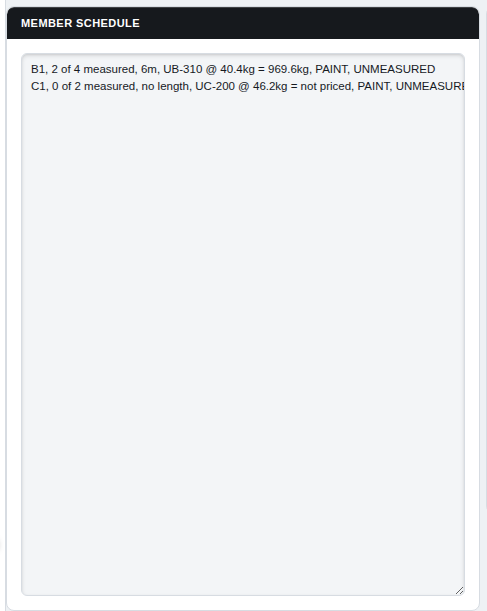
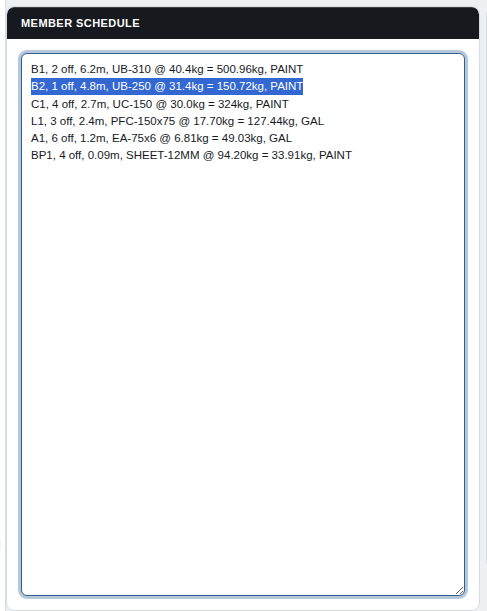
The Member Schedule: one line per member, click a line to work on it.
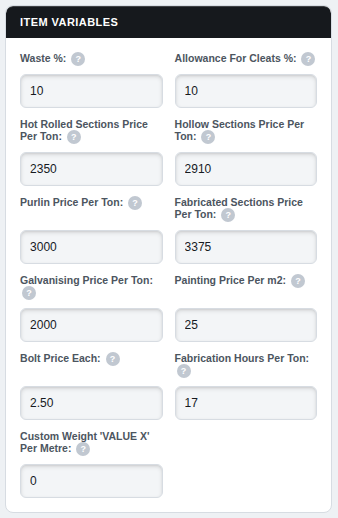
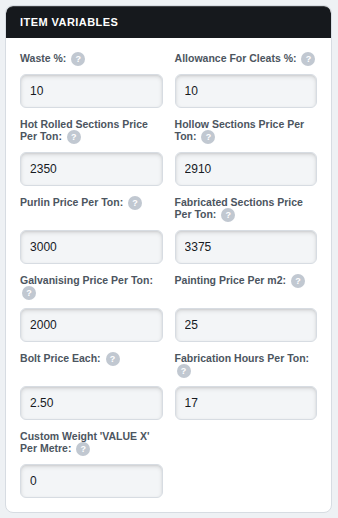
Item Variables: the rates each new member copies.
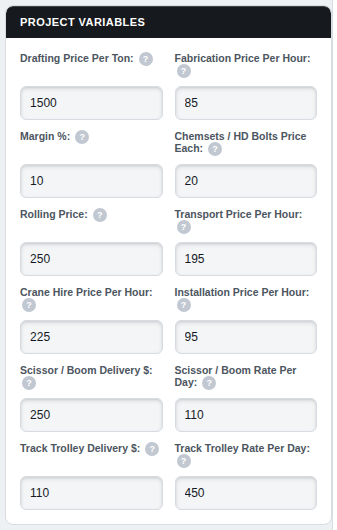
Project Variables: the rates that apply to the whole job.
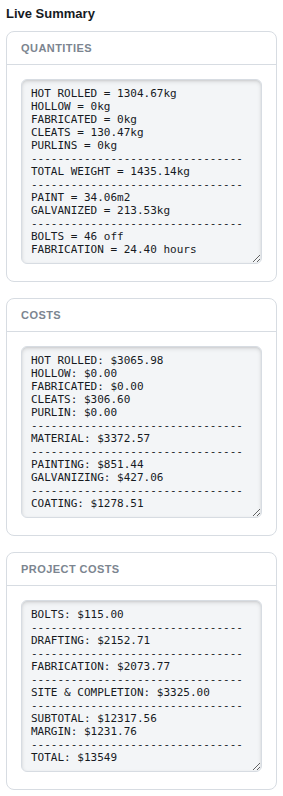
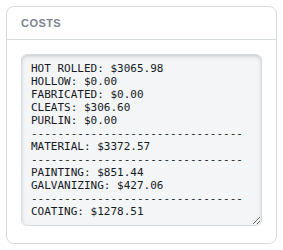
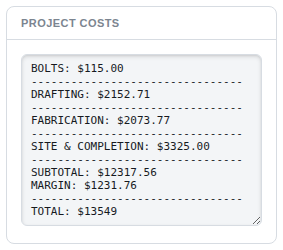
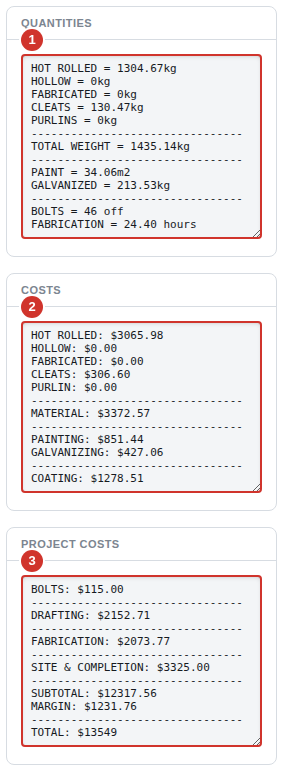
The Live Summary: Quantities, Costs and Project Costs.
The foot of the rail: the Saved tick and the light/dark switch.
What it does. Steel Quote turns a take-off - every member on the job with its size, length and quantity - into a weight, then prices it at your rates: supply steel, cleats, coating (paint or galvanising), bolts, drafting, fabrication labour, site costs and margin. Every figure is worked out again each time anything changes, so the Live Summary is always the current price. It also nests the quoted steel into stock lengths and writes the estimate sheet, the spreadsheet and marked-up drawings.
When to use it. For structural steel estimates in Australia, built from either a typed take-off or a PDF drawing set. Prices follow the Australian domestic market.
Catch. It works out what you give it. Use it with the estimate sheet so nothing is left off the quote, and check anything the app can't measure for you - site costs, rolling, special connections.
What it does. On a computer the workbench is three parts. The rail down the left holds the page buttons. The workspace in the middle holds the entry panel, the Member Schedule, the Item Variables and the Project Variables. The Live Summary down the right shows the quantities and prices. The Drawing, Site Costs and Nesting pages take over the middle when you open them; the Workspace button brings it back.
When to use it. Work left to right: rates, then members, then check the totals.
Catch. The right-hand column changes with the page. On the Drawing page it holds the entry panel and the Member Schedule, so the canvas keeps its width, and the Live Summary is not shown. On Site Costs the Live Summary stays alongside. On Nesting it is hidden - nesting does not change the price. Below 699 pixels wide the phone layout takes over instead.
What it does. Fill in the entry panel for a member - everything except Length - then use MEASURE on the drawing: click the member's two ends and it goes on the Member Schedule at the measured length, to the nearest 0.1 m. The next pair of clicks adds another member, or counts onto the same line when it measures the same and everything else matches. COLUMN places a vertical member with one click at the typed Length.
When to use it. When the plan has no member schedule of its own, or you prefer to take the members straight off the drawing.
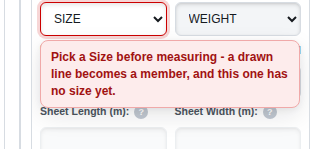
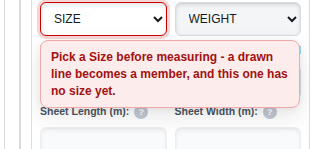
Catch. MEASURE and COLUMN will not start until the form describes a member that can be priced - Type, Size, Weight and Coating at least, and a Length for COLUMN. The note under the field says what is missing.
What it does. Read the plan's own printed member schedule and enter every row with ADD, leaving Length blank. With a drawing loaded, each line goes on as UNMEASURED - "0 of 4 measured, no length ... not priced". Use STRIKE to rule through each row on the plan as you enter it. Then click a line in the Member Schedule and press MEASURE (or COLUMN, with a Length typed): each instance you place counts up - 1 of 4, 2 of 4. The first one sets the length; one of a different length splits onto its own line (B1-2); at the full count the line settles and is priced like any other.
When to use it. When the drawings carry a member schedule - it is quicker to type the rows than to find every member first.
Catch. A blank Length is only accepted while a drawing is loaded; without one ADD asks for a length, so a typed quote can't carry zero-weight lines by accident. Until a line has a length it is not in the price, and the Live Summary says so on an UNMEASURED line.
What it does. Every change - a member added, edited or removed, a rate, the Project Name, a site cost - is saved in this browser straight away. The green ✓ Saved tick flashes for a moment each time it happens: at the foot of the rail on a computer, in the top bar on a phone.
When to use it. You don't have to do anything. If the tab is closed or the page reloads, the job is offered back next time in the restore list.
Catch. The autosave lives in this browser on this device only. Another computer, another browser, a private window or cleared browsing data won't have it, and only the newest 8 saves are kept. Each browser tab keeps its own save. It is a safety net, not a file: use Load/Save to keep the job. If the browser blocks saving, the tick never appears.
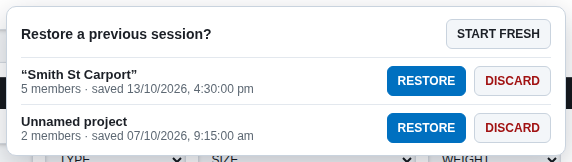
What it does. When the page opens and this browser holds saved work, a list appears at the top of the screen: one row per save, newest first, each naming the project ("Unnamed project" if it had no name), how many members, strikes and drawn marks it holds, and when it was saved.
When to use it. Pick up a job after a closed tab, a reload or a crash - or get back a job from another tab.
Catch. Ignoring the list loses nothing: the saves stay listed until you discard them, and the first change you make moves this tab's old save aside rather than over it. A job with drawn marks needs the same PDF loaded again to show them.
RESTORE
What it does. Loads that save into this tab - members, Project Name, Quote No., both sets of variables, site quantities, strikes and the sheet scales for its drawing set - and closes the list. A notice says if marks need the PDF loaded, or if any member's figures moved.
When to use it. To carry on with that job.
Catch. A save from another tab moves to this tab and leaves the list. The drawing's UNDO steps don't come back, and restoring a different job clears the Nesting page's ticks and job number.
See also Troubleshooting for the fabrication hours notice on older jobs.
DISCARD
What it does. Deletes that one save from this browser. The list stays open with the rest.
When to use it. Tidying away old or test jobs you will never want back.
Catch. It cannot be undone, and it asks nothing first. Save a file from Load/Save before discarding anything you might need.
START FRESH
What it does. Closes the list and leaves you on a new job. The saves stay listed for next time.
When to use it. Starting a different job while keeping the old ones on offer.
Catch. It always clears the Nesting page's ticks and job number. If you have already begun work under the list (a member or a strike on screen), that work and its Quote No. are kept; otherwise the Quote No. is cleared too.
Light / dark switch
What it does. Switches the app between light and dark. The button shows a moon in light mode and a sun in dark mode. It sits at the foot of the rail on a computer and top right on a phone.
When to use it. Dark for a dim office or night work; light for printing screenshots or bright rooms.
Catch. The choice is remembered in this browser only. On the first visit it follows your device's own light/dark setting. It changes the screen only - saved PDFs and spreadsheets look the same either way.
Switch to the classic calculator
What it does. Opens the original Steel Quote layout. It stays as it is, permanently.
When to use it. If you prefer the layout you know.
Catch. It opens in the same tab, and it keeps its own autosave, separate from the workbench's - a job does not move between them by itself. It has none of the workbench's newer parts, such as the Nesting page or the Quote No. box.
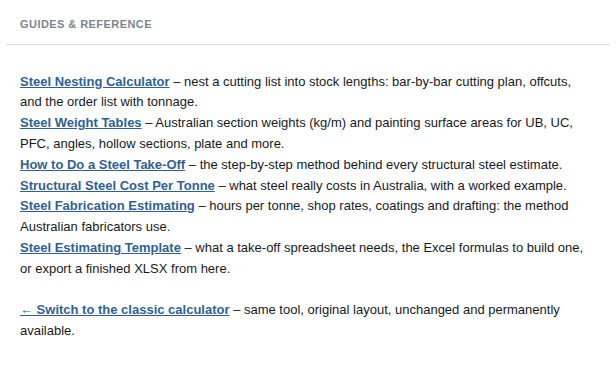
Guides & Reference
What it does. The Guides button on the rail opens a box of links: the Steel Nesting Calculator, the Steel Weight Tables (kg/m and paint areas for Australian sections), How to Do a Steel Take-Off, Structural Steel Cost Per Tonne, Steel Fabrication Estimating and the Steel Estimating Template - plus the classic calculator.
When to use it. Looking up a section weight, or reading up on the method behind an estimate.
Catch. The guides open in a new tab, so the job stays where it is. The standalone Nesting Calculator shares your stock on hand and cutting settings with the workbench's Nesting page in this browser.
About & Legal
What it does. Under Guides on the rail: what Steel Quote is for, the copyright notice, the version, and the address for feature requests and questions - info@steelquote.info.
When to use it. To ask for a feature, report a problem or check the version.
Notices
What it does. A bar near the bottom of the screen says what just happened - a file loaded or saved, a session restored, something skipped or failed. Warnings show in orange. OK puts it away; otherwise it goes by itself after a few seconds (longer for a longer message).
When to use it. Read it - it is the app telling you about something you did not see happen, such as members whose figures moved when an old job loaded.
Catch. A new notice replaces the one showing. The app never uses the browser's own message boxes for its messages and questions, so a browser that has been told to stop showing them can't silence one.
Questions on the page
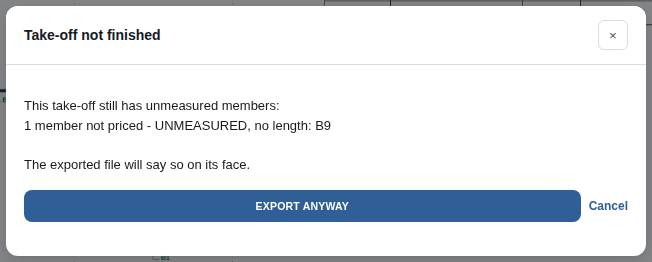
What it does. When the app needs a decision - RESET ALL, an EDIT that changes a drawn member's length, exporting with unmeasured members, a different drawing set - it asks in a box on the page, with a button for each answer and Cancel.
When to use it. Answer it before carrying on; nothing changes until you do.
Catch. Cancel, Escape, the × and a click outside the box all mean Cancel - nothing is changed or saved.
The ? bubbles
What it does. A ? beside a label explains that field. On a computer, hover over the label to read it; click or tap the ? to open the note under the label, and again (or anywhere else) to close it. Each note has a More in Help link to that field's entry on this page.
When to use it. Any time a field's purpose is not obvious.
Catch. The phone shows more bubbles than the computer (Project Name, Item, Length and the rest of the entry form carry one there).
Workspace
Step by step
Type the Item mark, the Quantity and the Length (m).
Pick the Material Type, then the Material Size, then the Weight (kg per m) - it fills itself when a size has only one.
Pick the Coating. Check the Bolts count (prefilled for standard connections) and tick Portal for knee and apex connections.
Check Weight (kg) and With Waste (kg), then press ADD (or Enter). The member joins the Member Schedule and the Live Summary re-prices.
To change a member, click its line in the Member Schedule, change the fields and press EDIT. REMOVE deletes it (UNDO for 6 seconds); CLEAR or Escape gives you a blank form.
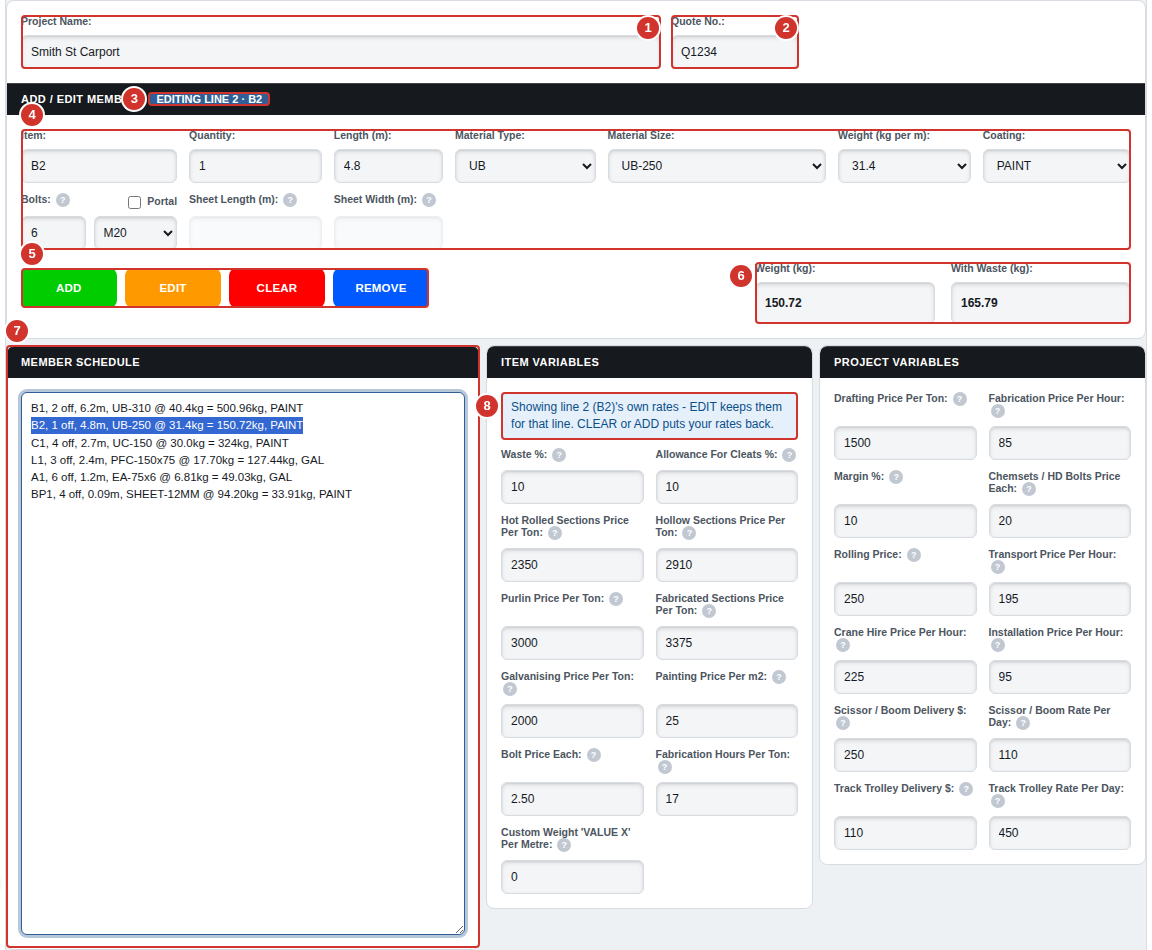
The Workspace with line 2 clicked for editing.
Project Name.
Quote No.
The Add / Edit Member bar, with the chip naming the line being edited.
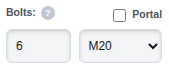
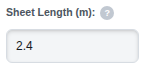
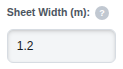
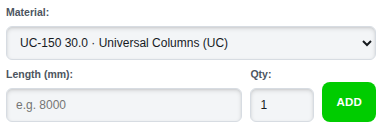
The member's fields: Item, Quantity, Length, Type, Size, Weight, Coating, Bolts and the sheet sizes.
ADD, EDIT, CLEAR and REMOVE.
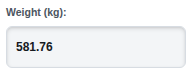
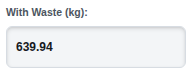
The Weight and With Waste readouts.
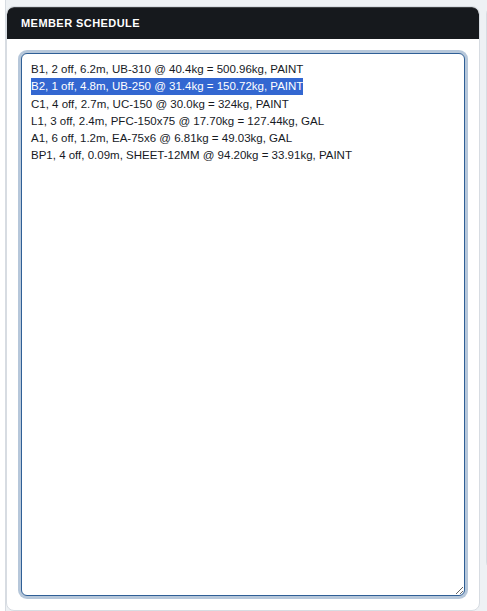
The Member Schedule.
The note saying the Item Variables now show the clicked line's own rates.
What it does. Names the job. It heads the estimate sheet and the spreadsheet, goes into every file name after the Quote No., shows in the restore list, and is the Nesting page's job name until you type another there.
When to use it. First thing on a new job.
Catch. ESTIMATE SHEET, SPREADSHEET, PDF DRAWING and SAVE ALL won't save without it - a note appears on the field instead. Enter in this box does not add a member; Escape just leaves the box.
What it does. Your own quote number, optional and free text (up to 40 characters; extra spaces are tidied away). It starts every file name, prints on the estimate sheet beside the Total Cost row, heads Raw Text, and is saved with the job in every file and the autosave.
When to use it. If you number your quotes - it keeps the files for one quote together in a folder.
Catch. There are no revision numbers - type "Q1234 rev B" if you want one. A file saved before this box existed reopens with it blank. RESET ALL clears it; START FRESH clears it only when nothing has been entered yet. Enter in this box does not add a member.
What it does. The black bar heads the member form. When a schedule line is clicked, a chip on it names that line - "editing line 2 · B2" - so you always know which member EDIT and REMOVE will act on. On the Drawing page the bar reads Item Values: the form there holds the selected member's values and the values new measurements will use.
When to use it. Glance at it before pressing EDIT or REMOVE.
Catch. On a computer a member you have just ADDed stays selected, so the chip names it and EDIT would change it. CLEAR, Escape or a click below the last schedule line puts the chip away.
Item
What it does. Your mark for the member - B1, C2, PL1 - as on the drawings. It starts the schedule line and labels the member on the marked drawing and in the nest.
When to use it. Every member. It can be left blank, but a mark makes the schedule, the drawing and the cutting list readable.
Catch. On the drawing, members only count onto the same line when the mark matches as well as the size, so B1 and B2 stay separate even if identical. A split line is named after its root: B1-2, B1-3. On a phone, ADD counts the mark up by itself (B1 to B2).
Quantity
What it does. How many of this member. Weight is Quantity × Length × kg per metre. For a SHEET it is the number of sheets on a computer - but on a phone it is the square metres of plate (the phone sets Width and Length to 1 m; see SHEET on a phone).
When to use it. Enter identical members as one line with their count rather than one line each.
Catch. It must be a plain number greater than zero ("2", "0.5", ".5" all work; "2 off" doesn't). A part quantity is priced as typed but rounded up when nested. For a schedule-first line it is the target count the drawn marks work towards. On a phone it has − and + buttons.
Length (m)
What it does. The member's length in metres, for one piece. MEASURE fills it from the drawing, to the nearest 0.1 m.
When to use it. Every member except SHEET, where it is locked and shows the plate area from Width × Length.
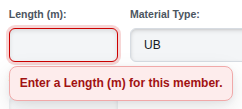
Catch. It is metres, not millimetres: 6.5, not 6500. Left blank with a drawing loaded, ADD enters the member as UNMEASURED (schedule-first); with no drawing loaded a blank Length is refused. Typing a Length and pressing EDIT settles an unmeasured line by hand.
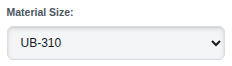
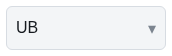
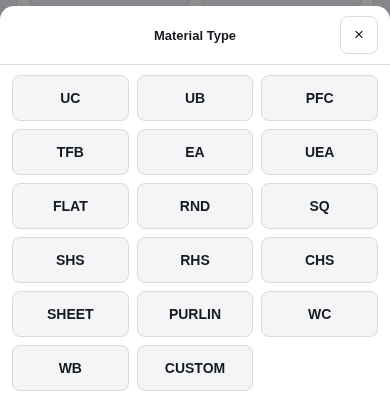
What it does. The section family: UC, UB, PFC, TFB, EA, UEA, FLAT, RND, SQ, SHS, RHS, CHS, SHEET, PURLIN, WC, WB or CUSTOM. It sets which $/t rate prices the member - hot rolled (UB, UC, PFC, TFB, angles, flats, rounds, squares, SHEET), hollow (SHS, RHS, CHS), fabricated (WB, WC) or purlin.
When to use it. First of the three section picks, after the length.
Catch. Changing it empties Size and Weight and re-sets the Bolts count. PURLIN is always RAW and never gets waste, cleats or fabrication hours. SHEET switches on Sheet Width and Sheet Length and can't be MEASUREd. CUSTOM takes your own kg/m. On a phone the list is the TYPE tap button, which opens it as a sheet from the bottom.
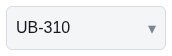
What it does. The size within the type - UB-310, PFC-200x75, SHS-100x100x5.0, SHEET-10MM. It sets the weights on offer, the paint area per metre and the bolt estimate.
When to use it. After Material Type.
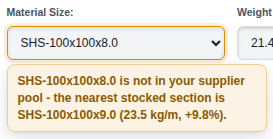
Catch. A size your supplier doesn't stock gets an orange note naming the nearest stocked section - it is advice only, and the member can still be added. The Nesting page offers the swap. For CUSTOM the sizes are HOT ROLLED and HOLLOW, which set the $/t rate used. On a phone the list is the SIZE tap button.
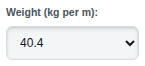
Weight (kg per m)
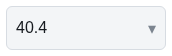
What it does. The section's mass per metre, from the published supplier tables. It fills itself when the size has only one weight.
When to use it. Pick it when a size comes in more than one weight (UB-310: 32.0, 40.4 or 46.2).
Catch. For SHEET the figure is kg per square metre of plate at that thickness. For CUSTOM it reads VALUE X, and the weight comes from the Custom Weight field in Item Variables. On a phone the list is the WEIGHT tap button.
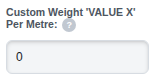
Custom Weight 'VALUE X' Per Metre
What it does. The kg/m used for a CUSTOM member (Weight = VALUE X). It sits in Item Variables but it is the member's own weight, not a rate: each CUSTOM member keeps the figure it was added with.
When to use it. A section that isn't in the lists - type its kg/m here, then pick CUSTOM, HOT ROLLED or HOLLOW, and VALUE X.
Catch. CUSTOM members can't be painted - there is no paint area for them - so pick GAL or RAW. Clicking a CUSTOM line shows its own kg/m here; ADD keeps whatever is on screen for the new member.
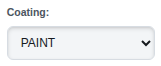
What it does. PAINT is priced per square metre of outside surface (the section's paint area × length, plus the cleats allowance). GAL is priced per tonne of the member's weight with waste and cleats. RAW adds nothing.
When to use it. Every member - ADD won't go until a coating is picked.
Catch. PURLIN is set to RAW by itself. PAINT is refused for CUSTOM members, which have no surface area data. On a phone the coating is three buttons: PAINT, GAL, RAW.
What it does. The bolt count for ONE member, both ends together. It prefills from the shop's cleat-plate schedule for every UB, UC and PFC and WB 700 and 800 (bolts per cleat × 2 ends; small PFCs take the floor of 2 per end), and 4 × M12 for a purlin. You can type over it. The line's bolts are this count × the Quantity, priced at the Bolt Price Each.
When to use it. Check it for every beam and column; type it for anything with no figure.
Catch. WB 900, 1000 and 1200, every WC, and portal connections past 460UB or 380 PFC have no confirmed figure: the box is left empty and ADD won't go until you type a count - nobody's guess goes into a quote. Angles, flats, hollow sections and sheet get no estimate; leave them blank for no bolts. Picking another Type or Size, or ticking Portal, replaces a count you typed with the new estimate - type your own count last.
Bolt size
What it does. The bolt diameter, M12 to M36. It is set with the count: M20 for members up to and including 460 deep, M24 above, M12 for purlins.
When to use it. Change it when the connection calls for a different bolt.
Catch. Every bolt is priced at the one Bolt Price Each, whatever its size - the size is recorded with the member and shown in the files, but it doesn't change the price.
Portal
What it does. Tick it for portal frame knee and apex connections. The bolt estimate then adds the flange bolt groups: 2 top and 2 bottom per end for PFC up to 380, 4 top and 4 bottom per end for UB and UC up to 460 (for example 310UB 24 bolts, 460UB 28, 200 PFC 12, 380 PFC 16).
When to use it. Rafters and columns in a portal frame.
Catch. It only works for PFC, UB and UC - for every other type it is greyed out and unticked. Past 460UB or 380 PFC there is no confirmed figure, so the count is left for you to type.
Sheet Length (m)
What it does. The plate's length in metres, for a SHEET member. With Sheet Width it gives the plate area, which shows in Length (m), and the weight is area × kg per m² × Quantity.
When to use it. Only with Material Type SHEET - for every other type the box is greyed out and empty.
Catch. Metres, not millimetres. On the Member Schedule a SHEET line's "m" figure is the plate area in m², and its "kg" rate is kg per m². A painted sheet is priced on both faces and its edges.
Sheet Width (m)
What it does. The plate's width in metres, used with Sheet Length for a SHEET member.
When to use it. Only with Material Type SHEET.
Catch. On a phone both sheet fields are hidden and set to 1 m, so the Quantity is the square metres of plate.
Weight (kg)
What it does. The member's raw weight before you commit it: Quantity × Length × kg per metre. It updates as you type.
When to use it. A quick check that the length and size are right before ADD.
Catch. It has no waste and no cleats - it is the same figure the Member Schedule line shows. It stays empty until Type, Size, Weight and Length are all there.
With Waste (kg)
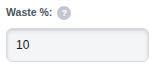
What it does. The raw weight plus the Waste % in Item Variables - the supply weight the member is bought on.
When to use it. Checking the weight a member adds to the order.
Catch. The cleats allowance is added on top of this in the totals, so it is not the whole priced weight. A purlin gets no waste, so both readouts match.
ADD
What it does. Puts the form on the Member Schedule as a NEW line, priced at your Item Variables as they stand. Enter in Item, Quantity, Length or any other box you type in on the form does the same. If something is missing or not a number, a note under the field says what, and nothing is added.
When to use it. Every new member. With a line clicked, ADD makes a copy of it with your changes - handy for a member that differs only in length or mark.
Catch. Item Variables are copied to each member when it is added; changing them later doesn't re-price members already on the schedule. ADD always uses your own rates, not a clicked line's. On a computer the new line stays selected, so press ADD (not EDIT) for the next member. With a drawing loaded and Length blank, the line goes on UNMEASURED.
What it does. Writes the form back over the clicked schedule line - its fields AND the rates showing in Item Variables. The line keeps its place, its drawing marks and its Nesting tick.
When to use it. Correcting a member, or re-pricing one member: click its line, change a rate in Item Variables, press EDIT.
Catch. Click a line first, or a note asks you to. If you change a drawn member's length while the drawing is on screen, it asks: REDRAW MARKS (re-cut the marks to the new length) or KEEP the drawn length; with no drawing on screen the marks are re-cut quietly. EDIT never merges the line into another that now matches. A rate changed while a line is clicked is lost if you click away without pressing EDIT.
CLEAR
What it does. Empties the member form (Quantity back to 1, Coating back to COATING), lets go of the clicked line and puts your own rates back in Item Variables. Escape in the form does the same.
When to use it. Starting a different member after clicking a line, or abandoning a half-filled form.
Catch. It never touches the Member Schedule, the Project Name or the Quote No. - to delete a line use REMOVE. On the Drawing page it also drops a half-placed measurement and puts the live tool down.
REMOVE
What it does. Deletes the clicked schedule line at once, with its marks on the drawing. The Delete key does the same while the Member Schedule has the focus - unless a mark or strike is selected on the drawing, when Delete removes that instead.
When to use it. A member that shouldn't be on the job.
Catch. It doesn't ask first - the UNDO bar gives you 6 seconds to bring it back. Click a line first, or a note asks you to.
Removed - UNDO
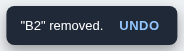
What it does. After REMOVE a bar names what went - '"B2" removed, with its 2 marks on the drawing.' - and UNDO puts the line back in its place, marks and all.
When to use it. Straight after a REMOVE you didn't mean.
Catch. It lasts 6 seconds and only for the last REMOVE. On a phone the line comes back unselected. The drawing's own UNDO button is a different thing - it takes back drawing actions.
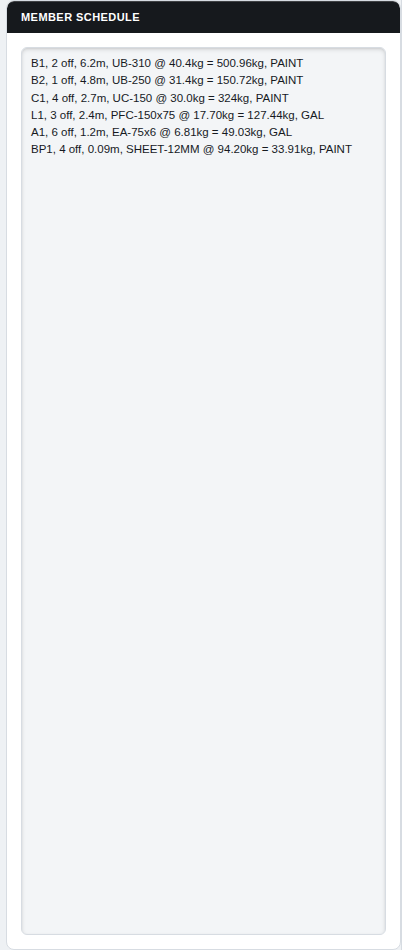
Member Schedule
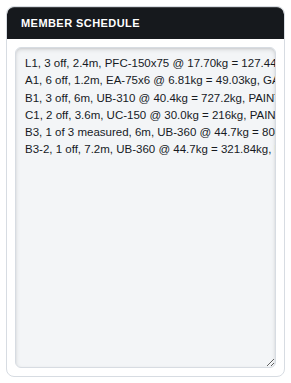
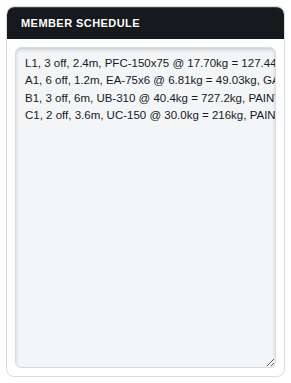
What it does. One line per schedule entry: "B1, 4 off, 6.5m, UB-310 @ 40.4kg = 1050.4kg, PAINT" - mark, quantity, length, size, kg/m, raw weight (no waste) and coating. Click a line to load it into the form for EDIT, REMOVE or copying with ADD; on the Drawing page the click also arms SELECT so its marks can be worked on.
When to use it. Checking the take-off and choosing the member to change.
Catch. You can't type in it. Clicking below the last line lets go of the selection. Clicking a drawn line also sets the drawing colour to that member's colour. Its weights are raw - waste and cleats are in the Live Summary.
Unmeasured lines ("2 of 4 measured")
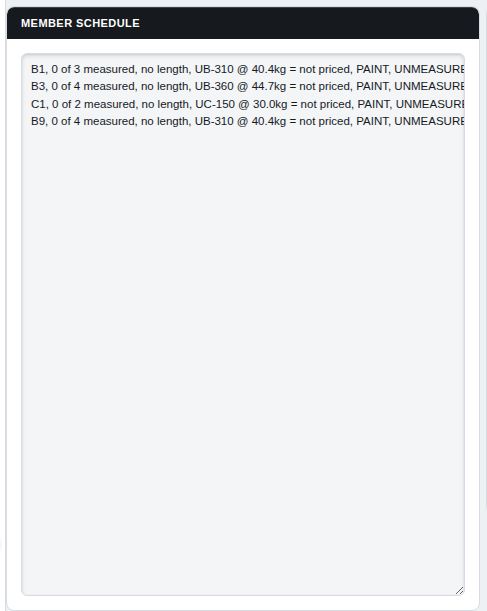
What it does. A member ADDed with no length while a drawing is loaded reads "C1, 0 of 2 measured, no length, ... = not priced, PAINT, UNMEASURED". As you measure into it, it counts up; once the first instance sets a length it is priced for the whole quantity at that length - "B1, 2 of 4 measured, 6m, ... = 969.6kg". When the marks reach the quantity the line settles into an ordinary line.
When to use it. Schedule-first take-off: click the line, then MEASURE or COLUMN into it.
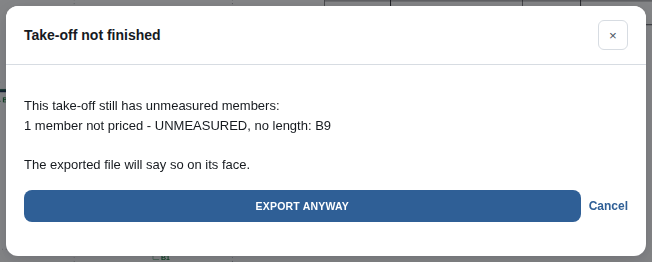
Catch. A line with no length weighs and costs nothing, and the Quantities box adds "UNMEASURED = N members, no length, not priced". If the plan has more than the schedule said, the quantity follows the marks. EDIT of only the coating leaves it unmeasured; typing a Length and pressing EDIT settles it. Exports ask before going and say on the file that members are unpriced.
What it does. When you click a schedule line, Item Variables show THAT member's rates - the ones it was priced at - and this note says so: "Showing line 2 (B2)'s own rates - EDIT keeps them for that line. CLEAR or ADD puts your rates back."
When to use it. Checking what a member was priced at, or changing one member's rate with EDIT.
Catch. Your own rates come back on CLEAR, ADD, Escape or any click that lets go of the line - so a new member is never priced at an old line's rates. Saves always record your own rates, not the clicked line's.
Notes under a field
What it does. When ADD, EDIT or a tool can't go ahead, a red note under the field says what to fix - "Pick a Type to start this item.", "Select a coating.", '"Quantity" must be a plain number greater than zero.' Orange notes are advice only - for example a size your supplier doesn't stock.
When to use it. Fix the named field and try again; the note goes when the field is put right.
Catch. Numbers must be plain - "6.5", ".5" and "+5" are fine; "6.5m", "5,000" and "12..5" are not. Rates and quantities can't be negative.
Live Summary
What it does. Three boxes - Quantities, Costs and Project Costs - worked out again from every member after every change, rate and site cost. Each box shows every line, TOTAL included.
When to use it. Keep an eye on it the whole way through; it is the quote as it stands.
Catch. It is hidden on the Drawing and Nesting pages. On a phone it is the Summary tab, and the black pill above the tab bar shows the running item count, weight and total.
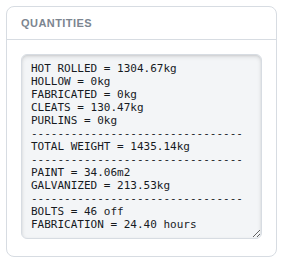
What it does. HOT ROLLED, HOLLOW, FABRICATED and PURLINS: the kg of each, with waste (purlins have none). CLEATS: the cleats allowance in kg. TOTAL WEIGHT: all of them added. PAINT: the painted area in m² (with the cleats allowance). GALVANIZED: the kg of galvanised steel, with waste and cleats. BOLTS: the bolt count, when there are any. FABRICATION: the shop hours, worked out from each member's weight × its hours per tonne.
When to use it. Checking tonnage, paint area and shop hours.
Catch. Fabrication hours are always worked out from the weight - you can't type them. To give a member more labour, EDIT its Fabrication Hours Per Ton. An UNMEASURED line here means members with no length are not in any figure.
Costs
What it does. HOT ROLLED, HOLLOW, FABRICATED and PURLIN: each weight at its $/t. CLEATS: the cleats allowance at the hot rolled rate. MATERIAL: the steel added up. PAINTING: area × $/m². GALVANIZING: weight × $/t. COATING: painting plus galvanizing.
When to use it. Seeing where the supply money is.
Catch. Each member is priced at its OWN rates, copied when it was added - not necessarily the rates showing in Item Variables now.
Project Costs
What it does. BOLTS: bolt count × Bolt Price Each. DRAFTING: TOTAL WEIGHT in tonnes × Drafting Price Per Ton. FABRICATION: the shop hours × Fabrication Price Per Hour. SITE & COMPLETION: the Site Costs page's total. SUBTOTAL: material, coating and all of these. MARGIN: SUBTOTAL × Margin %. TOTAL: SUBTOTAL plus MARGIN, to the nearest dollar.
When to use it. The quote price is the TOTAL.
Catch. Drafting, the fabrication $/hr, margin and the site rates are Project Variables - they apply to the whole job and re-price at once. Everything else keeps its cents; only the TOTAL is rounded to the dollar.
What it does. Opens the Site Costs page for the quantities a take-off can't measure: chemsets, rolling, transport and crane hours, lift and trolley hire, installation. The Live Summary stays alongside.
When to use it. Once the members are in, to add the site work: chemsets, transport, crane, lifts and installation.
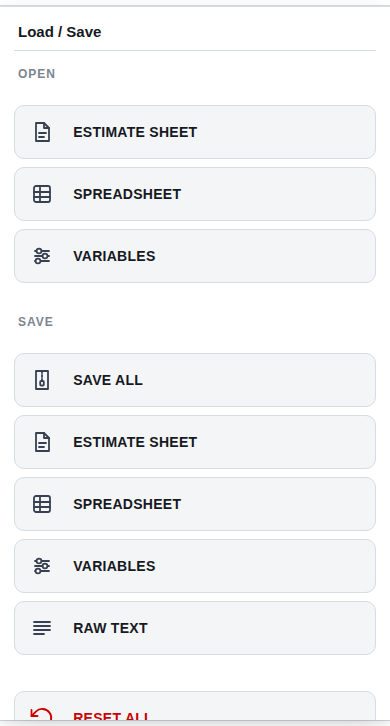
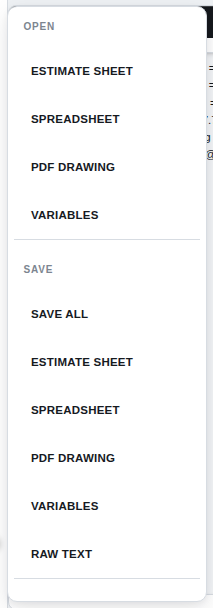
What it does. Opens the menu to open or save estimate sheets, spreadsheets, PDF drawings, variables, Raw Text and SAVE ALL (RESET ALL is the rail's own button on a computer). Escape or a click elsewhere closes it.
When to use it. To open a saved job or rates, or to save the job, its files or a zip of everything.
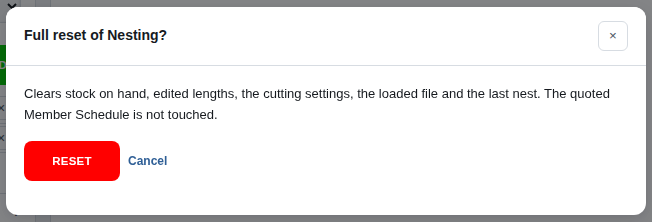
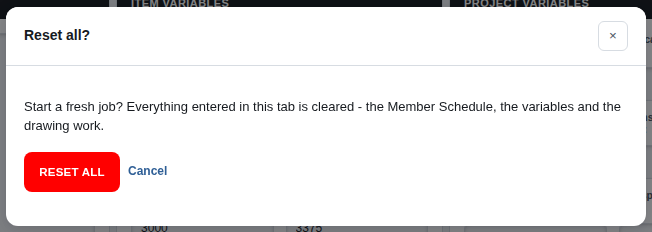
What it does. Asks "Reset all?" ("Start a fresh job?") and, on RESET ALL, clears everything in this tab - the Member Schedule, the variables back to their defaults, Project Name, Quote No., site costs and the drawing work - and reloads the page. On a phone the same button is at the foot of the Load / Save page.
When to use it. Starting a new job from scratch.
Catch. Only this tab's job goes; other tabs' saves stay in the restore list, so they are offered again after the reload. Your stock on hand and cutting settings on the Nesting page are kept. Save the job first if you will want it - the reset can't be undone.
How to (rail)
What it does. Opens this help page in a new tab, so the job stays open where it is. On a phone the How To tab does the same.
When to use it. Any question about a button, field or figure - search for it at the top of any section.
Guides (rail)
What it does. Opens the Guides & Reference box - the reference pages, the classic calculator and About & Legal.
When to use it. To reach the weight tables and estimating guides, the classic calculator, or the copyright and contact details.
Press Drawing on the rail, then drag a PDF drawing set onto Choose a drawing set (or click it to browse).
Click a sheet in the Sheets bar. A sheet opened for the first time takes the scale the picker shows (1:100 to start) and asks you to check it: click both ends of a dimension you know, type its real length in mm and press CHECK.
Fill in the entry form on the right - Item, Type, Size, Weight, Coating - and leave Length blank.
Press MEASURE (or the M key) and click a member's two ends. It goes straight onto the Member Schedule at the measured length, to the nearest 0.1 m. Click the next pair for the next member.
For columns, type the Length, press COLUMN (or C) and click once where each one stands.
Use SELECT (S) to pick a mark up and move, re-size or delete it. UNDO (Ctrl+Z, Cmd+Z on a Mac) takes back the last thing done on the drawing.
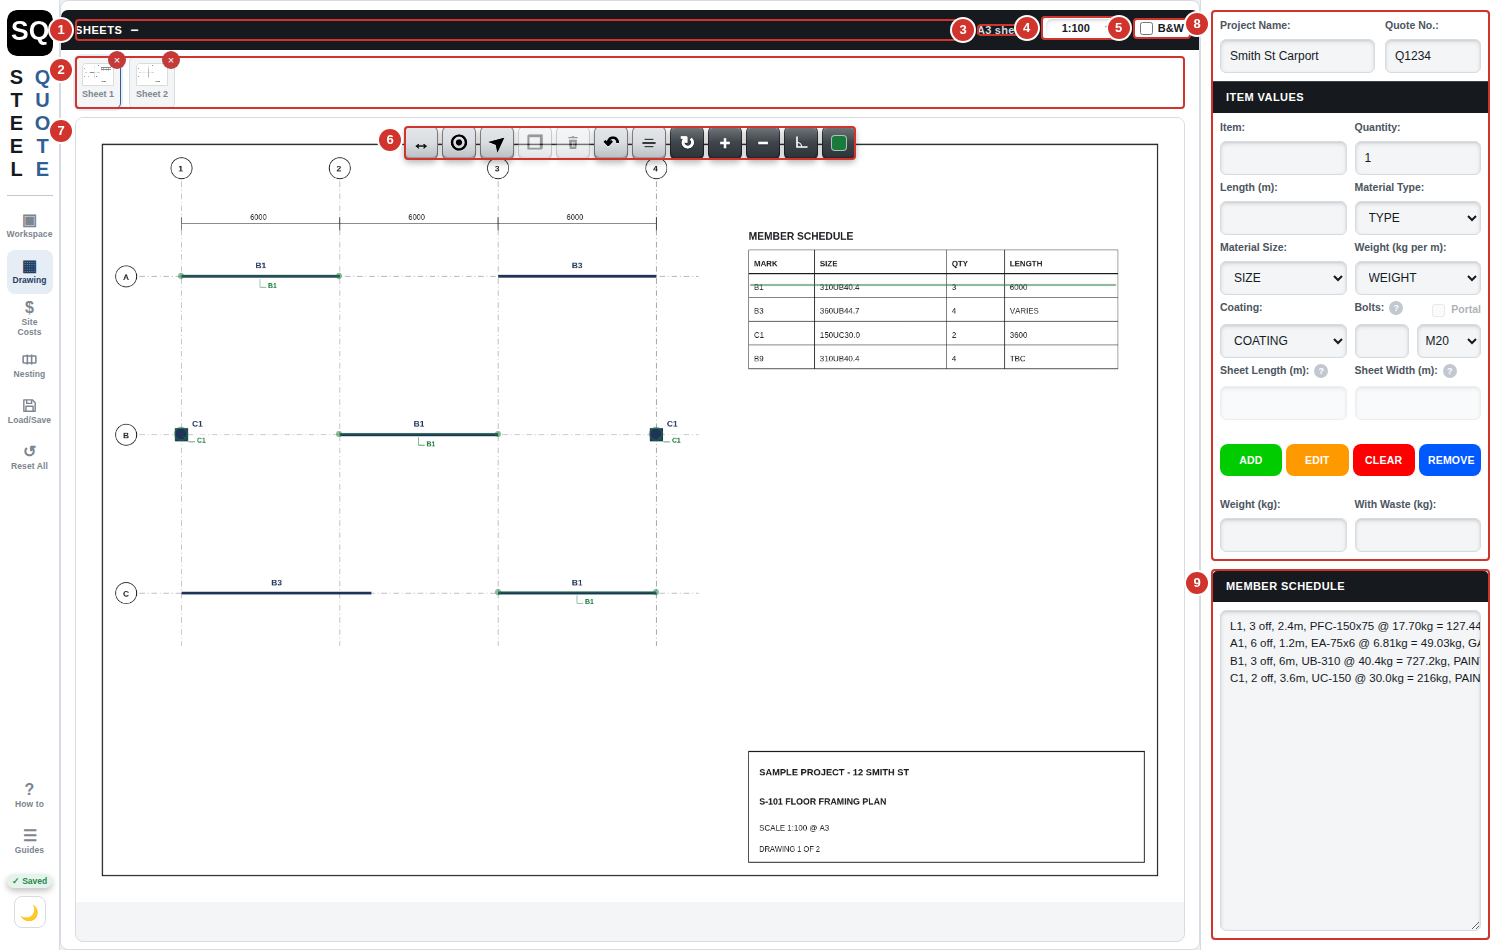
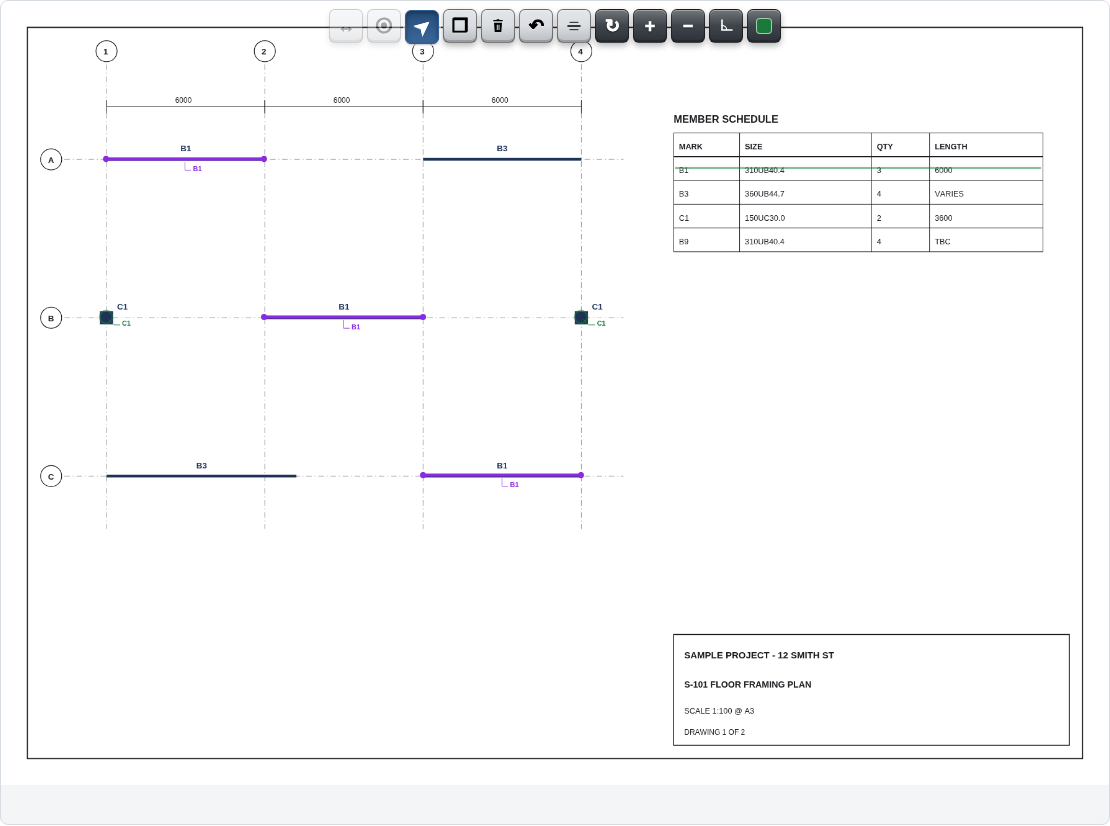
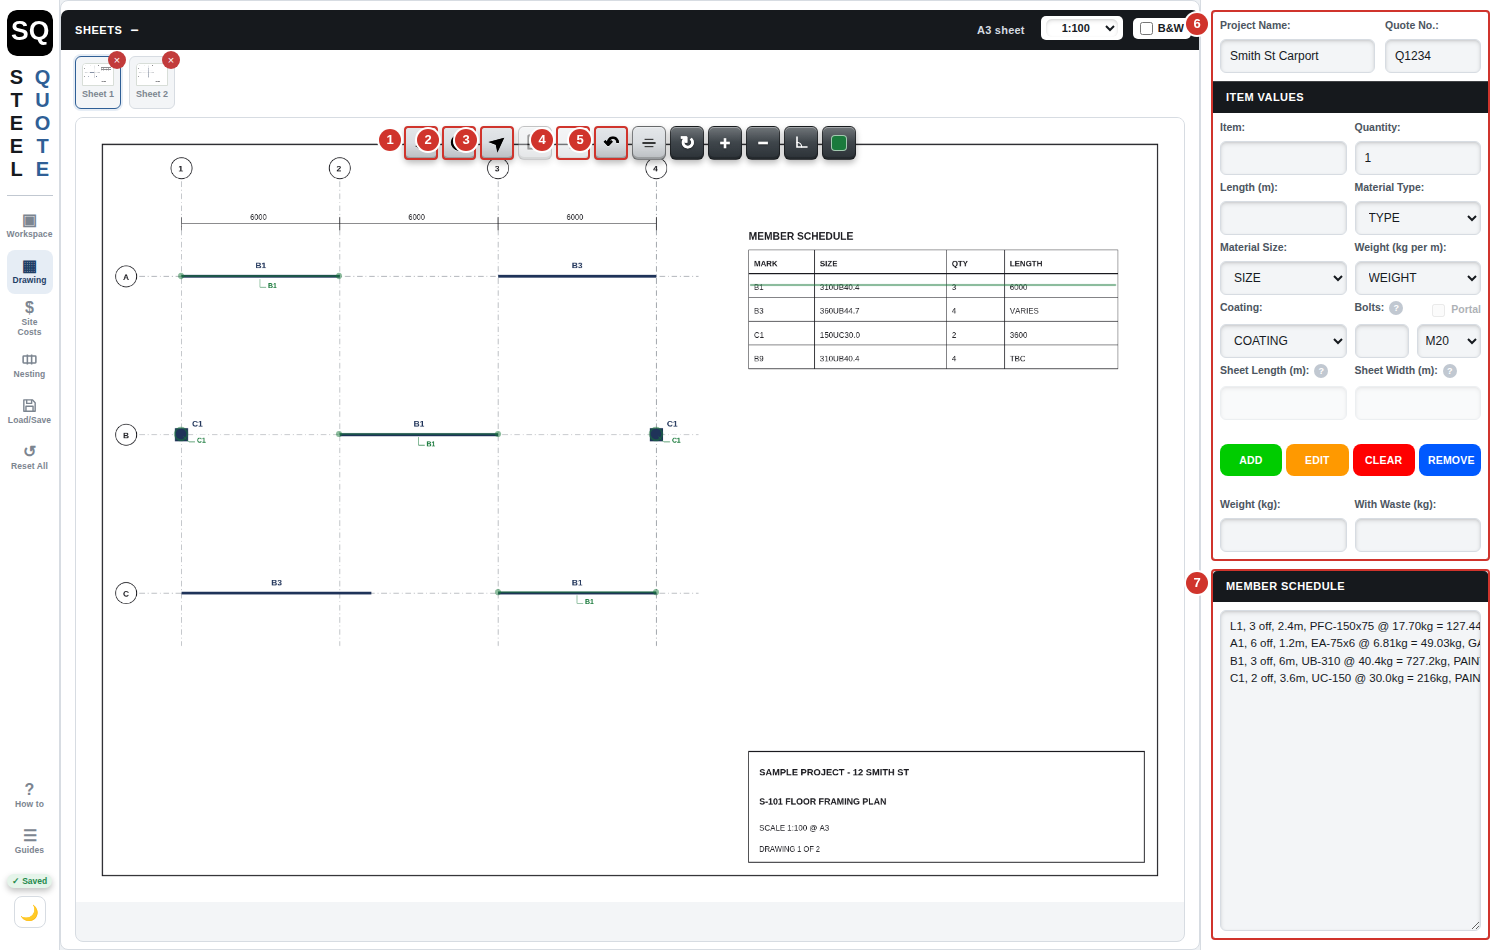
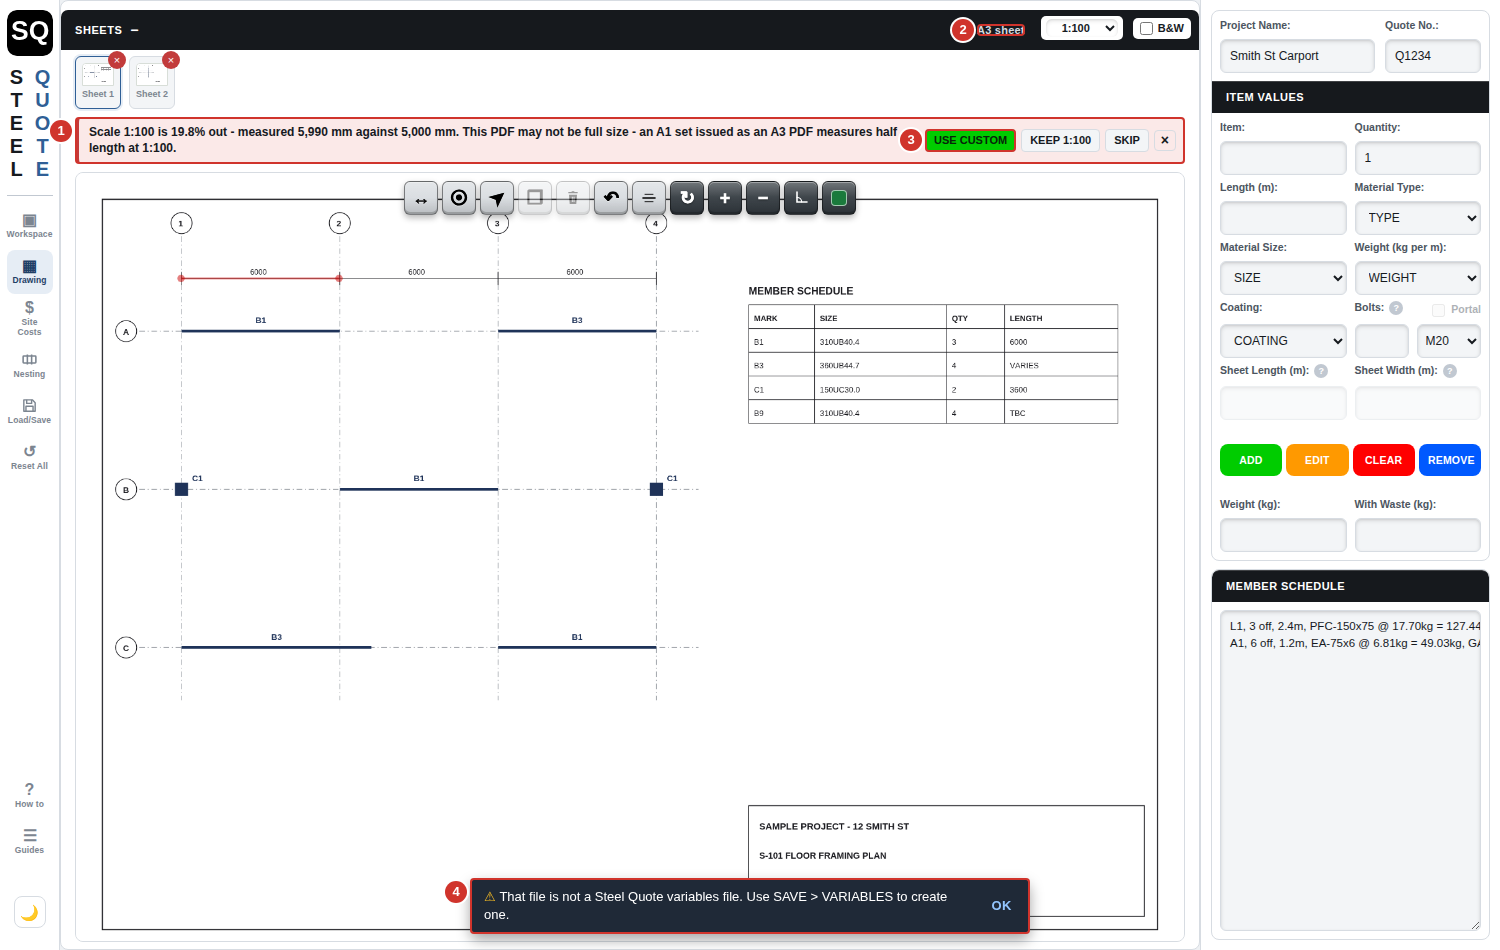
The Drawing page: the Sheets bar across the top, the tools beside the sheet, and the entry form and Member Schedule in the right-hand column.
Sheets - folds the thumbnails away to give the sheet more room.
The sheet thumbnails. Click one to open it; the × removes it from the set.
The open sheet's paper size, read from the PDF.
The scale picker for the open sheet, with Custom… to calibrate.
B&W - shows the plan in greyscale so faint linework is easier to trace.
The drawing tools: Measure, Column, Select, Copy, Delete, Undo, Strike, Rotate, Zoom in, Zoom out, Snap and Colour.
The open sheet, with each member's marks and name tags drawn over it.
The entry form. Whatever it holds is what the next MEASURE or COLUMN adds.
The Member Schedule. Each measured member lands here as you click.
What it does. Opens the Drawing page in the main column: the drop zone until a PDF is loaded, then the Sheets bar, the tools and the open sheet. The entry form and the Member Schedule move into the right-hand column, so you can set up a member while you look at the plan. Press it again, or press Workspace, to go back. The drawing stays loaded while you are away.
When to use it. Any take-off from a PDF drawing set.
Catch. The Drawing page is for a computer or a tablet, not a phone. On a phone the Drawing tab is not shown, and PDF DRAWING is left out of Load/Save. A job with drawing marks opened on a phone keeps them - open it on a computer to see them. Only one page shows at a time, so opening Drawing closes Site Costs or Nesting. On a touch screen each tool carries its name under its icon and is at least 40 pixels square; on a tablet narrower than 1000 pixels (an iPad in portrait) the twelve tools sit in one row of their own across the top of the screen, above the sheet and the entry form, rather than over the drawing.
Choose a drawing set
What it does. Loads a PDF drawing set. Each page of the PDF becomes a sheet in the Sheets bar. Drag the PDF onto the box, or click it (or press Enter on it) to browse for the file.
When to use it. At the start of a take-off from drawings. Once a set is loaded the box gives way to the sheets; to load another set, or a revision, use Load/Save > Open > PDF DRAWING.
Catch. PDF only. The PDF itself is not kept in this browser's autosave: after a reload your members and marks come back, but you load the PDF again. Load the same file and its scales, rotations, removed sheets and strikes are picked up as you left them. The PDF viewer is fetched from the internet the first time it is needed, so with no connection a drawing cannot be opened. If you pick a second PDF while the first is still opening, the one picked last wins.
"Members carry drawing marks - load the matching PDF"
What it does. After you open a saved job, or restore one, whose members were measured off a drawing, the drop zone says how many members carry marks and asks for the matching PDF. It stays there until a PDF is loaded.
When to use it. Load the PDF it asks for to see the marks and carry on measuring. The members are priced either way - the marks are only needed to see or change what was drawn.
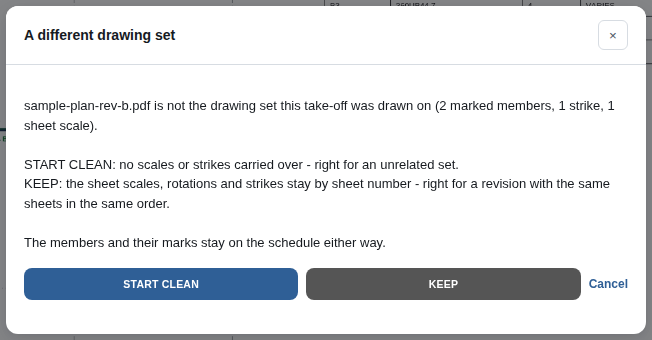
Catch. Load the same drawing set the job was drawn on. A different PDF asks whether to start clean or keep the sheet state - see A different drawing set.
A different drawing set (START CLEAN / KEEP)
What it does. Asked when you load a PDF that is not the set this job was drawn on, while the job has marks, strikes or sheet scales. START CLEAN loads it with no scales, rotations, removed sheets or strikes carried over - right for an unrelated set. KEEP keeps the sheet scales, rotations, removed sheets and strikes by sheet number - right for a revision with the same sheets in the same order. Cancel keeps the drawing you had and does not load the new one.
When to use it. When a revised set comes in mid-job (KEEP), or you have picked the wrong file (Cancel).
Catch. The members and their marks stay on the Member Schedule either way, and the marks are drawn on the same sheet numbers of the new set - on an unrelated set they will sit over the wrong linework. For a new job, use RESET ALL first. Either answer clears the drawing UNDO steps. After START CLEAN each sheet is asked the scale check again as you open it. A drawing saved from another program can read as a different set even when it is the same drawings; KEEP keeps everything.
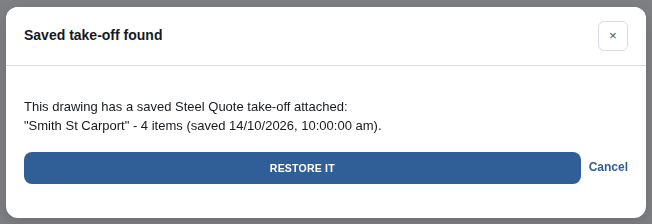
Saved take-off found (RESTORE IT)
What it does. A drawing saved from here with Load/Save > Save > PDF DRAWING carries the whole take-off inside it. Load it as a drawing and you are asked whether to restore it: RESTORE IT brings back the members, their marks, the rates, and each sheet's scale, rotation, removal and strikes. Cancel keeps the take-off you have and just shows the drawing.
When to use it. To carry on a take-off from a marked drawing you saved earlier, on this computer or another one.
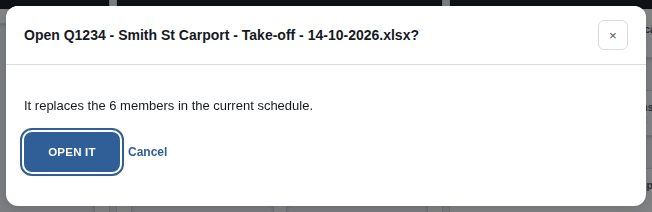
Catch. RESTORE IT replaces every member on your Member Schedule - the question says how many. If fabrication hours or missing rates changed on the way in, the notice says which members moved.
"That file is not a PDF" / "That PDF could not be opened"
What it does. Says why a file did not load. "That file is not a PDF" - the file picked was something else. "That PDF could not be opened" (or "could not be shown") - the PDF is damaged or in a form the viewer cannot read. "The PDF viewer failed to load. Check your internet connection and try again." - the viewer could not be fetched.
When to use it. Re-save the PDF from the program that made it (or print it to a new PDF) and load that. For the viewer, reconnect and pick the file again.
Catch. A file that fails changes nothing: the drawing you already had stays loaded, with its open sheet and marks.
Sheets
What it does. Folds the row of sheet thumbnails away, and the open sheet takes the height they gave back. Press it again to bring them back. The bar itself stays, with the sheet size, the scale picker and B&W.
When to use it. Once you are working on one sheet and want more of it on screen.
Sheet thumbnails
What it does. One small picture per sheet in the set, labelled Sheet 1, Sheet 2 and so on. Click one to open it in the big view; the open sheet is highlighted. Each sheet keeps its own zoom, scroll position, rotation and scale, so going back to a sheet puts you exactly where you left it. The thumbnails follow Rotate and B&W.
When to use it. To move between sheets - a plan, the elevations, the plan's own member schedule.
Catch. Switching sheets drops a half-placed measuring point or strike and closes a scale check. A mark you have selected stays selected, so you can switch sheets and COPY it onto the new one.
× on a thumbnail (remove sheet)
What it does. Takes the sheet out of the strip so it cannot be opened - a cover sheet, notes or anything with no steel on it. It is not asked about. Members measured on that sheet stay on the Member Schedule and stay priced.
When to use it. To tidy a big set down to the sheets you are taking off.
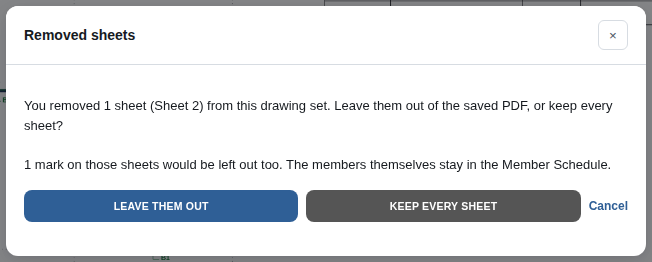
Catch. There is no button to bring a removed sheet back, and UNDO does not cover it. The job remembers it for that drawing set, so loading the same PDF again keeps it hidden; only a different set loaded with START CLEAN, or RESET ALL, shows every sheet again. When you save the marked drawings you are asked once whether to LEAVE THEM OUT or KEEP EVERY SHEET; marks and strikes on a sheet left out go with it.
Sheet size (A1 sheet, A3 sheet ...)
What it does. Shows the open sheet's paper size, read from the PDF page: A0 to A4 when the page is within 2% of one, otherwise its size in mm (for example "1000 x 707 mm"). On a narrow screen the word "sheet" drops off.
When to use it. Compare it with the title block before you trust a scale. A ratio like 1:100 is only right when the PDF is the full-size sheet.
Catch. An A1 set issued as an A3 PDF shows "A3" here, and at 1:100 every member measures half its real length. If the title block says A1 @ 1:100 and this says A3, use Custom… or let the scale check set it from a known dimension.
Scale picker
What it does. Sets the scale of the OPEN sheet: 1:20, 1:50, 1:100, 1:150 or 1:200, any ratio you have calibrated on this job, or Custom… to calibrate one. Picking a ratio applies it at once and asks you to check it on one known dimension (see Scale check). A sheet opened for the first time takes whatever ratio the picker shows - 1:100 on a new set - and is asked the same check.
When to use it. On each sheet before you MEASURE, whenever its scale differs from the one shown. Each sheet keeps its own scale.
Catch. Changing a sheet's scale does not re-measure members already drawn on it - their lengths stay as they were measured. Set the scale first, then measure. A calibrated ratio is listed rounded to a whole number (1:98, say); the sheet it was set on keeps the exact figure, but picking that listed ratio on another sheet applies the rounded one. Columns need no scale; MEASURE does.
Custom… (Real length (mm) and SET)
What it does. Sets the open sheet's scale from a dimension you know. Pick Custom… in the scale picker, click both ends of a dimension on the sheet, type its real length in mm in the Real length (mm) box and press SET (or Enter). The ratio it works out is added to the picker for the rest of the job and rides in every save. The × (or Escape) leaves the scale as it was.
When to use it. When a sheet is not printed at a standard ratio, when the PDF is not full size, or when the scale check comes out more than 2% off.
Catch. Pick the longest dimension you can find - an error of a pixel matters less over a long run. With SNAP on, the second click is straightened onto the first one's horizontal or vertical, which is what you want for a dimension line. A Custom scale is never asked the scale check.
Scale check (CHECK)
What it does. After a ratio is picked, or taken by a sheet on its first open, a strip above the sheet asks you to prove it: click both ends of a dimension you know, type its real length in mm and press CHECK (or Enter). Within 2% it says so ("Scale 1:100 checked - measured 9,980 mm against 10,000 mm") and closes. Further out it says by how much and offers USE CUSTOM or KEEP.
When to use it. Every time it appears - it takes ten seconds and catches a drawing issued at the wrong size before every member on the sheet is priced wrong.
Catch. While it is waiting its clicks place nothing - no mark, member or strike. Arming a tool, switching sheet or rotating closes it, and a sheet's first-open check is not asked again: pick the ratio again to check it later. A ratio confirmed or kept on a sheet is not asked again in this session. The check never changes a member or a price. Type the length as plain digits (10000, not 10,000).
USE CUSTOM / KEEP 1:100
What it does. Shown when the check is more than 2% out. The strip names the % and what was measured against what you typed. USE CUSTOM sets the sheet's scale from the dimension you just measured, exactly as a Custom calibration would. KEEP 1:100 (it names the ratio) leaves the ratio as picked.
When to use it. USE CUSTOM when the PDF is not full size or the ratio is simply wrong. KEEP when you know the dimension you clicked was not drawn to scale.
Catch. The 2% is judged on the exact figure, so a check showing "2.0% out" can still be out. The usual cause is a set drawn at A1 and issued as an A3 PDF, which measures half length at 1:100 - look at the sheet size.
SKIP and × (scale check)
What it does. Closes the scale check without checking. The ratio stays as picked. Escape does the same.
When to use it. When the sheet has no dimension you can trust, or you have already checked it another way.
Catch. Nothing has been checked. Measure one member you know before relying on the sheet.
B&W
What it does. Shows the drawing in greyscale with the contrast lifted, so faint coloured linework is easier to read and trace over. Your own marks and strikes stay in their colours. The thumbnails follow it, and so does the marked drawings PDF you save.
When to use it. On a set with pale or coloured linework - hatching, light grey gridlines, coloured services.
Catch. It is not remembered: after a reload it is off again. If it is ticked when you save PDF DRAWING, the saved sheets come out in greyscale too.
The sheet and its marks
What it does. The open sheet, with every member drawn over it: a line for a measured member, a dot for a column, each in the member's colour and tagged with its name. Marks are see-through so the drawing reads under them. The line you have selected is drawn solid, thicker and purple - in its own colour instead while you are measuring into an unmeasured line. Strikes are drawn a little heavier than marks.
When to use it. Scroll it with the scroll bars, Shift and the mouse wheel, or a sideways swipe; on a touch screen drag one finger. Zoom with the wheel, a pinch or the zoom buttons.
Catch. Clicking on the sheet does whatever tool is live. With no tool live, a click does nothing - press MEASURE, COLUMN, SELECT or STRIKE first.
Mouse wheel and pinch
What it does. Turning the mouse wheel over the sheet zooms in and out about the cursor, so the spot under it stays put. Shift and the wheel, or a sideways swipe, scrolls instead. A trackpad pinch zooms smoothly. On a touch screen two fingers zoom about their midpoint and move the sheet; one finger scrolls, taps and drags as usual. The zoom and position are remembered per sheet.
When to use it. To get close on a connection and back out again without reaching for the buttons.
Catch. A pinch never places anything: the second finger cancels the first finger's tap or drag, and taps are ignored for a moment after. While you are dragging a mark or strike, the wheel does nothing until you let go.
Zoom in / Zoom out
What it does. Enlarges or shrinks the open sheet in steps of 25%, from 50% to 300%. The sheet is redrawn sharp at the new size a moment later.
When to use it. When you have no mouse wheel. The wheel and a pinch zoom at the point you are looking at; the buttons do not.
Catch. Each sheet keeps its own zoom, so a sheet you come back to opens at the zoom you left it at, not the one on screen now.
Rotate
What it does. Turns the open sheet 90 degrees clockwise each press. Its thumbnail turns with it, and the marks stay on the drawing where they were. The rotation is kept per sheet and saved with the job.
When to use it. For a sheet issued sideways, or an elevation that reads better turned.
Catch. A half-placed measuring point is dropped and a scale check closes - click both ends again after rotating. UNDO does not undo a rotation; press Rotate until it comes round.
Measure
What it does. Click a member's two ends and it is added to the Member Schedule straight away, at the measured length to the nearest 0.1 m, with everything else from the entry form. The tool stays armed, so the next pair of clicks is the next member. Another member that measures the same and matches in every other way counts onto its line instead of starting a new one. Key: M.
When to use it. Beams, rafters, girts, bracing - anything that runs along the plan. With an unmeasured line selected it measures INTO that line instead - see Schedule first.
Catch. It will not arm until the form can make a member (see A tool that won't arm) and is greyed until the sheet has a scale. Length is the one field it does not need - the line supplies it, and anything typed there is replaced. It is greyed while a mark or strike is selected: press Escape or click empty sheet first. Each member is added at the Item Variables (rates) showing at that moment, and changing them later does not re-price it. SHEET is sized by Width x Length, so it cannot be measured. Pressing MEASURE again turns it off and drops the line selection.
Column
What it does. One click places a vertical member on the plan as a dot, at the Length typed in the form. Further clicks with the same properties count onto that column's line - one line, quantity up by one each click. A selected column line takes the count first; otherwise the newest matching line does. Key: C.
When to use it. Columns, posts and anything else that is a point on a plan. Type the column height in Length (m) first.
Catch. It needs a Length - a column is one point, so the length comes from the form. It needs no sheet scale. Change the Item name, the Length or any other property and the next click starts a new line. With the Item box blank, nothing counts onto a line and every click is its own line. Moving a column's dot never changes its length.
Select
What it does. Click a mark, or its name tag, to select it: its line lights up in the Member Schedule and its details fill the entry form. Drag the middle of a line to move it (length unchanged); drag an end to re-size it. A strike is selected, moved, re-aimed and deleted the same way. Clicking empty sheet puts the selection down. Key: S.
When to use it. To check which line a mark belongs to, fix a mark, or pick one to COPY or DELETE. Clicking a line in the Member Schedule while the drawing is open turns SELECT on for you.
Catch. Only the selected mark can be dragged - click it first, then drag. Re-sizing the only mark of a line changes the line's length and its price. Re-sizing one mark of a line with several splits it onto its own line (B1-2, quantity 1). Selecting a member also makes its colour the colour for new members. Pressing SELECT a second time puts the selection down too.
Copy
What it does. With a mark selected, each click drops another mark of that member - same length and angle - and the quantity goes up by one. The tool stays armed for a row of drops, and the selection follows the newest copy. On a sheet with a different scale the copy is re-cut so it spans the same metres.
When to use it. A run of identical members, or the same member repeated on another sheet: select it, open the other sheet, COPY, click.
Catch. It copies the line's FIRST mark, not necessarily the one you selected, and the click is where that mark's starting end goes - a member drawn right to left lands to the left of the click. On a measured line the quantity becomes the number of marks, so a quantity typed by hand (4 off with one drawn) becomes 2 after one copy. Greyed until a mark is selected, and for a strike. A line cannot be copied onto a sheet with no scale.
Delete
What it does. Removes the selected mark, and the quantity on its line drops by one. The line's last mark takes the line off the schedule with it. With a strike selected, it removes the strike. Keys: Delete or Backspace.
When to use it. A mark drawn twice, or in the wrong place.
Catch. An unmeasured (schedule-first) line keeps its target and its row: deleting its last mark leaves "0 of 4 measured" rather than removing it. It only acts on a mark on the sheet on screen. The Delete key with a line selected in the Member Schedule but no mark selected removes the whole line, as REMOVE does (with UNDO in the notice). Greyed until something is selected.
Undo
What it does. Takes back the last thing done on the drawing - a measure, a column, a measure into a line and its splits, a count onto a line, a copy, a move, a re-size, a delete, a strike or a colour - and the Member Schedule goes back with it. Up to 30 steps. If the step was on another sheet, that sheet opens. Keys: Ctrl+Z, or Cmd+Z on a Mac.
When to use it. Straight after a slip on the drawing.
Catch. A half-placed point or strike goes first; with the scale check open, UNDO takes back the check's last point, or closes the check, before any step. A typed ADD, EDIT or REMOVE since the last drawing action means the steps are dropped (the notice says why) - undoing past it would lose your typing. OPEN, RESTORE, RESET ALL and a different drawing set clear them too. The steps are not kept after a reload. It does not undo a scale, a rotation or a removed sheet. Ctrl+Z in a box you are typing in undoes the typing, not the drawing.
Strike
What it does. Draws a straight line through a row of the PLAN'S OWN printed member schedule, to show you have entered it. Click one end, then the other. The tool stays armed so you can work down a column of rows. It uses the current colour. Escape drops a half-drawn one.
When to use it. Working schedule-first: enter a row with ADD, strike it on the plan, move to the next.
Catch. A strike is a note on the plan, never a member: it does not reach the Member Schedule, the price or the nest. Clicking a strike with STRIKE armed does not delete it - use SELECT, then DELETE (or drag it, or recolour it). Strikes belong to the sheet they were drawn on, are saved with the job and the marked drawings PDF, and stay when the same set is loaded again; START CLEAN on a different set drops them.
Snap
What it does. While it is on (the button stays pressed), the second click of a measurement is straightened onto the horizontal or vertical of the first, whichever is nearer. It does the same for a calibration, a scale check and dragging a line's end.
When to use it. On square framing, so a hand that is a pixel off does not add length.
Catch. It never changes lines already drawn, moving a whole line, or strikes. It is off again after a reload. Turn it off for raking members and bracing.
Colour
What it does. Opens the colour palette. The swatch on the button is the colour new members and strikes are drawn in - dark green to start. With a member or strike selected, the colour you pick repaints it too.
When to use it. To tell members apart on a busy sheet - one colour for beams, another for columns, say.
Catch. Each member keeps the colour it was drawn in; with nothing selected a pick changes only what you draw next. Selecting a member makes ITS colour the current colour, so the next new member comes out in it. A recolour of a selected member is a step UNDO can take back.
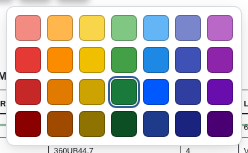
Colour palette
What it does. A grid of 28 colours, light to darkest, in red, orange, yellow, green, blue, indigo and violet. Click one to use it; the palette closes. The current colour is outlined.
When to use it. After pressing Colour. Escape, or a click anywhere else, closes it without a change.
Catch. Marks are drawn see-through over the drawing, so the light colours can be hard to see on a busy sheet - pick a medium or dark one there.
Drawing keys: M, C, S, Delete, Escape, Ctrl+Z
What it does. M presses MEASURE, C presses COLUMN, S presses SELECT. Delete or Backspace deletes the selected mark or strike. Escape cancels one thing at a time: a half-drawn strike, a calibration, a half-placed measuring point, then the live tool, then the selection. Ctrl+Z (Cmd+Z on a Mac) is UNDO.
When to use it. To keep one hand on the mouse while taking off.
Catch. The keys do nothing while you are typing in a box, while a question is on screen, or when the drawing is not showing. A key does only what a click could: M on a sheet with no scale, or with the form incomplete, says why instead. Escape closes the colour palette or the Load/Save menu first if one is open.
Measure first
What it does. The plain way to take off from a drawing: set up a member in the entry form, then MEASURE each one on the plan (or COLUMN for columns). Every measurement goes onto the Member Schedule as you click - a new line, or a count onto a matching line.
When to use it. When the drawing has no printed member schedule, or you would rather work across the plan than down a list.
Catch. Change the form between members - a new Item name, Size or Coating - or the next measurement joins the line you were last on. Members are added unselected, so the next measurement starts fresh.
What it does. Enter every row of the plan's own member schedule with ADD, leaving Length blank. Each line goes on as "0 of 4 measured, not priced" - the quantity is its target. Then click the line in the Member Schedule and press MEASURE (or COLUMN, with a Length typed): every instance you click goes INTO that line and counts up, 1 of 4, 2 of 4. The first one sets the length. One within 2% of it counts on; one further out is a different member and splits onto its own line. At the full count the line settles, prices like any other and is put down, so the next measurement is a fresh member.
When to use it. When the plan prints its own member schedule - enter it, strike each row as you go, then find each member on the plan.
Catch. A blank Length is only accepted while a drawing is loaded. A line with no length yet is not priced, and the Live Summary says how many ("UNMEASURED = 2 members, no length, not priced"); the estimate and spreadsheet ask before saving and carry a line saying so. Once the first instance sets a length the line prices for its full target at that length. More instances than the schedule said: the plan wins and the quantity follows the marks. Typing a Length and pressing EDIT settles a line by hand; an EDIT of only the coating does not.
Split lines (B1-2)
What it does. When one instance of a member turns out a different length, it goes onto its own line named after the original with a number: B1-2, then B1-3. It is placed under its parent. This happens when you measure into an unmeasured line and the length is more than 2% off, when you drag the end of one mark of a several-mark line, and when you EDIT the length with one mark of a several-mark line selected.
When to use it. It happens by itself - check the split lines when you finish a sheet.
Catch. A further instance at a split's own length counts onto that split rather than opening B1-3. An unmeasured line gives up one from its target for every instance that splits off. A name of your own like PB-12 is a name, not a split - it splits to PB-12-2.
Counting onto a line (nearest 0.1 m)
What it does. Every measured length is rounded to the nearest 0.1 m (6.04 m reads 6). When a new measurement matches a line drawn from lines in every way - name, length to 0.1 m, type, size, coating, bolts and rates - it counts onto that line: another mark, quantity up by one, no new row. A selected matching line takes it first, else the newest match.
When to use it. It happens by itself, so a member found three times reads as one line of 3 rather than three lines of 1.
Catch. Rates count: change an Item Variable between two members and they stay on separate lines. So does a different name - B1 and B2 with identical properties never join. Counting onto a line adds one to its quantity, so a quantity you typed is kept and added to. An unmeasured line is never counted onto this way; MEASURE INTO handles those.
A tool that won't arm (it names the missing field)
What it does. MEASURE and COLUMN will not draw a line that cannot become a member. If the form is missing something, the tool does not arm and a note hangs under the field that needs filling - "Pick a Size before measuring", say. The same check runs on every click, in case the form was emptied after the tool was armed.
When to use it. Fill in the named field and press the tool again.
Catch. Both tools need Type, Size, Weight (or a custom kg/m), a Coating, and a Bolts count where there is no confirmed figure for the connection. COLUMN also needs a Length. PAINT is refused on a section with no paint area (a custom section) - choose Galvanizing or Raw. SHEET cannot be measured. Turning a tool OFF is never blocked.
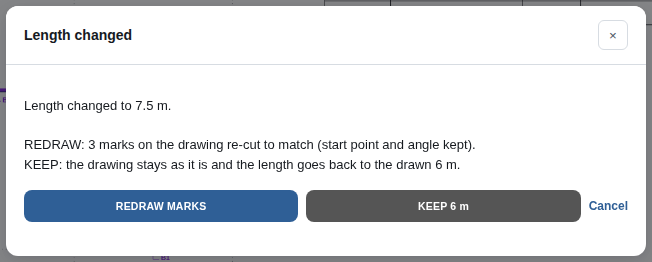
Length changed: REDRAW MARKS / KEEP
What it does. Asked when you EDIT the Length of a member that has marks on the drawing, with the drawing on screen. REDRAW MARKS re-cuts every mark to the new length, keeping its start point and angle. KEEP leaves the drawing as it is and puts the length back to the drawn one. Cancel changes nothing.
When to use it. REDRAW when the typed length is right and the marks were a little off; KEEP when you typed into the wrong line.
Catch. With the drawing not on screen (no PDF loaded, or on a phone) it is not asked - the marks are re-cut quietly. With ONE mark of a several-mark line selected, an EDIT of the length splits that one off onto its own line instead.
Drawing notices
What it does. The drawing tells you what happened in a notice at the bottom of the screen. The ones you will meet:
"Set this sheet's scale first - pick it in the SHEETS bar." MEASURE was pressed on a sheet with no scale.
"Those two clicks are in the same place - click the member's two ends." Nothing was measured.
"Put the selection down first (Esc), then MEASURE." A key was pressed while a mark was selected.
"Set this sheet's scale before copying a line onto it" - COPY onto a sheet with no scale.
"The mark was not moved - the sheet was redrawn during the drag. Drag it again." The mark is where it was.
"Nothing to undo - the Member Schedule has changed since the last drawing action" - see Undo.
"Scale 1:100 checked", "Kept 1:100 on sheet 2", "Sheet 2 scale set from your 5,000 mm dimension" - the outcome of a scale check.
"Loading the PDF viewer…" - the viewer is still arriving on a slow connection; the drawing opens when it does.
When to use it. Read the notice when a click seems to do nothing - it says why.
Catch. Warnings show in the warning colour. A notice stays up longer the more it has to say, and a newer one replaces it.
Site Costs
Step by step
Press Site Costs on the rail. The page takes the place of the workspace; the Member Schedule sits beside it and the Live Summary stays on the right.
Type each quantity: a count of chemsets or rolled members, hours of transport, crane and installation, days of scissor / boom and track trolley hire.
Check the Rate beside each row. It comes from Project Variables; change it there and every row re-prices at once.
Leave the Delivery rows alone unless you need a second run: any hire days book one delivery by themselves, and taking the days back to 0 takes the delivery off too.
Read Total Site & Completion at the foot. It goes into SUBTOTAL, so the margin is added to it.
Press Workspace (or Site Costs again) to go back to the take-off.
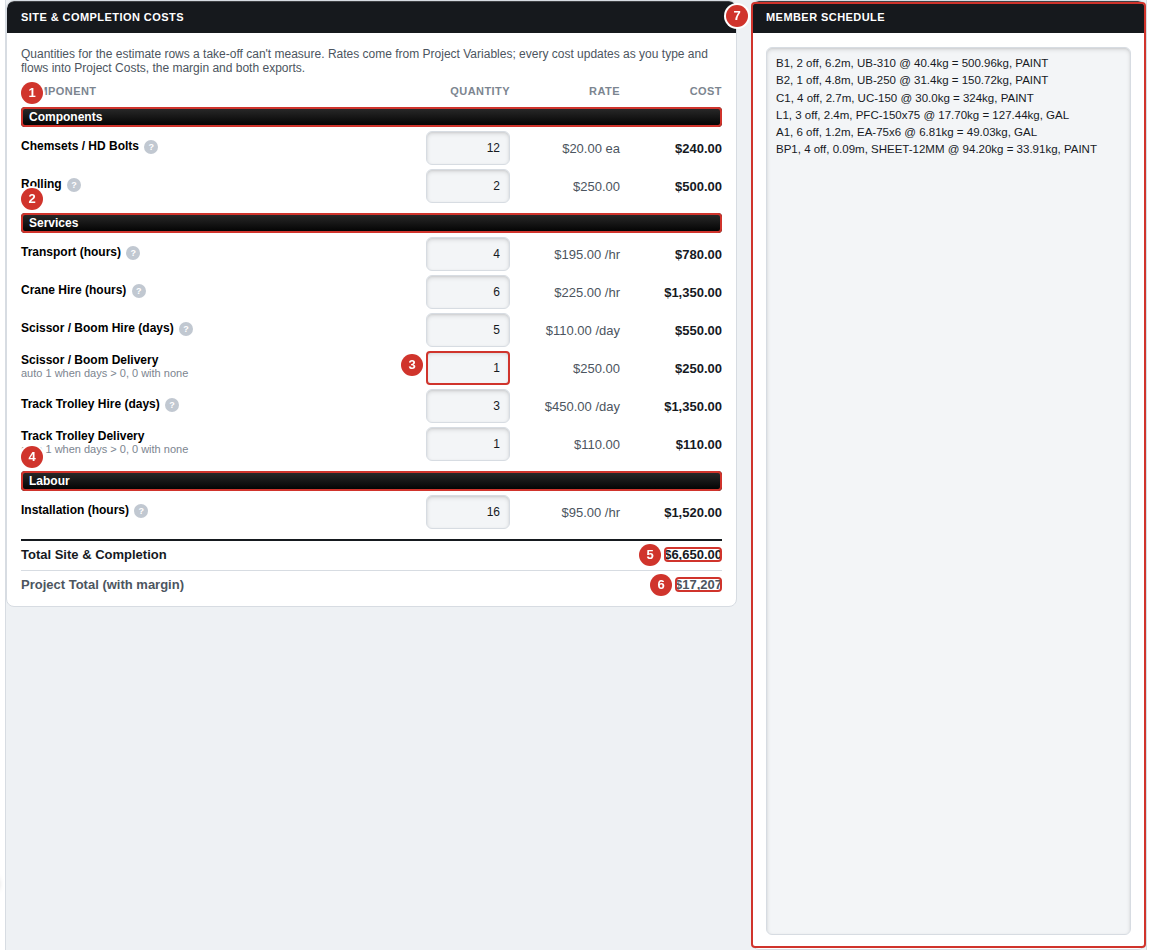
The Site & Completion Costs page with every row filled in.
Components: Chemsets / HD Bolts and Rolling, priced each.
Services: transport and crane by the hour, scissor / boom and track trolley hire by the day.
The Delivery rows: one delivery booked as soon as there are hire days, none once the days go back to 0.
Labour: installation hours.
Total Site & Completion: every row added up.
Project Total (with margin): the job's TOTAL, the same figure as the Live Summary.
The Member Schedule, moved beside the costs while this page is open.
What it does. Holds the estimate rows a take-off can't measure: chemsets, rolling, transport, crane hire, scissor / boom and track trolley hire with their deliveries, and installation. Each row is Quantity x Rate = Cost. The costs update as you type and flow into the Live Summary (the SITE & COMPLETION line under Project Costs), the margin, the TOTAL, the estimate sheet PDF, the spreadsheet and RAW TEXT.
When to use it. Once the members are in, or any time - a job can even be priced with site costs alone and no members.
Catch. Only the quantities live on this page. The rates are in Project Variables and apply to the whole job, so changing one re-prices this page straight away (unlike the Item Variables, which each member keeps from when it was added). The quantities are saved with the job - the autosave, the estimate sheet, the spreadsheet and the marked drawings - but NOT in the Variables file, which carries rates only. A quantity must be zero or more; a negative is refused with a note on the field. Enter in a quantity just accepts it - it never adds a member.
Catch (phone). The phone layout has no Site Costs button. Fill the quantities on a screen at least 699 pixels wide (turn or unfold the phone, or use a computer). Quantities already in a job you open on the phone still count in its total.
What it does. The number of chemical anchors or hold-down bolts used on site. Cost = quantity x Chemsets / HD Bolts Price Each (Project Variables, $20 to start with). For example 12 chemsets at $20 = $240.00.
When to use it. Whenever the job fixes steel down to concrete - base plates, column bases, wall plates.
Catch. These are not the connection bolts. Member bolts are counted from the schedule and priced on their own Bolts row; chemsets are only what you type here. On the estimate sheet they print on their own row under Components, beside Bolts and Rolling.
Rolling
What it does. The number of members sent away for rolling (curving). Cost = quantity x Rolling Price (Project Variables, $250 to start with) - a price per member.
When to use it. Curved beams, arched rafters, rolled hollow sections.
Catch. It is one price per member, whatever its size or length. If the roller quotes by the metre or by the job, work the figure out and set the Rolling Price to suit, or put the quantity at 1 and the Rolling Price at the quoted lump sum.
Transport (hours)
What it does. Truck time to deliver the steel, in hours. Cost = hours x Transport Price Per Hour (Project Variables, $195 to start with).
When to use it. On every job you deliver. Allow for the round trip and the unloading.
Catch. Part hours are fine (1.5). This is the steel's delivery only - the scissor / boom and track trolley deliveries have their own rows.
Crane Hire (hours)
What it does. Crane time on site for erection, in hours. Cost = hours x Crane Hire Price Per Hour (Project Variables, $225 to start with).
When to use it. When the steel is lifted into place by crane.
Catch. There is no separate crane travel or minimum-hire row: include the crane company's minimum and travel time in the hours, or in the rate.
Scissor / Boom Hire (days)
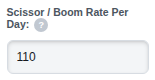
What it does. Days of scissor lift or boom lift hire. Cost = days x Scissor / Boom Rate Per Day (Project Variables, $110 to start with). Typing any days also books one delivery on the row below, and taking the days back to 0 (or clearing them) sets the delivery back to 0, typed or not.
When to use it. When the erectors need an elevated work platform on site.
Catch. On the estimate sheet PDF the hire and its delivery share one line: the days print as the quantity and the cost includes the delivery. The spreadsheet keeps them as two rows.
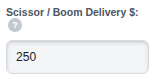
What it does. The number of deliveries (drop off and pick up) of the scissor or boom lift. Cost = deliveries x Scissor / Boom Delivery $ (Project Variables, $250 to start with). It fills itself: any hire days set it to 1, no days set it back to 0.
When to use it. Leave it to fill itself. Type a number only for a second run, for example 2 when the lift goes off site and comes back.
Catch. While there are hire days, a figure you type is yours - changing the days from 3 to 4 keeps your 2. Taking the days back to 0 clears it, typed or not; type it again if the hire comes back. With no days a delivery cannot be typed at all: it goes back to 0 with a note to enter the hire days first. In the spreadsheet both kinds follow the days cell - an untouched row is 1 with days and 0 without, a typed 2 stays 2 with days and goes to 0 if the days are put back to 0 in Excel. A file saved before 15 Oct 2026 can still hold a delivery at 0 days: it opens priced as it was saved, and the load notice names it so you can fix it.
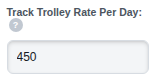
Track Trolley Hire (days)
What it does. Days of track trolley hire. Cost = days x Track Trolley Rate Per Day (Project Variables, $450 to start with). Typing any days also books one delivery on the row below, and taking the days back to 0 (or clearing them) sets the delivery back to 0, typed or not.
When to use it. When a track trolley is hired to move steel on site.
Catch. As with the scissor / boom, the estimate sheet PDF prints hire and delivery on one line (the cost includes the delivery); the spreadsheet keeps two rows.
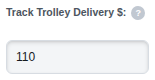
What it does. The number of track trolley deliveries. Cost = deliveries x Track Trolley Delivery $ (Project Variables, $110 to start with). It sets itself to 1 when there are hire days and 0 when there are none.
When to use it. Leave it to fill itself; type a number only when there is more than one delivery.
Catch. A number you type is kept while there are hire days, whatever they change to. Taking the days back to 0 clears it, so a trolley that comes off the job takes its deliveries with it, and with no days a delivery cannot be typed (it goes back to 0 with a note). The spreadsheet and older files follow the same rules as the Scissor / Boom Delivery.
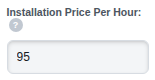
What it does. Site installation labour, in hours. Cost = hours x Installation Price Per Hour (Project Variables, $95 to start with).
When to use it. When you erect the steel. Count every person's hours: two riggers for 8 hours is 16.
Catch. This is site labour only. Workshop labour is FABRICATION, worked out from the weight of the steel; it is not typed here. On the estimate sheet both sit under Labour.
Total Site & Completion
What it does. Every row's cost added up, to the cent. It shows in the Live Summary's Project Costs as SITE & COMPLETION and goes into SUBTOTAL, so the margin is worked out on it too. With the example on this page (12 chemsets, 2 rolled, 4 h transport, 6 h crane, 5 days scissor with 1 delivery, 3 days trolley with 1 delivery, 16 h installation, starting rates) the total is $6,650.00.
When to use it. To check the site allowance before you send the quote.
Catch. Margin is added to site costs like everything else. If you pass hire or crane costs on at cost, take that into account in the rate.
What it does. The job's TOTAL - the same figure as the TOTAL in the Live Summary - shown here so you can see what the site costs do to the price without leaving the page. It is to the whole dollar.
When to use it. To see the final price move as you type a quantity.
Catch. With no members in the schedule this line reads "add members first", even though the Live Summary still prices a job that is site costs only.
Member Schedule beside Site Costs
What it does. While the Site Costs page is open, the Member Schedule moves in beside it so you can see what you are costing the site work for. It goes back to the workspace when you leave the page, at the same scroll position.
When to use it. Counting base plates for chemsets, or members for rolling, straight off the schedule.
What it does. Every save carries the site quantities and their costs:
When to use it. When you send or keep an estimate with site work on it - to know where each site row turns up.
Estimate sheet PDF - each row in use prints its quantity, rate and cost; the scissor / boom and track trolley lines include their delivery. A row with no quantity is left blank, and the PDF is left fillable so you can still type in those cells by hand.
Spreadsheet - each row is Rate x Quantity on the Estimate sheet, with the deliveries on rows of their own.
RAW TEXT - a SITE COSTS list of every row in use as quantity x rate = cost, then SITE TOTAL.
Catch. A site quantity changed in Excel changes Excel's total but does NOT come back when you reopen the file here - OPEN reads the quantities the app saved. Change them on this page and save again. A quantity typed with more than two decimals (2.125 hours) prints as typed, because that is what it was costed at.
Nesting
Step by step
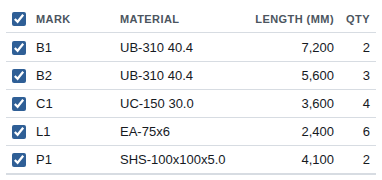
Take off the members in the Workspace (typed or measured on the drawing), then press Nesting on the rail. The cutting list fills itself from the Member Schedule.
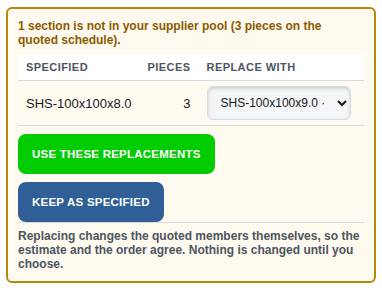
Untick any line you are not buying steel for. Answer the supplier-pool panel if it shows: USE THESE REPLACEMENTS or KEEP AS SPECIFIED.
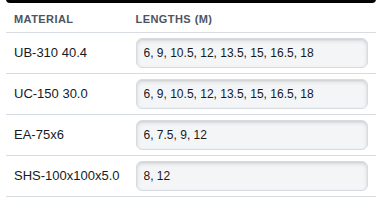
Check Lengths to order from for each material, and add any bars already on your rack under Stock on hand.
Open Cutting settings and check the saw kerf, end trim and minimum usable offcut.
Press NEST CUTTING LIST (or COMPARE METHODS to try all four ways and keep the best).
Read the order list, then EXPORT: print the order sheet for purchasing and the workshop cutting sheet for the saw.
Once the steel is cut from this plan, press COMMIT TO STOCK: the rack bars it used come off and the offcuts go on.
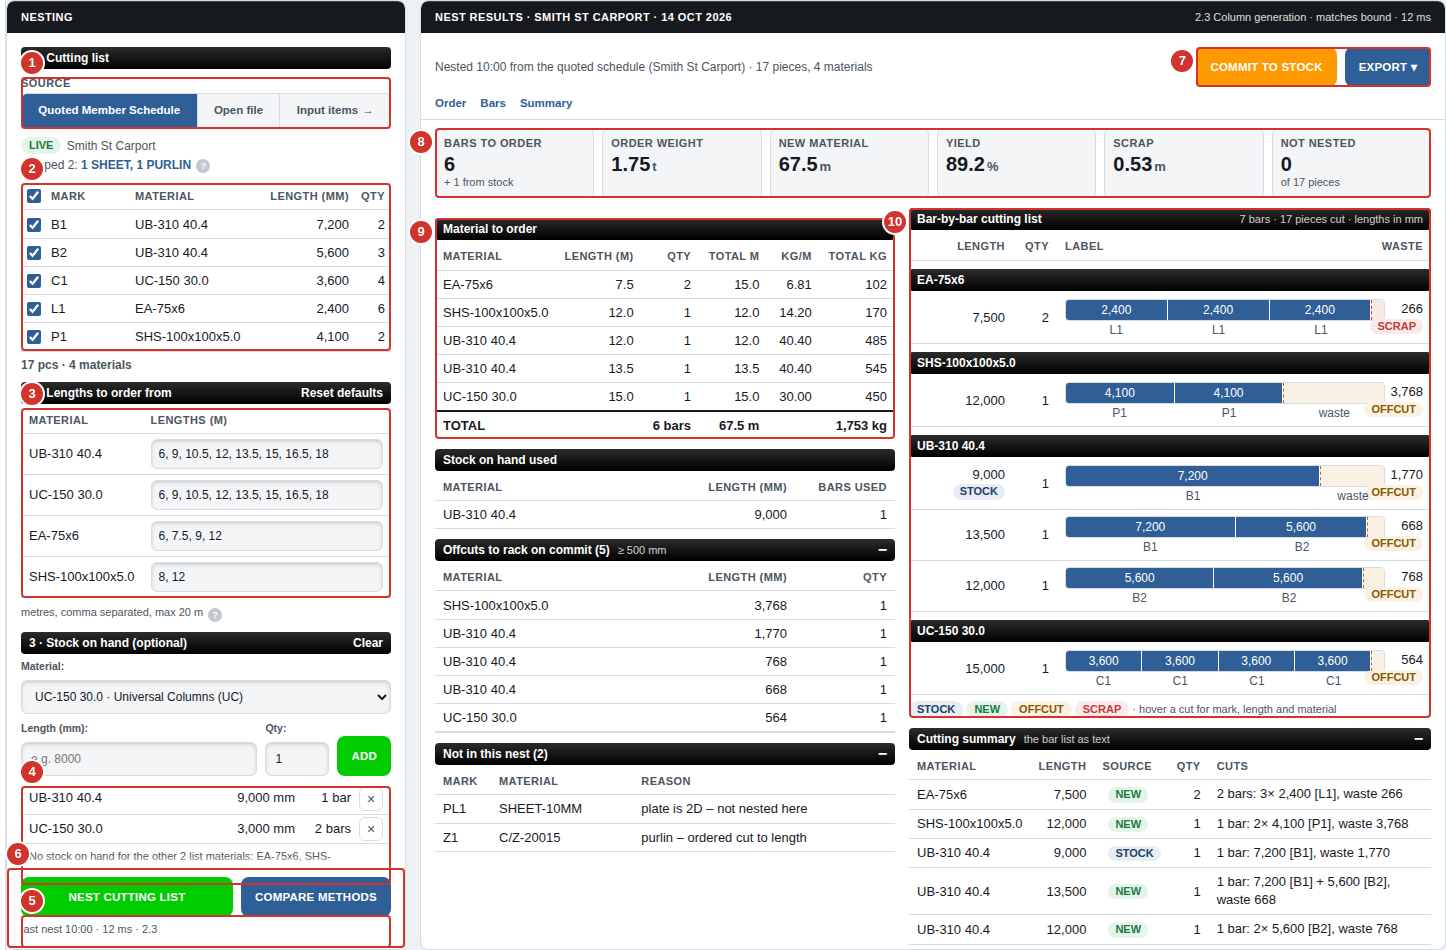
The Nesting page after a nest of a small job.
Source: the quoted Member Schedule, or a cutting-list file.
The cutting list, one line per schedule line, with its include tick.
Lengths to order from, one row per material.
Stock on hand: the bars on your rack.
Cutting settings: kerf, end trim, minimum offcut, method.
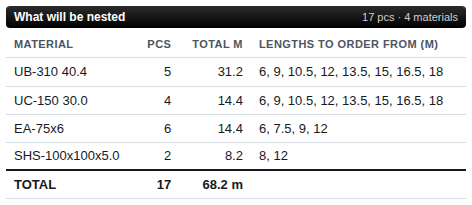
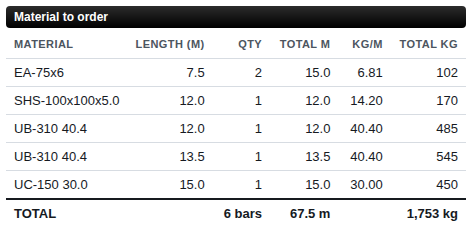
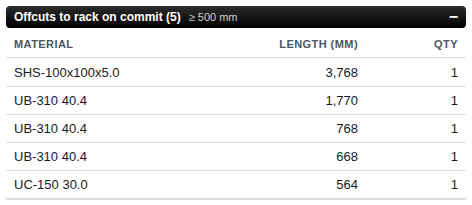
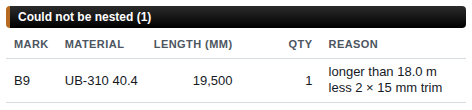
What it does. Works out how to cut every linear member on the job from the lengths you can buy, using bars already on your rack first. It gives you what to order (lengths, quantities and weight), the bar-by-bar cutting list for the saw, the offcuts left over and anything that would not fit. The left panel holds the four inputs - cutting list, lengths to order from, stock on hand, cutting settings - and ends on the NEST button. The right panel holds the results.
When to use it. Once the take-off is done, to order steel and plan the cutting. You can open it at any time: before the first nest it shows what will be nested.
Catch. Nesting does not change the price. The quote is priced on each member's weight plus the Waste %, not on the bars the nest buys, so the Live Summary is hidden while this page is open. The one exception is USE THESE REPLACEMENTS on the quoted schedule, which changes the members themselves. The page is computer-only: below 699 pixels wide it closes and the phone layout takes over.
What it does. Picks where the cutting list comes from. Quoted Member Schedule nests the members on this job and follows the schedule live - add, edit or remove a member and the list changes with it. Open file nests a list read from a file instead: a Steel Quote spreadsheet, a detailer's shaft or part list, or a CSV.
When to use it. The schedule for a job you priced here. A file when the detailer has issued the cutting list and you want to order from that.
Catch. A file is a snapshot: it does not follow the schedule, and a job number read from the file's title goes with the file when you switch back. Changing source clears the include ticks for that source.
What it does. Members are not entered on the Nesting page. This button asks Add items in the Workspace: GO TO WORKSPACE takes you to the entry form with the Item box ready; Stay here closes the question.
When to use it. When a member is missing from the cutting list.
Catch. If the source was a file, going to the Workspace switches the source back to the Quoted Member Schedule. The loaded file stays under Open file.
Back to Nesting
What it does. After GO TO WORKSPACE a note says Nesting is reading the quoted schedule for about eight seconds. Its Back to Nesting button returns you to the Nesting page.
When to use it. After adding the missing member. The rail's Nesting button does the same any time.
The LIVE line: Skipped and rounded up
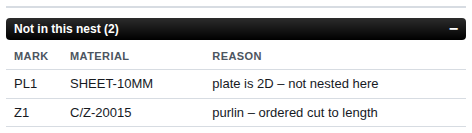
What it does. Under Source, a LIVE tag and the job name show the list is following the schedule. Skipped N counts the members left out (SHEET, PURLIN, unmeasured, other) and links to the full list under Not in this nest. N rounded up counts lines whose quantity was not a whole number. Each has a ?.
When to use it. To check nothing you meant to order was left out.
Catch. Plate is 2D and is not nested here; purlins are ordered cut to length; custom sections have no stock lengths; unmeasured members have no length yet - measure them on the drawing. A quantity of 2.5 nests as 3 pieces and its line is marked.
1 · Cutting list
What it does. Lists every piece to be cut: Mark, Material, Length in millimetres and Qty. One line per schedule line. Under it, a count of pieces and materials, and how many lines are unticked.
When to use it. Check it against the drawings before you nest.
Catch. The list is read-only when it follows the schedule: change a member in the Workspace and it updates here. Only the section types that come in lengths are nested - UB, UC, PFC, TFB, angles, flat, round and square bar, SHS, RHS, CHS, WB and WC.
Include ticks
What it does. A ticked line is nested; an unticked line is left out. The tick in the heading ticks or unticks every line at once.
When to use it. To nest part of a job - steel supplied by others, a stage ordered later, or one material at a time.
Catch. A tick belongs to its schedule line, not to its position: it stays with the line through EDIT and a reload, and goes when the line is removed. Opening another job, START FRESH or restoring a different job's save clears the ticks. Unticking does not change the price.
Show all rows / Show fewer
What it does. A long cutting list scrolls in its own box. Show all N rows opens it to full length; Show fewer folds it back.
When to use it. To read or untick down a long list without scrolling inside the box.
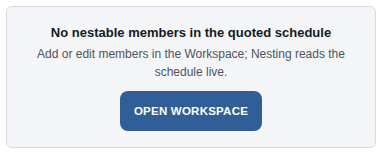
No nestable members / OPEN WORKSPACE
What it does. Shows when the schedule has nothing that can be nested. OPEN WORKSPACE takes you to the entry form.
When to use it. On a new job, or one that is all plate and purlins.
Catch. If every member is still unmeasured it says so: measure them on the drawing, or type their lengths, then nest.
Opening a cutting-list file
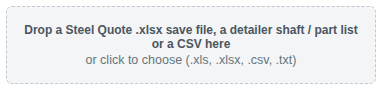
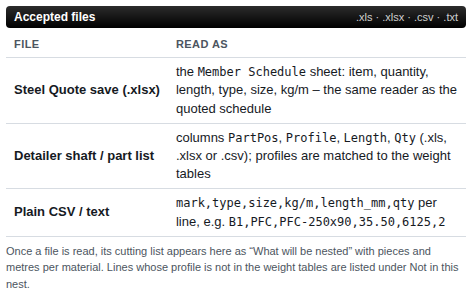
What it does. With Source on Open file, drop a file on the box or click it to choose one (.xls, .xlsx, .csv or .txt). It reads a Steel Quote spreadsheet's Member Schedule sheet, a detailer's shaft or part list with PartPos, Profile, Length and Qty columns, or plain lines of mark,type,size,kg/m,length_mm,qty. Profiles are matched to the weight tables.
When to use it. To order from the detailer's own list rather than your take-off.
Catch. Reading .xls and .xlsx needs the Excel reader from the internet; offline it says so - save the list as CSV and import that. Rows whose profile is not recognised, and purlins, are left out and listed under Not in this nest. A file with a title fills the Job box (unless you have typed one) until you switch back to the schedule.
What it does. While no file is loaded, the results side lists the three kinds of file the page reads and which columns it takes from each, with an example CSV line: B1,PFC,PFC-250x90,35.50,6125,2.
When to use it. To check a file's layout before you drop it in.
Replace file / Use schedule instead
What it does. Once a file is read, a FILE line names it and when it was loaded, and any profiles nested without a kg/m. Replace file picks another file; Use schedule instead goes back to the quoted schedule. The line also says how many pieces the quoted schedule has, for comparison.
When to use it. When the detailer reissues the list, or to compare the file with your take-off.
Catch. A profile without a kg/m still nests, but weighs nothing in the order weight.
Clear list
What it does. Unloads the file. The drop zone comes back for another one.
When to use it. When the file is finished with.
Catch. It only shows for a file. The quoted schedule is never cleared from here.
× (remove a file row)
What it does. Takes one line out of a loaded file's cutting list.
When to use it. To drop a line from the detailer's list for good. To leave it out for now, untick it instead.
Catch. Only file lines have it. Schedule lines are removed in the Workspace, which also takes them off the quote.
Not in your supplier pool
What it does. Lists any section in the cutting list that your supplier does not stock (some heavy-wall and odd hollow sections), with how many pieces, the replacement offered, its kg/m and how much heavier or lighter it is. The same check runs when you pick such a size in the entry form.
When to use it. Before ordering: decide whether to buy the replacement or chase the specified size.
Catch. Nothing changes until you choose. The piece count is every piece of that section on the quote, unticked and unmeasured ones too, because that is what a replacement rewrites.
Replace with (and LIGHTER)
What it does. Offers what can be bought, best first: the same outside size with the nearest wall either way, then the next section up. An option lighter than specified is marked LIGHTER and its weight difference shows in red; the lightest option that is not lighter sits straight after it.
When to use it. Pick the option you want before pressing USE THESE REPLACEMENTS. Your pick is remembered.
Catch. A lighter section is the engineer's call, not the estimator's. Check before you buy it.
USE THESE REPLACEMENTS
What it does. Swaps every piece of each listed section for the replacement picked. On the quoted schedule it changes the members themselves - size, kg/m, weight, coating area, fabrication hours and price - so the estimate and the order always name the same steel. On a file it changes the file's list only.
When to use it. When you will buy the replacement.
Catch. On the schedule this re-prices the quote, and there is no undo button: to go back, EDIT those members in the Workspace. Any drawing UNDO steps from before it are dropped. Nest again afterwards - the old nest is cleared.
KEEP AS SPECIFIED
What it does. Leaves the sections as specified and hides the panel.
When to use it. When you will source the specified size elsewhere.
Catch. It is remembered for each section until that section leaves the cutting list; if it comes back, you are asked again. Opening another job clears it.
2 · Lengths to order from
What it does. One row for each material in the cutting list, holding the lengths in metres the nest may buy, separated by commas. The defaults follow the stockists' published lengths for that size - for example UB and UC 6, 9, 10.5, 12, 13.5, 15, 16.5 and 18 m; angles 6, 7.5, 9 and 12 m; flats and rounds 6 m; most SHS and RHS 8 and 12 m. Its ? reads: the nest only buys a material from its own row; an edited row applies to that material only.
When to use it. When your supplier only carries some lengths, or a long member needs a longer bar.
Catch. 20 m is the most a row takes; longer entries are ignored and the row says so. An edited row is marked and shows its defaults beside the material. Edits are shared with the Steel Nesting Calculator in this browser.
Reset defaults (lengths)
What it does. Puts every material's lengths back to the defaults.
When to use it. After a one-off job with special lengths.
Catch. It resets every material, including ones not on this job, and the Steel Nesting Calculator with them.
3 · Stock on hand (the rack)
What it does. Lists the bars on your rack, grouped under the cutting-list material they suit, with their length and how many. Offcuts racked by a commit are marked with the date. Bars of other materials are listed after, under Other materials on the rack. The nest cuts from these first and only buys new bars for what is left.
When to use it. Before each nest, so you use what you have.
Catch. A bar is used only for exactly the same material - type, size and kg/m. The rack belongs to this browser, not the job: it is shared with the Steel Nesting Calculator and every job you nest here, and opening another job leaves it as it is.
Material (stock)
What it does. Picks the material of the bars you are adding. It lists the cutting list's materials; Other material… opens Type, Size and Weight (kg/m) to add anything else.
When to use it. Each time you add bars to the rack.
Length (mm) and Qty (stock)
What it does. The length of the bars in millimetres, and how many. Enter in either box adds them. The length is read exactly as a pasted line is, here and on the Steel Nesting Calculator: 8000, 8000.4, or 8,500 with a thousands comma.
When to use it. Each time you add bars to the rack.
Catch. Millimetres, not metres: a length no longer than the two end trims is refused, and so is one under 100 (it looks like metres - 8 m is 8000). 8 500, 8.5 m and 8500mm are refused rather than guessed at; write 8500.
ADD (stock)
What it does. Puts the bars on the rack. Bars of the same material and length join the existing line.
When to use it. After filling in Material, Length and Qty.
× (remove a stock line)
What it does. Takes that whole line of bars off the rack.
When to use it. When bars have been used on another job or scrapped.
Catch. It removes every bar on the line at once, with no question.
Clear (stock)
What it does. Asks Remove all stock on hand?, naming how many bars and materials, committed offcuts included. REMOVE empties the rack; Cancel leaves it.
When to use it. To start the rack again from a stocktake.
Catch. It empties the Steel Nesting Calculator's rack too.
Paste or import stock lengths: ADD PASTED LENGTHS
What it does. Adds many bars of the chosen Material at once. One bar length per line in millimetres, with an optional count: 8000, 8000 x 2 or 8,500 x 2. A comma after one or two digits is a thousands comma, so 8,500 is one 8500 mm bar - the same as on the Steel Nesting Calculator, which reads a pasted list with the very same rules.
When to use it. To key in a stocktake of one material quickly.
Catch. Every line goes on as the Material picked above. Lines that cannot be read stay in the box with the reason, so you can fix them; the rest are added. A length no longer than the two end trims, or under 100 mm (it looks like metres), is refused. Write the length as plain millimetres: 8 500, 8.5 m and 8500mm are not read.
Drop a CSV of stock
What it does. Reads a CSV with one line per bar group, type,size,kg/m,length_mm,qty, and puts it on the rack - any mix of materials.
When to use it. To load a rack list kept in a spreadsheet.
Catch. Lines that cannot be read are listed under the stock form; the rest are added.
4 · Cutting settings
What it does. Folds open to the job name, saw kerf, end trim, minimum usable offcut and method. Folded, its heading shows them in one line: job · kerf / trim / min offcut (mm) · method. A figure changed from the default shows in bold.
When to use it. Once to match your saw, then check the readout before each nest.
Catch. Each setting has a ceiling - kerf 50 mm, end trim 500 mm, minimum offcut 10,000 mm. A bigger figure is cut back to it and the panel says so. A figure that is not a number, or below zero, is not taken. The settings are shared with the Steel Nesting Calculator.
Job / project
What it does. The name printed on the results, the print sheets and the export file names. It follows the Project Name until you type something else. Its ? says the same.
When to use it. When the order should carry a job number different from the Project Name.
Catch. Empty the box to make it follow the Project Name again. The file names also start with the Quote No.
What it does. The width of steel lost to each saw cut. The nest allows it between every two pieces on a bar. Default 2 mm.
When to use it. Set it to your saw blade.
Catch. Capped at 50 mm - a kerf typed as 1000 instead of 1.000 would otherwise stop any bar holding anything.
End trim per bar end (mm)
What it does. Trimmed from each end of every bar before the first cut and after the last. A 12 m bar with 15 mm trim has 11,970 mm to cut from. Default 15 mm.
When to use it. To square up mill ends or allow for damaged ends.
Catch. It counts at both ends, so a piece must be shorter than the longest length to order less twice the trim, or it cannot be nested. Capped at 500 mm.
Min usable offcut (mm)
What it does. A leftover this long or longer is kept as an offcut and goes back on the rack when you commit; a shorter one is scrap. Default 500 mm.
When to use it. Set it to the shortest piece worth racking in your shop.
Catch. It changes the Scrap tile and what a commit racks, not what is bought. Capped at 10,000 mm.
Method
What it does. How the nest is worked out. 2.1 Standard fills one bar at a time. 2.2 Multi-start retries with random restarts and repairs. 2.3 Column generation (the default) solves for the best mix of cutting patterns, then rounds it to whole bars, and tells you how close it came to the best possible. 2.4 Exact search searches for the proven best and is the slowest.
When to use it. 2.3 suits almost every job. Use COMPARE METHODS rather than guessing.
Catch. Each method has a time limit, shared out across the materials. On a big job 2.4 can stop at its limit and reports Best found (capped) rather than Proven optimal.
Reset defaults (settings)
What it does. Puts kerf back to 2 mm, end trim to 15 mm, minimum offcut to 500 mm and the method to 2.3, and empties the Job box.
When to use it. After trying settings out.
Full reset
What it does. Asks Full reset of Nesting?, then clears stock on hand, edited lengths, the cutting settings, the loaded file and the last nest. The quoted Member Schedule is not touched.
When to use it. Rarely - to start Nesting from nothing.
Catch. It empties the rack, which the Steel Nesting Calculator shares. There is no undo.
NEST CUTTING LIST
What it does. Runs the nest with the chosen method. For each material it cuts from the rack first, then buys new bars from that material's lengths to order from. Under the button a line says when the last nest ran, how long it took and with which method - or how many pieces are ready.
When to use it. After checking the four inputs.
Catch. It is greyed out until at least one line is ticked. When anything has changed since the last nest it reads RE-NEST CUTTING LIST.
COMPARE METHODS
What it does. Runs all four methods on the same list, stock and settings and keeps the best: least new material, then least scrap, then fewest bars. A tie goes to your chosen method.
When to use it. On a big or costly order, where a few metres matter.
Catch. It takes longer than one nest. It does not change the Method setting.
What it does. Before the first nest, the results side shows a checklist of the four steps (list, lengths, stock, settings) and a table of each material: pieces, total metres and the lengths it will be ordered from, with edited beside changed lengths.
When to use it. A last check before pressing NEST.
STALE and RE-NEST
What it does. When the cutting list, lengths, stock or settings change after a nest, a banner says what changed and when the nest ran, the heading shows STALE and the tiles grey. RE-NEST runs it again.
When to use it. Whenever the banner shows, before ordering or printing.
Catch. The old results stay on screen and can still be printed and exported, so check for the banner first. SAVE ALL names a stale nest's files OUT OF DATE.
The run line
What it does. Says when the nest ran, from the schedule or which file, how many pieces and materials, and how many rack bars it used. The heading shows the job, the date, the method, how long it took and how good the result is: 2.3 says matches bound or how many metres over the best possible; 2.4 says proven optimal or best found (capped).
When to use it. To check you are looking at the right nest.
The result tiles
What it does.Bars to order: new bars to buy, and how many come from stock. Order weight: the new bars' weight in kg or tonnes. New material: metres of new bar. Yield: the share of all steel supplied (new and rack) that ends up in pieces. Scrap: metres of leftovers shorter than the minimum offcut. Not nested: pieces that fit no bar, of the total.
When to use it. At a glance after each nest.
Catch. Order weight is the bars bought, not the quote's tonnage - it includes the offcuts and scrap. A material with no kg/m adds nothing to it.
Order · Bars · Compare · Summary
What it does. Jumps down the results to the order list, the bar-by-bar list, the method comparison or the cutting summary, opening it if folded.
When to use it. On a long result.
Material to order
What it does. The new bars to buy, by material and length: Length (m), Qty, Total m, kg/m and Total kg, with a TOTAL line. Each length is shown to the millimetre - a 6,250 mm bar reads 6.25, as on the Steel Nesting Calculator and in the EXCEL and CSV files. A whole length shows one decimal on screen (12.0) and is the plain 12 in the files.
When to use it. To place the steel order. EXPORT > Copy order list puts it on the clipboard for an email.
Catch. If everything fits in stock on hand it says there is nothing to order. A material with no kg/m shows a dash.
Stock on hand used
What it does. The rack bars this nest cuts from, by material and length, with how many.
When to use it. To pull the bars before cutting. It prints on the workshop cutting sheet.
Offcuts to rack on commit
What it does. The leftovers at or over the minimum usable offcut, by material and length. These go on the rack when you press COMMIT TO STOCK.
When to use it. To mark and rack the offcuts at the saw.
Could not be nested
What it does. Pieces that fit no bar, with the reason: longer than the longest length less twice the end trim, or no lengths to order from for that material.
When to use it. Add a longer length to the material's row, check the length on the drawing, or plan a splice.
Catch. These pieces are not in the order list at all - nothing is bought for them until you fix the cause and nest again.
Not in this nest
What it does. Every schedule line or file row the nest left out and why: plate (2D - not nested here), purlin (ordered cut to length), custom section (no stock lengths), unmeasured, no length, no quantity, a size not in the weight tables, or a file row that could not be read.
When to use it. To be sure nothing is missing from the order. Plate and purlins still need ordering separately.
Bar-by-bar cutting list
What it does. Every bar to cut, grouped by material: its length (tagged STOCK for a rack bar), how many bars are cut the same way, a drawing of the bar showing each piece with its length and mark, and the waste, tagged OFFCUT or SCRAP. Point at a piece to see its mark, length and material. Lengths are in millimetres.
When to use it. At the saw. Print it as the workshop cutting sheet.
Cutting summary
What it does. The same bars as words: material, bar length, NEW or STOCK, how many, and the cuts on each (for example 2 bars: 2× 5,980 [B1], waste 35).
When to use it. For a shorter printout, or to check one material quickly.
Method comparison and Apply
What it does. After COMPARE METHODS, one row per method: bars, new metres, scrap metres, yield, weight, time and how good the result is. The result on screen is marked CURRENT; Apply on another row shows that method's result instead.
When to use it. When you prefer a method that came second - say fewer bars over less scrap.
COMMIT TO STOCK
What it does. Updates the rack to match this nest. It first says what it will do - remove N rack bars and add N offcuts - and waits for COMMIT or Cancel. Committed offcuts are dated on the rack.
When to use it. When the steel is actually cut (or the order placed) from this nest, so the next job sees the real rack.
Catch. It is greyed out when the nest uses no rack bars and leaves no offcuts. If the nest is stale the question says so. Committing changes the rack the Steel Nesting Calculator sees too.
UNDO COMMIT
What it does. After a commit the button reads UNDO COMMIT and a note says when it was committed. Pressing it puts back the rack bars the commit used and takes its offcuts off again. Bars added to the rack since are kept.
When to use it. When you committed too early, or the plan changed before cutting.
Catch. Running the same list again still shows UNDO COMMIT, so the same offcuts cannot be racked twice: undo first, then commit the new nest. An offcut already cut up since cannot come off, and the page says how many.
EXPORT ▾
What it does. Opens the list of what the nest can be saved or printed as: Excel workbook, CSV, Copy order list, and the three print sheets.
When to use it. After a nest. It is greyed out until there is one.
Catch. Load/Save > SAVE ALL also takes the Excel and CSV files when this page holds a nest.
Excel workbook (.xlsx)
What it does. Saves a workbook with two sheets: Cutting List (each bar pattern with its pieces, waste and a text drawing) and Order List (what to buy, with any pieces that could not be nested).
When to use it. To send the order to a supplier or keep it with the job.
Catch. It needs the Excel writer, which loads from the internet; offline it says so - the CSV still works.
CSV
What it does. Saves the cutting list and order list as one plain CSV file.
When to use it. For a system that only reads CSV, or when offline.
Copy order list
What it does. Puts the Material to order table on the clipboard, ready to paste into an email or a spreadsheet.
When to use it. To email a quick order.
Catch. Some browsers block the clipboard; the page says if the copy failed.
Print order sheet (A4)
What it does. Prints one A4 portrait sheet for purchasing: the job in large type, the result tiles, anything that could not be nested, the material to order and the offcuts to rack. A long offcut list is set in three or four columns so it stays on the page.
When to use it. For the buyer, or to file with the order.
Catch. Around 100 offcuts it genuinely needs a second page.
Print workshop cutting sheet (A3 landscape)
What it does. Prints the rack bars to pull and the bar-by-bar cutting list with its drawings, on A3 landscape so the bars are wide enough to read.
When to use it. For the saw operator.
Catch. Set the printer to A3; on A4 the browser shrinks it.
Print cutting summary (A4)
What it does. Prints the cutting summary - the bar list as text - on A4 portrait.
When to use it. When the workshop wants the list without drawings, or there is no A3 printer.
What Nesting keeps between jobs
What it does. Two kinds of thing live on this page. The job's own - ticks, the Job box, a loaded file, supplier picks, sections kept as specified and the commit - are cleared when you OPEN a file, press START FRESH or restore a different job. The shop's - stock on hand, lengths to order from and the cutting settings - stay in this browser for every job.
When to use it. Know it before starting a new job: the rack you see is the shop's rack, not the last job's.
Catch. The nest itself is not saved with the job: after a reload or OPEN, press NEST again. Save its Excel or CSV (or use SAVE ALL) to keep it.
Steel Nesting Calculator (shared stock)
What it does. A separate page (Guides > Steel Nesting Calculator) with the same nesting engine, for a cutting list typed or pasted on its own, with no quote. It shares three things with this page in the same browser: stock on hand, lengths to order from, and the cutting settings. A change on one shows on the other, even with both open.
When to use it. For a quick nest that is not part of a quote, or a list from another estimator.
Catch. Its cutting list and job box are its own. A commit, Clear or Full reset on either page changes the rack on both. A different browser or computer has its own rack.
Load / Save
Step by step
Type the Project Name (and Quote No. if you use one). Every save but VARIABLES and RAW TEXT needs a Project Name.
Press Load/Save on the rail (on a phone, the Load/Save tab).
Press SAVE ALL for every file in one zip, or one of the SAVE buttons for a single file.
Answer any question the page asks - unmeasured members, removed sheets. Cancel saves nothing.
To carry on later, press Load/Save > OPEN > ESTIMATE SHEET or SPREADSHEET and pick the file. A marked drawing goes back in through PDF DRAWING.
The Load / Save menu.
OPEN: ESTIMATE SHEET, SPREADSHEET, PDF DRAWING, VARIABLES.
SAVE ALL: every file for the job in one zip.
The single saves: ESTIMATE SHEET, SPREADSHEET, PDF DRAWING, VARIABLES, RAW TEXT.
RAW TEXT: the whole job as a plain page to print or copy.
What it does. Every way in and out of the app: four OPEN buttons and six SAVE buttons (on a phone, RESET ALL as well). Rest the pointer on a button (or tab to it) and a short tip says what it does; move onto the tip to click its More in Help link, which opens that button's entry here in a new tab.
When to use it. To save the job, reopen an old one, carry your rates to another job or start again.
Catch. The menu closes as soon as you press one of its buttons, click anywhere else or press Escape; whatever the button does then shows on the page. Your work is also kept in this browser as you go (the Saved tick), but that copy lives only in this browser on this computer - save a file to keep the job safe or move it.
The filled-in estimate sheet, plus the whole take-off tucked inside it
Yes - OPEN > ESTIMATE SHEET
Take-off spreadsheet (.xlsx)
Estimate, Member Schedule and a hidden save sheet
Yes - OPEN > SPREADSHEET
Marked drawings PDF
The drawing set with every mark and strike, a Member Schedule page, and the take-off inside it
Yes - OPEN > PDF DRAWING (drawing and job) or OPEN > ESTIMATE SHEET (job only)
Variables (.json)
Your Item and Project Variables only
No - rates only, through OPEN > VARIABLES
RAW TEXT
A plain page to print or copy
No - nothing is saved
Nesting .xlsx and .csv
The order list and cutting list
No - they are for purchasing and the workshop
What it does. Each job file carries the members with their own rates, the Item and Project Variables, the site quantities, the Project Name and Quote No., each member's drawing marks, and the sheet scales, rotations, removed sheets and strikes. The drawing PDF itself travels only in the marked drawings PDF.
When to use it. Deciding what to save or send: the estimate sheet for the client, the spreadsheet to work on in Excel, the marked drawings to carry on measuring.
Catch. Some PDF programs throw away the take-off tucked inside a PDF when they re-save it. Keep the spreadsheet too - SAVE ALL does - so the job survives either way.
OPEN > ESTIMATE SHEET
What it does. Reopens an estimate sheet PDF saved by Steel Quote and puts the whole job back: members, rates, site quantities, Project Name, Quote No., and the sheet scales and strikes. It also reads a marked drawings PDF the same way, taking the job but not the drawing.
When to use it. To carry on, revise or re-price a quote you sent - on a computer or a phone.
Catch. It REPLACES the schedule on screen; if there are members already, the page asks first (OPEN IT or Cancel). The Nesting page starts afresh for the opened job (your stock on hand is kept), and the drawing UNDO starts again. An ordinary PDF, or one whose take-off was stripped by another program, gives "No Steel Quote take-off found in that PDF". The notice after it may name members whose fabrication hours moved, or rates it filled in.
What it does. Reopens a take-off spreadsheet (.xlsx) saved by Steel Quote and rebuilds the job from it, drawing marks included. Quantity, Length, Waste %, Cleats % and Bolt Count edited on its Member Schedule sheet, and the Project Variables edited on its Estimate sheet, come back with it.
When to use it. To carry on a job, or to bring back a take-off adjusted in Excel.
Catch. It replaces the schedule on screen (it asks first when there are members). Only a Steel Quote take-off spreadsheet opens - anything else says "no MemberData sheet found". Edits come back only if the spreadsheet program saved the file after recalculating (Excel does). A member's own $/t and other rates, the site quantities and anything typed into Fabrication Hours (column R) do not come back: fabrication hours are always worked out again from the weight, and the notice names any member whose hours moved. To change the take-off itself, it is safest to OPEN it here, edit, and save again.
What it does. Opens the Drawing page and asks for a PDF drawing set to measure from - the same as Import Drawing's drop zone. A marked drawings PDF saved here also offers its take-off back ("Saved take-off found").
When to use it. To start a take-off off the plans, or to pick up a marked drawing where you left it.
Catch. Not on a phone - measuring is a desktop feature, so the phone's Load/Save hides both PDF DRAWING buttons. Loading a different drawing set while the job has marks, strikes or scales asks first.
What it does. Loads a Variables file (.json) saved with SAVE > VARIABLES: every Item Variable (waste, cleats, the $/t rates, galvanising, paint, bolt price, fabrication hours per ton, Custom Weight) and every Project Variable (drafting, fabrication $/hr, margin and the site rates). The schedule, Project Name and site quantities are not touched. The notice says how many it loaded.
When to use it. At the start of a job, before the first member, to bring in your shop's rates.
Catch. Item Variables are copied to each member when it is added, so loading new ones does NOT re-price the members already in the schedule - only the next ones. Project Variables apply to the whole job and re-price straight away. A value in the file that is not a number is skipped and named ("Skipped (not a number): ..."). If a schedule line is clicked, it is put down first so the file's rates become the live ones. A file that is not a Steel Quote variables file is refused.
What it does. Saves every file for the job in one zip, named "Quote No. - Project Name - date.zip". Always inside: the estimate sheet PDF, the take-off spreadsheet and the Variables file. Also inside when the job has them: the marked drawings PDF (marks or strikes, with the drawing loaded) and the Nesting spreadsheet and CSV (a nest run on the Nesting page). Each file is exactly what its own SAVE button gives.
When to use it. Whenever you finish a session or send a quote - one download instead of several, and phones that keep only the first download get everything.
Catch. The questions (Project Name, unmeasured members, removed sheets) are asked once, before anything is made; Cancel saves nothing. The first SAVE ALL each visit fetches the zip library from the internet ("Loading the zip library…"). A file that cannot be made is left out and the notice names it - for example marked drawings with no drawing loaded ("load the drawing PDF to include the marked drawings"). The nest is not kept when the page is reloaded, so press NEST again after a reload if you want the nesting files. A nest that no longer matches the schedule still goes in, named OUT OF DATE.
What it does. Fills the estimate sheet PDF with this job's figures - steel, coating, bolts, drafting, fabrication, site costs, margin, the TOTAL to the dollar, Cost P/T and Hours P/T, the Project Name and Quote No. - and saves it. The whole take-off goes inside the PDF, so the file reopens here later. The button reads GENERATING… while it works.
When to use it. For the estimate you file or send, and as a save of the job.
Catch. It needs a Project Name, and asks first if any member is unmeasured. The blank estimate sheet is fetched from the website each time, so it needs an internet connection. The PDF is left fillable: site rows with no quantity stay blank for hand entry. A character the PDF's font cannot print (an emoji, Chinese, an invisible mark pasted from an email) prints as its plain letter or a "?" - the file name and the job inside keep your text as typed.
What it does. Saves the take-off spreadsheet (.xlsx): an Estimate sheet priced with live formulas that agree with the screen to the cent, a Member Schedule sheet with each member's weight, rates and hours, and a hidden save sheet that OPEN reads back. Unmeasured members are named under the Estimate's summary and in the Member Schedule's Note column.
When to use it. To work on the estimate in Excel, to hand the numbers on, and as a save of the job.
Catch. It needs a Project Name and asks first about unmeasured members. The formulas are live, so an edit in Excel re-prices Excel's copy - but only some edits come back when you OPEN it here (see OPEN > SPREADSHEET). A hand-edited copy can load back differently from what Excel shows; to change the take-off, OPEN it here, edit and save again.
What it does. Saves the loaded drawing set with every member's marks and every strike drawn on, a MEMBER SCHEDULE page at the back, and the whole take-off inside the file. Drop it back into Import Drawing to pick up exactly where you left off. Black-and-white view carries into the file if it is switched on.
When to use it. To keep a marked-up set as the record of your take-off, or to hand it to someone checking it.
Catch. It needs a drawing loaded ("Load a PDF drawing first - OPEN > PDF DRAWING") and a Project Name. If you removed sheets from the strip it asks whether to leave them out. Unmeasured members are named on the schedule page. Not on a phone.
What it does. Saves just your rates - the Item Variables as the panel shows them and every Project Variable - as a small file to reuse on the next job.
When to use it. Whenever your rates change, so every new job starts from them (OPEN > VARIABLES).
Catch. No members, no site quantities, no Project Name - it does not save the job. It saves the LIVE rates: with a schedule line clicked, the panel shows that line's rates, but the file still gets your live ones. No Project Name is needed.
SAVE > RAW TEXT
What it does. Opens a plain page in a new browser window: the Quote No., the Project Name, the Member Schedule, the Quantities, Costs and Project Costs, and a SITE COSTS list (each row in use as quantity x rate = cost, then SITE TOTAL). Print it or copy from it.
When to use it. For a quick print, or to paste the figures into an email.
Catch. It is not a file and cannot be reopened. If the browser blocks pop-ups the window never opens and the page says "The browser blocked the Raw Text window - allow pop-ups for this site and press RAW TEXT again."
RESET ALL (phone Load / Save)
What it does. On a phone, RESET ALL sits at the foot of the Load / Save page (on a computer it is on the rail instead, so the menu leaves it out). It does the same as RESET ALL on the rail: asks "Reset all?", and on RESET ALL clears everything in this tab - the Member Schedule, the variables, the site quantities, the drawing work and the Nesting page's job - and starts a fresh job.
When to use it. To start a new job from nothing in this tab.
Catch. The rates go back to the standard starting rates - OPEN > VARIABLES to get yours back. Save the job first if you may want it again. Stock on hand and stock lengths on the Nesting page are kept.
What it does. SAVE ALL, ESTIMATE SHEET, SPREADSHEET and PDF DRAWING stop and put this note on the Project Name, because the name heads the sheet and names the file.
When to use it. Type the Project Name and press the save again.
What it does. When the schedule already has members, OPEN > ESTIMATE SHEET and OPEN > SPREADSHEET ask before the file replaces them, naming the file and how many members will go. OPEN IT goes ahead; Cancel, Escape or a click outside leaves the job as it is.
When to use it. Whenever it appears: OPEN IT to swap the job on screen for the file's, Cancel to keep working on the one you have.
Catch. Nothing is merged: the opened job replaces the one on screen. Save the current one first if you need it.
"Take-off not finished" - EXPORT ANYWAY
What it does. SAVE ALL, ESTIMATE SHEET and SPREADSHEET ask this when any member is still UNMEASURED (entered from the plan's schedule, not yet measured). It names them: "N members not priced - UNMEASURED, no length: ..." and "N members still being measured, priced at the length found so far: ...".
When to use it. EXPORT ANYWAY to save a part-finished take-off; Cancel to go back and measure.
Catch. The file says so on its face: the same lines print in red under the estimate sheet's summary, under the spreadsheet Estimate's summary, in its Member Schedule's Note column and on the marked drawings' schedule page. A member with no length is in the files but priced at nothing.
"Removed sheets" - LEAVE THEM OUT / KEEP EVERY SHEET
What it does. When you have removed sheets from the drawing strip, PDF DRAWING and SAVE ALL ask once whether the saved drawing should leave them out or keep every sheet. It names the sheets, and how many marks and strikes sit on them.
When to use it. LEAVE THEM OUT for a lighter file with only the sheets you used; KEEP EVERY SHEET for the full set.
Catch. Marks and strikes on a sheet left out are left out of the PDF too. The members themselves stay in the Member Schedule and in the other files.
What it does. Says what went in: "Saved 3 files in <zip name>: estimate sheet PDF, take-off spreadsheet, variables file." A file that could not be made gets its own line ("Marked drawings PDF not included - load the drawing PDF to include the marked drawings."). A stale nest adds "The nest is stale - it ran before the last change (...). RE-NEST on the Nesting page and save again for a current one."
When to use it. Read it after SAVE ALL to be sure every file you needed went into the zip.
Catch. "Nothing was saved" means no zip was made at all - the zip library did not load, or no file could be built. Each file can still be saved with its own SAVE button. The notice goes by itself after a few seconds; OK closes it sooner.
The load notice
What it does. After every OPEN a notice at the foot of the page says what came in ("Loaded 5 items from Q1234 - Smith St - Take-off - 14-10-2026.xlsx."). It may add three things: members carrying drawing marks, fabrication hours that moved, and rates the file was missing. When it has something to warn you about it shows in the warning colour.
When to use it. Read it after every OPEN - it is where the app says a job changed on the way in.
Catch. It stays up for a few seconds, longer for longer messages; OK closes it. A file that will not open says why in the same place.
"Fabrication hours now come from each member's weight"
What it does. Fabrication hours are always worked out from each member's weight and its own Fabrication Hours per Ton - never stored or typed. When a file carries hours that no longer match (an older job, or hours typed into the spreadsheet's column R) the notice names the members that moved: "B1 was 9.99 h, now 6.12 h" for up to three, then "N more moved too".
When to use it. Check the named members before you re-send an old quote: the labour, and so the price, may have changed.
Catch. A file saved by this version never shows it. To give one member more labour, click its line, change its Fabrication Hours per Ton and press EDIT - a typed hours figure is always replaced.
"Rates missing from the file were filled from the job's rates"
What it does. When a member in an opened file has a rate missing or blank (an older file, or a cell cleared in Excel), the job's own rate is filled in so that member is never priced at $0. The notice names the rate and up to three of the members it filled.
When to use it. Check the named rate is right for those members; if not, click each line, set the rate and press EDIT.
"… carry drawing marks - load the matching PDF"
What it does. A job opened from the estimate sheet or the spreadsheet brings its members' drawing marks, but not the drawing. The notice says how many members carry marks and to load the matching PDF in Import Drawing; the drop zone keeps saying it until you do. On a phone it says to open the job on a desktop instead.
When to use it. Load the same drawing set (OPEN > PDF DRAWING) and the marks, scales and strikes go back on their sheets.
Catch. It must be the same drawing set. A different set is asked about before anything is carried across.
What it does. Each OPEN checks the file is one of its own and says so if it is not, changing nothing:
When to use it. When an OPEN says it cannot use a file: check you picked the right kind of file for that button.
ESTIMATE SHEET: "No Steel Quote take-off found in that PDF. Only Estimate Sheets and Marked Drawings saved by this calculator can be reopened - to view the sheets of an ordinary drawing, use OPEN > PDF DRAWING."
SPREADSHEET: "Could not open the file: no MemberData sheet found - this doesn't look like a Steel Quote save file."
VARIABLES: "That file is not a Steel Quote variables file. Use SAVE > VARIABLES to create one."
Catch. The Nesting files and RAW TEXT are not save files. A PDF re-saved in another program may have lost the take-off inside it - open the spreadsheet instead.
"… library failed to load" when saving or opening
What it does. The PDF, spreadsheet and zip tools come from the internet. If one could not be fetched - or the copy fetched was not the exact one the app trusts - the button that needs it says so and does nothing else: "PDF library failed to load. Check your internet connection and try again.", "Spreadsheet library failed to load...", "Nothing was saved - the zip library did not load...". The estimate sheet also needs its blank template from the website: "the estimate sheet template could not be fetched - check your internet connection".
When to use it. Reconnect and press the button again. SAVE ALL still saves the files it could make and names the rest.
What it does. The Load/Save tab opens the same menu as a full page: OPEN ESTIMATE SHEET, SPREADSHEET and VARIABLES; SAVE ALL, ESTIMATE SHEET, SPREADSHEET, VARIABLES and RAW TEXT; RESET ALL. Tap the tab again, or another tab, to close it.
When to use it. To save a job priced on the phone, or open one saved on a computer.
Catch. The two PDF DRAWING buttons are not there - drawing take-off is a desktop feature. SAVE ALL on a phone leaves the marked drawings out and says to open the job on a desktop with the drawing loaded. There are no hover tips on a phone.
Before the first member goes in, check every rate in Item Variables: waste, cleats, the four steel $/t rates, galvanising, painting, bolts and fabrication hours per tonne.
Check Project Variables: drafting, the shop's $/hr, margin and the site rates.
Or bring in your usual rates in one go: Load/Save > Open > VARIABLES and pick a variables file saved from an earlier job.
Press Enter or click out of a box to put a rate in. The Live Summary re-prices for Project Variables straight away.
To change one member's Item Variables later, click its line in the Member Schedule, change the rate and press EDIT.
The two rate panels beside the Member Schedule, with a line clicked.
Item Variables: the rates each member copies when it is added.
The note that says you are looking at a clicked line's own rates, not yours.
Project Variables: rates for the whole job, re-priced at once.
What it does. Holds the rates priced onto each member: Waste %, Allowance For Cleats %, the hot rolled, hollow, purlin and fabricated $/t, galvanising $/t, painting $/m², Bolt Price Each and Fabrication Hours Per Ton - plus the Custom Weight, which is a member's own kg/m. When you press ADD (or measure a member off the drawing), the member takes a COPY of every one of these figures and keeps it.
When to use it. Set it before you start the take-off. Click the heading to fold the panel away. On a phone both Variables panels are on the Values tab (Item Variables first, Project Variables below).
Catch. Item Variables are copied to each member when it's added; changing them later doesn't re-price existing members - only the next one you add. So a rate changed halfway through a take-off leaves the first half at the old rate, and the Live Summary does not move. To change a member already in, click its line, change the rate and press EDIT (see Changing one member's rates). Opening a saved job puts that job's saved rates in the panel.
What it does. Rates that belong to the whole job, not to a member: Drafting Price Per Ton, Fabrication Price Per Hour, Margin %, and the rates for every Site Costs row (chemsets, rolling, transport, crane, installation, scissor / boom and track trolley).
When to use it. Any time. A change here re-prices the whole job as soon as you press Enter or click out of the box. On a phone both Variables panels are on the Values tab (Item Variables first, Project Variables below).
Catch. The site QUANTITIES (hours, days, counts) are on the Site Costs page, not here - a rate here costs nothing until its row has a quantity.
What it does. Gives a member already on the schedule a new rate. Click its line in the Member Schedule: Item Variables now show that member's own rates, with a blue note saying so. Change the rate and press EDIT. EDIT keeps the rates on show for that line.
When to use it. A supplier price changed for one section, or one member needs more shop labour (raise its Fabrication Hours Per Ton).
Catch. There is no button that re-prices every member at once - do each line with EDIT. A rate changed while a line is on show only goes onto that line if you press EDIT: ADD, CLEAR, Escape or clicking away puts your own rates back and drops the change. ADD never gives a new member the clicked line's rates.
What it does. Every rate, percentage and site quantity takes a plain number. ".5", "5." and "+5" are fine - they are tidied to 0.5, 5 and 5.
When to use it. Whenever a red note appears under a rate box.
Catch. A negative is refused ("must be zero or more"), Margin included - a negative used to take money off the quote with nothing on screen. Commas and units are refused too: type 2350, not 2,350 or $2350. A rate box left empty stops the Live Summary re-pricing until it has a figure ("Please enter a value"). An empty site quantity counts as none.
The variables file
What it does.Save > VARIABLES writes your rates to a small file: every Item Variable (Custom Weight included) and every Project Variable. Open > VARIABLES puts them back into the panels and says how many it loaded.
When to use it. Keep one file of your standard rates and open it at the start of each job, or carry rates to another computer.
Catch. It holds rates only: no members and no Site Costs quantities, so hours and days never carry from one job to the next. Opening it changes the rates for the NEXT member added and the Project Variables; members already on the schedule keep their own Item Variables. A value in the file that is not a number is skipped and named in the notice. If a schedule line was clicked, it is let go first, so the file's rates become your own.
What it does. Extra steel on top of each member's weight for offcuts and drops. Default 10 %. A member's weight with waste = raw weight × (1 + Waste % ÷ 100). That weight is what the steel rate is charged on.
When to use it. Lower it for jobs that cut cleanly from stock lengths; raise it for lots of short pieces. The Nesting page shows the real offcuts if you want to check.
Catch. Purlins never get waste (or cleats). Waste is not painted: the painted area is the member's own area plus the cleats allowance. It is an Item Variable, so it is copied to each member when added.
What it does. A weight allowance for cleats, end plates and fittings, as a % of each member's weight WITH waste. Default 10 %. It shows as CLEATS in the Live Summary.
When to use it. Raise it for connection-heavy work, lower it for simple members.
Catch. Cleats are always priced at the member's own hot rolled $/t - even on a hollow or fabricated member. They carry fabrication hours, galvanising (on a GAL member) and their share of paint area. The cleat plate schedule sets bolt counts only; plate is never priced from it. Purlins get no cleats.
What it does. The supply price in dollars per tonne for UB, UC, PFC, TFB, equal and unequal angles, flats, rounds, squares, SHEET and CUSTOM hot rolled members. Default $2350/t. Also the rate every member's cleats are priced at.
When to use it. Set it to your supplier's current price.
Catch. Copied to each member when added. "Per Ton" means per tonne (1000 kg).
Hollow Sections Price Per Ton
What it does. The supply price per tonne for SHS, RHS, CHS and CUSTOM hollow members. Default $2910/t.
When to use it. Set it to your supplier's current hollow section price.
Catch. The cleats on a hollow member are still priced at the hot rolled rate, not this one.
Purlin Price Per Ton
What it does. The supply price per tonne for PURLIN members (C and Z sections). Default $3000/t.
When to use it. Set it to your purlin supplier's price.
Catch. Purlins are priced on their bare weight: no waste, no cleats and no fabrication hours. Each purlin gets 4 × M12 bolts (2 per end). Picking PURLIN sets the Coating to RAW, so a purlin is never painted or galvanised in the price.
Fabricated Sections Price Per Ton
What it does. The supply price per tonne for welded beams (WB) and welded columns (WC). Default $3375/t. They show as FABRICATED in the Live Summary.
When to use it. Set it to your WB / WC supplier's price.
Catch. Their cleats are priced at the hot rolled rate. Bolts for WB 900 and deeper and every WC must be typed by hand.
Galvanising Price Per Ton
What it does. The hot-dip galvanising price per tonne for members with Coating GAL. Default $2000/t.
When to use it. Set it to your galvaniser's price.
Catch. It is charged on the member's priced weight - waste and cleats included. Copied to each member when added.
What it does. The painting price per square metre of surface for members with Coating PAINT. Default $25/m².
When to use it. Set it to your painter's price for the system specified.
Catch. The area comes from the section's surface area per metre, plus the cleats allowance - not from the weight, and waste is not painted. CUSTOM members and purlins have no surface area, so PAINT is refused for them.
What it does. The price of one bolt assembly. Default $2.50. Each member's bolts cost its Bolts count × its Quantity × this price.
When to use it. Set it to your average bolt, nut and washer price.
Catch. One price for every diameter on a member - M12, M20 and M24 all cost the same. Hold-down bolts and chemsets are not bolts here: they are the Chemsets / HD Bolts row in Site Costs.
What it does. Workshop hours for each tonne of steel. Default 17 h/t. Each member's hours = its priced weight in tonnes (with waste and cleats) × this figure, worked out again on every change.
When to use it. Set your shop's average. To give one member more or less labour, click its line, change this figure and press EDIT.
Catch. Hours are always worked out from weight - they can never be typed, and a figure typed into a spreadsheet's hours column is replaced when the file is opened. Purlins carry no hours. Copied to each member when added.
What it does. Your workshop charge-out rate. Default $85/hr. FABRICATION $ = the job's fabrication hours × this rate.
When to use it. Set it to your shop rate.
Catch. A Project Variable, so one rate for the whole job. The hours are multiplied before they are rounded, so the shown hours × the rate can sit a few cents off the FABRICATION figure.
Margin %
What it does. Profit added on top of the SUBTOTAL. Default 10 %. MARGIN = SUBTOTAL × Margin % ÷ 100, to the cent.
When to use it. Set it for each quote.
Catch. It is a markup on cost, not a margin on the sell price: 10 % on a $10,000 SUBTOTAL is $1,000, a $11,000 TOTAL. It applies to everything, site costs included. Zero or more only.
What it does. Raw weight = Quantity × Length (m) × kg/m. For a SHEET the Length is the plate's area, Width × Length in m², and the weight is that × its kg/m² (the schedule line shows the area as the length, e.g. 0.09m). A CUSTOM member uses the Custom Weight.
When to use it. To check the Weight readout or a schedule line by hand.
Catch. A member entered from the plan's schedule with no length yet weighs nothing and is not priced until it is measured.
Waste
What it does. Weight with waste = raw weight × (1 + Waste % ÷ 100), using the member's own Waste %. The HOT ROLLED, HOLLOW and FABRICATED weights in Quantities are these figures added up.
When to use it. To check the weight a member is priced on, or to see what a different Waste % would do.
Catch. Purlins get no waste: PURLINS is their raw weight.
Cleats
What it does. Cleats = weight with waste × Allowance For Cleats % ÷ 100. The member is priced on weight with waste + cleats. All members' cleats show as one CLEATS line, in kg and $, priced at each member's own hot rolled $/t.
When to use it. To check the CLEATS line, or to judge whether 10 % suits a job with heavy or light connections.
Catch. Cleats are added on the weight WITH waste, so 10 % and 10 % make 21 % on the raw weight, not 20 %. No cleats on purlins.
Steel supply (MATERIAL)
What it does. Each member's weight with waste × its own $/t ÷ 1000, in one of four groups: HOT ROLLED (UB, UC, PFC, TFB, angles, flats, rounds, squares, SHEET, CUSTOM hot rolled), HOLLOW (SHS, RHS, CHS, CUSTOM hollow), FABRICATED (WB, WC) and PURLIN. CLEATS is added at the hot rolled rate. MATERIAL is all five.
When to use it. To check the HOT ROLLED, HOLLOW, FABRICATED, PURLIN and MATERIAL lines against your own figures.
Catch. MATERIAL is rounded from the unrounded figures, so it can be a cent off the five lines added up (J1: $3065.98 + $306.60 = $3372.58, MATERIAL $3372.57). Each member uses the rate it copied when added.
Fabrication hours
What it does. Each member's hours = weight with waste and cleats (t) × its own Fabrication Hours Per Ton. FABRICATION in Quantities adds up every member's UNROUNDED hours and rounds once, to the hundredth. FABRICATION $ = those unrounded hours × Fabrication Price Per Hour, rounded once to the cent.
When to use it. To check the labour line. To change a member's labour, change its hours per tonne with EDIT.
Catch. Hours are never typed or stored as an input: they are worked out from weight every time. Because the $ comes from the unrounded hours, the shown hours × the rate can be a few cents out (J1: 24.40 h × $85 = $2074.00, but the job's 24.3973 h cost $2073.77). Purlins carry no hours. An old job whose saved hours differ is re-priced on opening and the notice names the members that moved.
What it does. For a PAINT member: area = Quantity × Length × the section's surface area per metre (from the published tables, the same as the Steel Weight Tables page), then × (1 + Allowance For Cleats % ÷ 100). A SHEET is both faces and its four edges: Quantity × (2 × W × L + 2 × (W + L) × thickness). PAINTING = area × the member's own $/m².
When to use it. To check the PAINT area and PAINTING cost, or to see why a CUSTOM section cannot be painted.
Catch. Waste is not painted, cleats are. SHS and RHS use the outside box perimeter - about 5 % over the published round-cornered figure, on purpose. CUSTOM members and purlins have no area, so PAINT is refused for them.
Galvanising
What it does. For a GAL member: the weight with waste and cleats × its own galvanising $/t ÷ 1000. GALVANIZED in Quantities is those weights added up. COATING = PAINTING + GALVANIZING, rounded from the unrounded figures (so it too can be a cent off the two lines).
When to use it. To check the GALVANIZED weight and GALVANIZING cost.
Catch. A RAW member adds no coating.
Bolts
What it does. Each member's bolts = its Bolts count (both ends together) × its Quantity. BOLTS in Quantities is the job's count; BOLTS $ = every member's bolts × its own Bolt Price Each. The count is prefilled from the shop's cleat-plate schedule (below), and you can type over it.
When to use it. To check the BOLTS count and cost, or to see why a member's bolts are what they are.
Catch. No waste is added to bolts. Angles, flats, rounds, squares, TFB, hollow sections, SHEET and CUSTOM get no estimate - type a count if they need bolts. Diameter: M20 up to and including 460 deep, M24 deeper; purlins M12.
Bolt counts
What it does. The figures the Bolts box is prefilled with. A simple (shear) connection uses the shop's cleat-plate schedule, bolts per cleat at each end; the member gets twice that.
When to use it. To check the count the Bolts box was filled with, and which sizes you must count by hand.
Family
Depth
Bolts per end
Per member
UB
150, 180, 200
2
4
UB
250, 310, 360
3
6
UB
410
4
8
UB
460
5
10
UB
530
6
12 (M24)
UB
610
7
14 (M24)
UC
100, 150, 200
2
4
UC
250, 310
3
6
PFC
75 to 230
2
4
PFC
250, 300
3
6
PFC
380
4
8
WB
700
8
16 (M24)
WB
800
9
18 (M24)
PURLIN
any
2
4 (M12)
With Portal ticked (PFC, UB and UC only), the member gets a depth-based base - 2 per end up to 230 deep, one more per end for each further 75 mm or part - plus the flange groups: 8 more for a PFC up to 380, 16 more for a UB or UC up to 460. That gives, per member: PFC up to 230 12, PFC 250 and 300 14, PFC 380 16; UB 150 to 200 and UC 100 to 200 20; UB and UC 250 22; UB 310, UC 310 and UB 360 24; UB 410 26; UB 460 28.
Catch. No figure, so you type the count: WB 900, 1000 and 1200, every WC, and a portal UB deeper than 460 (530 and 610). These are the shop's measured figures - none is guessed. ADD will not go until a count is typed.
What it does. DRAFTING is worked out from the TOTAL WEIGHT as shown (in kg, to the hundredth): TOTAL WEIGHT × Drafting Price Per Ton, rounded to the dollar, then ÷ 1000, to the cent - the spreadsheet's ROUND(ROUND(weight × rate, 0) / 1000, 2). So 1.50 kg at $1663 is $2494.50, $2495, $2.50 (not the $2.49 of 2.4945 rounded). TOTAL WEIGHT is PURLINS (rounded to the hundredth of a kg) plus the hot rolled, hollow, fabricated and cleats weights added up and then rounded.
When to use it. To check the DRAFTING line.
Catch. Purlins are included, though they carry no waste, cleats or hours.
Site costs
What it does. Each Site Costs row is its quantity × its Project Variables rate: chemsets × price each, rolling × price each, transport hours × $/hr, crane hours × $/hr, hire days × $/day plus deliveries × $ each (scissor / boom and track trolley), installation hours × $/hr. SITE & COMPLETION is the rows added up, to the cent.
When to use it. To check SITE & COMPLETION against the Site Costs page.
Catch. Margin is added on site costs too. A job with only site costs still prices.
Margin and the TOTAL
What it does. SUBTOTAL = MATERIAL + COATING + BOLTS + DRAFTING + FABRICATION + SITE & COMPLETION, the six figures as shown. MARGIN = SUBTOTAL × Margin % ÷ 100, to the cent. TOTAL = SUBTOTAL + MARGIN, rounded to the nearest dollar and shown without cents.
When to use it. To check MARGIN and the TOTAL, or to work back to the price before margin.
Catch. Only the TOTAL is in whole dollars; everything else keeps its cents. The estimate sheet's Total and the spreadsheet's GRAND TOTAL are the same whole-dollar figure.
Rounding
What it does. Figures are worked out at full accuracy and rounded where they are shown: weights and areas to the hundredth, money to the cent, the TOTAL to the dollar. Three are worked out from figures as SHOWN instead: the SUBTOTAL adds up the six lines as shown, DRAFTING is taken from the TOTAL WEIGHT as shown (and rounded to the dollar before the ÷ 1000 - see Drafting), and MARGIN from the SUBTOTAL as shown. A half always rounds UP, judged on the figure as written ($16143.345 is $16143.35), the same as Excel's ROUND.
When to use it. When a total looks a cent off the lines above it, or the spreadsheet and the screen seem not to agree.
Catch. A total rounded from unrounded parts can sit a cent off the sum of its rounded lines (MATERIAL, COATING, TOTAL WEIGHT) - that is expected, not an error. The SUBTOTAL, DRAFTING and MARGIN are the exceptions above: they start from figures as shown.
The figures on the estimate sheet and spreadsheet
What it does. Both files carry the screen's figures. The Rate column shows the rate a row was priced at: the rate as typed when every member on it agrees; when they differ, cost ÷ quantity to the fewest decimals that make Rate × Quantity the Cost to the cent. The Fabrication row prints the hours to as many decimals as make $/hr × hours its Cost. Cost P/T = TOTAL ÷ tonnes; Hours P/T = the unrounded hours ÷ tonnes.
When to use it. When you check the estimate sheet or the spreadsheet against the screen, row by row.
Catch. With no steel weight (a site-costs-only job) Hours P/T and Cost P/T are left blank. Site rows with no quantity stay blank on the estimate sheet so you can fill them by hand. The spreadsheet's figures are live formulas, so an edit in Excel re-prices.
Worked example: job J1
What it is. This is golden job J1, one of the fixed jobs the app is tested against before every upload. Every figure in a grey box below is exactly what the app shows for this job. Follow it with a calculator.
When to use it. To check the app by hand, or to see every step of a price laid out with real figures.
The inputs
Rates: all at the defaults - Waste 10 %, Cleats 10 %, Hot Rolled $2350/t, Galvanising $2000/t, Painting $25/m², Bolt Price Each $2.50, Fabrication 17 h/t, Drafting $1500/t, Fabrication $85/hr, Margin 10 %, Chemsets $20 each, Transport $195/hr, Crane Hire $225/hr, Installation $95/hr.
Site Costs: 16 chemsets, 3 transport hours, 4 crane hours, 16 installation hours.
Members, as the Member Schedule shows them (raw weight, before waste):
B1: 2 × 6.2 m × 40.4 kg/m = 500.96 kg. BP1 is four 300 × 300 base plates: 0.3 × 0.3 = 0.09 m² each, × 4 × 94.20 kg/m² = 33.912 kg. A1 is 6 × 1.2 × 6.81 = 49.032 kg. Every member here is hot rolled.
Step 1 - each member's priced weight, hours, paint and bolts
Member
Raw kg
+10 % waste
+10 % cleats
Priced on, kg
Hours (× 17 ÷ 1000)
Paint m² (before cleats)
Bolts
B1
500.96
551.056
55.1056
606.1616
10.30475
2 × 6.2 × 1.24 = 15.376
UB 310: 3 per end, 6 each × 2 = 12
B2
150.72
165.792
16.5792
182.3712
3.10031
1 × 4.8 × 1.06 = 5.088
UB 250: 6 each × 1 = 6
C1
324
356.4
35.64
392.04
6.66468
4 × 2.7 × 0.90 = 9.72
UC 150: 4 each × 4 = 16
L1
127.44
140.184
14.0184
154.2024
2.62144
GAL - not painted
PFC 150: 4 each × 3 = 12
A1
49.032
53.9352
5.39352
59.32872
1.00859
GAL - not painted
angle: none
BP1
33.912
37.3032
3.73032
41.03352
0.69757
4 × (2 × 0.09 + 2 × 0.6 × 0.012) = 0.7776
plate: none
Total
1186.064
1304.6704
130.46704
1435.13744
24.39734
30.9616
46
The surface areas per metre (1.24, 1.06, 0.90 m²/m) are the published figures for each section, as on the Steel Weight Tables page.
Step 2 - Quantities
HOT ROLLED = 1304.67kg - the weight with waste, 1304.6704 kg.
CLEATS = 130.47kg - 10 % of 1304.6704 = 130.46704 kg.
TOTAL WEIGHT = 1435.14kg - 1304.6704 + 130.46704 = 1435.13744, rounded; no purlins.
PAINT = 34.06m2 - the four painted members' 30.9616 m² × 1.10 for cleats = 34.05776.
SUBTOTAL: $12317.56 - $3372.57 + $1278.51 + $115.00 + $2152.71 + $2073.77 + $3325.00, the six figures as shown.
MARGIN: $1231.76 - $12317.56 × 10 % = $1231.756, to the cent $1231.76.
TOTAL: $13549 - $12317.56 + $1231.76 = $13549.32, to the dollar.
Step 5 - the estimate sheet's extra figures
qty_fabrication = 24.3973 - the Fabrication row's hours: 24.3973 × $85 = $2073.77, its Cost to the cent. Two decimals (24.40) would not be.
sum_hours = 17 - Hours P/T: 24.39734 h ÷ 1.43514 t = 16.99997, to the hundredth.
sum_costpt = 9440.89 - Cost P/T: the $13549 TOTAL ÷ 1.43514 t.
The spreadsheet's Fabrication row: Rate 85.00, Cost 2073.77, and a Quantity cell holding the unrounded 24.39734 h, shown to the same four decimals as the estimate sheet - 24.3973 - so $85 × 24.3973 is its Cost to the cent.
File Names
Step by step
Type the Quote No. if you use one - it starts every file name.
Type the Project Name - it comes next.
Save. The app adds what the file is (Estimate, Take-off, Marked drawings, Variables, Nesting) and today's date.
Find the file in your Downloads: "Q1234 - Smith St - Estimate - 14-10-2026.pdf".
Project Name and Quote No. name every file - here, the zip SAVE ALL just saved.
Project Name: the second part of every name ("/" becomes "-").
What it does. Every file the app saves is named the same way: Quote No. - Project Name - kind - date, the parts joined by " - ", then the file type. For example "Q1234 - Smith St - Estimate - 14-10-2026.pdf". The date is the day you save it, day-month-year, from this computer's clock.
When to use it. It sorts itself: every file for a quote sits together in a folder, and each says what it is and when it was saved.
Catch. Two saves on the same day give the same name; the browser usually adds "(1)" to the second. The name keeps what you typed - only the PDF's printed text tidies characters its font cannot print.
The kinds of file
What it does. Every file the app saves is named by the same rule; only the kind in the middle changes.
When to use it. To find a saved file, or to know what a file is before you open it.
Saved by
Named
SAVE > ESTIMATE SHEET
Q1234 - Smith St - Estimate - 14-10-2026.pdf
SAVE > SPREADSHEET
Q1234 - Smith St - Take-off - 14-10-2026.xlsx
SAVE > PDF DRAWING
Q1234 - Smith St - Marked drawings - 14-10-2026.pdf
SAVE > VARIABLES
Q1234 - Smith St - Variables - 14-10-2026.json
Nesting page EXCEL / CSV
Q1234 - Smith St - Nesting - 14-10-2026.xlsx / .csv
SAVE ALL
Q1234 - Smith St - 14-10-2026.zip
Catch. RAW TEXT is a window, not a file, so it has no name.
Blank parts are left out
What it does. A part that is blank is dropped, with its " - ". No Quote No. gives "Smith St - Estimate - 14-10-2026.pdf". A Variables file saved with no Project Name either is "Variables - 14-10-2026.json".
When to use it. When a file name is shorter than you expected.
Catch. Only VARIABLES (and RAW TEXT) can be saved without a Project Name; every other save asks for one first.
Characters a file name cannot hold
What it does. Spaces and ordinary punctuation stay. The characters Windows or a Mac will not take in a file name - \ / : * ? " < > | - each become "-", so "Unit 3/45 Smith St" saves as "Unit 3-45 Smith St". Runs of spaces become one space, dots and spaces at either end of a part are dropped (so ".Smith St" saves as "Smith St", never a hidden file), and invisible marks pasted from an email are taken out. The Steel Nesting Calculator names its files by exactly the same rules.
When to use it. When a file name differs from the Project Name you typed.
Catch. Each part is cut to about 80 letters (fewer for accented letters or other scripts), so a very long Project Name is shortened in the file name - the name inside the file is kept in full. The Quote No. box takes up to 40 characters.
The SAVE ALL zip
What it does. The zip has no kind in its name: "Q1234 - Smith St - 14-10-2026.zip". Inside, each file has the same name its own SAVE button would give it, and carries the time it was saved on this computer's clock.
When to use it. To find the zip SAVE ALL made, and the files in it.
What it does. If the nest on the Nesting page ran before the last change to the schedule, lengths or settings, SAVE ALL still puts its two files in the zip, named "Q1234 - Smith St - Nesting - OUT OF DATE - 14-10-2026.xlsx" (and .csv), and the notice says the nest is stale.
When to use it. If you see it, press RE-NEST on the Nesting page and SAVE ALL again for a current nest.
Catch. Only inside the zip. The Nesting page's own EXCEL and CSV buttons keep the ordinary name, stale or not - the page's STALE banner is the warning there.
Nesting file names
What it does. The Nesting page's EXCEL and CSV files are named Quote No. - job - "Nesting" - date. The job is the one the file's own title line names: a job typed on the Nesting page or taken from a loaded cutting-list file, otherwise the Project Name.
When to use it. To find the Nesting page's files, or to name them after a job of your own.
Catch. A job from a loaded file can give the nesting files a different name from the estimate. Type the job on the Nesting page to fix it.
What it does. The separate Steel Nesting Calculator page names its Excel and CSV files from its Job number box: "JN 1470 - Nesting - 14-10-2026.csv". It has no Quote No.; with the box blank the file is "Nesting - 14-10-2026.csv".
When to use it. Type the job number before you export.
Catch. Importing a cutting-list file with a title fills the Job number box for you, and the next file replaces it - until you type your own, which is never overwritten. Its names are tidied exactly as the workbench's are: the same characters replaced with "-", a leading dot dropped, invisible marks taken out and the job cut to about 80 letters.
Keyboard Shortcuts
Step by step
Type the member in the entry form: Item, Tab, Quantity, Tab, Length, then pick Type, Size, Weight and Coating.
Press Enter to ADD it. The cursor goes back to Item with the name highlighted, ready for the next member.
On the drawing, press M to measure, C for a column and S to select - with one hand on the mouse.
Press Escape to back out of whatever is half done, one step at a time.
Press Ctrl+Z (Cmd+Z on a Mac) to take back the last thing done on the drawing.
Where the keys act: the drawing tools, the entry form and the Member Schedule.
MEASURE - the M key.
COLUMN - the C key.
SELECT - the S key.
DELETE - Delete or Backspace with a mark or strike selected.
UNDO - Ctrl+Z or Cmd+Z.
The entry form - Enter adds the member, Escape clears it, Tab walks Item, Quantity, Length.
The Member Schedule - Delete removes the selected line.
What it does.M presses MEASURE, C presses COLUMN and S presses SELECT - exactly as a click on the button would, so a second press turns the tool off. Delete or Backspace presses DELETE for the mark or strike you have selected.
When to use it. Working down a sheet: keep the mouse on the plan and switch tools with the other hand.
Catch. The keys only work with the drawing on screen and a sheet open, never while you are typing in a box, never while a question is showing, and not with Ctrl, Cmd or Alt held. A key does no more than a click could: M on a sheet with no scale says "Set this sheet's scale first - pick it in the SHEETS bar."; M or C with the entry form missing a field names the field; M or C with a mark selected says "Put the selection down first (Esc), then MEASURE." Holding a key down presses it once, not over and over. Delete with only a schedule line selected (no mark) is the schedule's own Delete, which removes the whole line - see Delete.
What it does. Cancels one thing per press, nearest first:
An open colour palette or Load/Save menu closes.
A question on the page is cancelled (same as its Cancel).
On the drawing: a scale check waiting for its clicks is skipped; then a half-drawn strike, a Custom… calibration, or a half-placed measuring point is dropped; then the live tool (MEASURE, COLUMN, COPY, STRIKE, SELECT) is turned off; then a selected strike, mark or line is put down.
On a phone, a picker sheet that is open closes.
In the entry form (Item, Quantity, Length, Type, Size, Weight, Coating, Bolts): a half-drawn strike is dropped if there is one; otherwise the form is cleared, the same as CLEAR.
In Project Name, Quote No., an Item or Project Variable, a Site Costs box or a box on the Nesting page: the box is let go. Nothing is cleared.
On the Nesting page, an open EXPORT menu closes.
When to use it. Whenever a click went somewhere you did not mean, or to get a tool out of the way. Keep pressing until you are back where you want to be.
Catch. Escape inside the entry form wipes a half-typed member. If you only want to stop the drawing tool, click on the sheet first so the keyboard is not in a form box, then press Escape. In the Custom… scale's Real length box, Escape closes the calibration and leaves the scale as it was.
What it does. The same as the drawing's UNDO button: takes back the last drawing action - a measure, a column, a count onto a line, a copy, a move or re-size, a delete, a strike or a colour - and the Member Schedule and TOTAL go back with it. Up to 30 steps.
When to use it. Straight after a click that put a mark in the wrong place.
Catch. It works only with the drawing on screen and a sheet open. In a box you are typing in (Item, a rate, Project Name and so on) the key is the browser's own text undo instead. It does not undo a typed ADD, EDIT or REMOVE - and once one of those has happened, the older drawing steps are dropped ("Nothing to undo - the Member Schedule has changed since the last drawing action...") because undoing past them would lose your typing. Ctrl+Shift+Z does nothing: there is no redo. A REMOVE has its own UNDO on the toast for 6 seconds.
What it does. In the entry form, Enter is ADD: the member goes on the Member Schedule and the cursor returns to Item with its name highlighted. In Project Name, Quote No., the Item and Project Variables, the Site Costs boxes and the Nesting page's boxes, Enter just keeps what you typed and moves the cursor out - it never adds a member.
When to use it. Typing a schedule in from the plan: Item, Tab, Quantity, Tab, Length, pick the rest, Enter, and straight on to the next.
Catch. Enter is always ADD, never EDIT - even with a schedule line clicked. To change a line, press the EDIT button. Pressing Enter twice adds the member twice; REMOVE the extra line.
What it does. With a line clicked in the Member Schedule, Delete does the same as REMOVE: the line goes, with an UNDO on the toast for 6 seconds.
When to use it. Tidying the schedule from the keyboard.
Catch. With the drawing on screen and a MARK selected (clicking a mark also highlights its line), Delete removes that one mark instead - quantity down by one - not the whole line. Backspace never removes a schedule line.
What it does. Tab walks the entry form in the order you read a schedule: Project Name, Quote No., then Item, Quantity, Length, Material Type, Material Size, Weight, Coating and the Bolts fields. Arriving in a box by Tab highlights what is in it, so the next key you type replaces it, as in a spreadsheet. The Item and Project Variables work the same way.
When to use it. Entering a long schedule without the mouse.
Catch. Only Tab highlights. A mouse click drops the cursor where you click, so you can fix one digit in the middle of a rate.
Enter and Escape in the scale boxes
What it does. In the Custom… scale's Real length (mm) box, Enter is SET and Escape closes the calibration. In the scale check's Real length (mm) box, Enter is CHECK.
When to use it. Type the dimension and press Enter instead of reaching for the button.
Catch. An empty box says "Enter a length in mm." (calibration) or "Enter the real length in mm." (check) and waits.
What it does. When the page asks a question (RESET ALL, a different drawing set, an unfinished take-off and the rest), Tab and Shift+Tab move between its buttons and stay inside it, Enter or Space presses the highlighted button, and Escape is Cancel.
When to use it. Whenever a question is on the page and you would rather not reach for the mouse.
Catch. Cancel, Escape, the cross and a click outside the question all mean "no" - nothing is changed or saved. While a question is up, the drawing keys and Ctrl+Z do nothing.
What it does. In Stock on hand, Enter in Length (mm) or Qty adds the bar, the same as its ADD button. Enter in any other box on the page (a cutting setting, a row of lengths to order from) keeps the value. Escape closes the EXPORT menu. Enter or Space on a drop zone opens the file picker.
When to use it. Entering a run of stock bars from the keyboard.
Catch. The Nesting page has no tool keys of its own; M, C, S and Ctrl+Z do nothing there.
What it does. Below 699 pixels wide Steel Quote switches to a layout built for a thumb: one column, big buttons, a tab bar along the bottom and pages that slide up over the form. It is the same calculator with the same prices and rates.
When to use it. Pricing on site or at a supplier's counter. For drawing take-off and nesting, use a computer.
Catch. Unfold the phone or turn it sideways to a screen 699 pixels or wider and the computer layout appears, drawing page included. To force the computer layout on any screen, open steelquote.info/desktop.html; it offers your saved work back like any other visit.
TYPE (tap button)
What it does. Opens the Material Type list as a sheet from the bottom: UB, UC, PFC, angles, flats, rounds, hollow sections, SHEET, PURLIN, CUSTOM and the rest. One tap picks it and the size list follows straight away.
When to use it. For every new member of a different section.
Catch. It stands in for the Type list of the computer layout. After a pick the button shows what is picked.
SIZE (tap button)
What it does. Opens the size list for the picked type, in two columns. If no type is picked yet it opens the type list first.
When to use it. To change size without changing type.
WEIGHT (tap button)
What it does. Opens the kg-per-metre list for the picked size. When the size has only one weight it fills itself and the list never opens.
When to use it. For sizes rolled in more than one weight.
The pick list (‹ and ×)
What it does. The sheet the three tap buttons open. Its title says what you are picking. ‹ steps back from weight to size, or size to type. ×, or a tap outside it, closes it without a change. The current pick is shown dark.
When to use it. Every time you pick a section.
Catch. After the last pick the cursor goes to Length (if it is empty) so you can type straight on; for SHEET it goes to Quantity.
Quantity − / +
What it does. One fewer, one more. The quantity never goes below 1.
When to use it. Instead of the keyboard for small counts.
Catch. A step replaces whatever was typed in the box with a whole number.
PAINT / GAL / RAW
What it does. Sets the coating in one tap. PAINT is priced on the square metres of surface, GAL per tonne, RAW adds nothing. The picked one shows dark.
When to use it. For each member, before ADD.
Catch. A PURLIN sets itself to RAW.
SHEET (plate) on a phone
What it does. The phone hides the Sheet Width and Length boxes and sets both to 1 m, so Quantity is the square metres of plate at the picked thickness.
When to use it. For a quick plate allowance: 6.5 m² of 10 mm plate is Quantity 6.5.
Catch. A SHEET line loaded from a computer keeps its real width and length. After ADD a SHEET keeps its 1 m by 1 m for the next one.
ADD on a phone
What it does. Adds the member, then readies the form for the next: a number at the end of the Item mark counts up (B1 becomes B2) and sits selected, and Length clears. Type, size, weight and coating stay put. Nothing is left selected on the schedule.
When to use it. For a run of similar members: type the length, tap ADD, repeat.
Catch. Because nothing stays selected, EDIT cannot overwrite the line you just added. To change it, tap its line in the schedule first.
The keyboard's next arrow
What it does. Walks Item, Quantity, then Length. If no section is picked yet, it opens the Type list instead of jumping past it.
When to use it. To fill a member without reaching up the screen.
Catch. The number boxes open the number pad directly. The field you are typing in is scrolled clear of the keyboard.
Changing a line on a phone
What it does. Tap a line in the Member Schedule to load it into the form. EDIT saves your changes to it, REMOVE deletes it with a few seconds of UNDO, and CLEAR empties the form.
When to use it. To fix a member already added.
Catch. UNDO brings the line back unselected, so the next ADD is a new member.
What it does. Shows the job so far: number of lines, total weight in kg (purlins included) and the TOTAL in dollars. Tap it to open the Summary.
When to use it. A glance after each ADD.
Catch. It hides while the job is empty, while the keyboard is up, over the Weight readouts, and while a question is showing.
Workspace (tab)
What it does. Back to the entry form and the Member Schedule. It closes whatever page is open over them, Site Costs included.
When to use it. After checking the Summary or Values.
Summary (tab)
What it does. Opens the Live Summary as a page: Quantities, Costs and Project Costs, the same figures as the computer's right-hand column, updated as you go. Tap the tab again to close it.
What it does. Opens your rates on one page: the Item Variables (waste, cleats, $ per tonne, bolt price, fabrication hours and the VALUE X weight for CUSTOM) with the Project Variables (drafting, fabrication $/hr, margin and the site cost rates) below. Some labels are shortened to fit. Tap the tab again to close it.
When to use it. Before the first member, to set the job's rates.
Catch. Item Variables are copied to each member when it is added; changing them later does not re-price members already on the schedule. Project Variables apply to the whole job at once.
What it does. Opens this help page in a new tab, so the job stays open where it is.
When to use it. Any question. Search at the top of any section.
Load/Save (tab)
What it does. Opens the Load / Save page: open an estimate sheet, spreadsheet or variables file; SAVE ALL, ESTIMATE SHEET, SPREADSHEET, VARIABLES, RAW TEXT; RESET ALL. Tap the tab again, or another tab, to close it.
When to use it. To open a job sent from a computer, or to save or send the job from the phone.
What it does. There is no Site Costs tab on a phone. Site quantities typed on a computer travel in the save files and the autosave and are priced on the phone - they show in the Summary's Project Costs and every export. If one of them needs fixing, the Site Costs page opens on the phone with a note on the field; the Workspace tab closes it. Its rows follow the same rules there: hire days book one delivery, days put back to 0 take the delivery off, and a delivery cannot be typed with no days.
When to use it. Enter chemsets, transport, crane, hire and installation on a computer. The rates for them are on the phone's Values page.
What it does. Measuring off a PDF drawing set and nesting need a wider screen, so the phone has no Drawing tab, no PDF DRAWING buttons in Load/Save and no Nesting page. Members measured on a computer still come across with the job and are priced.
When to use it. Open the job on a computer (or unfold the phone) to measure, mark or nest.
Catch. Opening a job with marked members on a phone says to open it on a desktop to see the marks. SAVE ALL on a phone leaves the marked drawings out and says so.
? bubbles on a phone
What it does. Tap any ? at the right of a label for a short note on that field. The phone adds one to every entry field - Project Name, Quote No., Item, Quantity, Length, Type, Size, Weight, Coating, Weight and With Waste - as well as the ones the computer has.
When to use it. Whenever a field is unclear. Each note links to its entry here.
What it does. Work saves itself in this browser as you go and is offered back on your next visit. To move a job to a computer, save the Estimate Sheet PDF or the Spreadsheet from Load/Save - both carry the whole take-off - and OPEN it there.
When to use it. Before closing the browser on anything you want to keep or send.
Catch. The autosave lives in this browser on this phone only. It does not reach your computer by itself.
The scale check says the ratio is more than 2% out
What it means. You clicked both ends of a dimension you know, typed its real length, and what the two clicks measure at the picked ratio is more than 2% away from it. The strip reads, for example, "Scale 1:100 is 50.0% out - measured 3,000 mm against 6,000 mm. This PDF may not be full size - an A1 set issued as an A3 PDF measures half length at 1:100."
What to do.
Look at the paper size beside the scale picker. If the title block says "A1 @ 1:100" but the sheet size reads A3, the PDF has been reduced to half size: everything measures half length at 1:100. On that PDF the true ratio is 1:200 (an A1 drawing on A2 paper is about 1:141).
Press USE CUSTOM to set the sheet's scale from the dimension you just measured. This is the safest fix: it is right whatever size the PDF was issued at.
Or pick the right ratio in the scale picker - it will ask you to check it again.
Press KEEP only when you know the dimension you clicked was not drawn to scale (a "NTS" detail, a broken dimension line).
Catch. Every sheet has its own scale, and a reduced set is usually reduced on every sheet - check each one as you open it. Members already measured on a sheet keep the length they were measured at: changing the scale afterwards does not re-measure them. MEASURE them again, or click the line, type the right Length and press EDIT. The 2% is judged on the exact figure, so "2.0% out" can still be out.
"Take-off not finished" - the unmeasured-members warning
What it means. At least one schedule line is still UNMEASURED - entered from the plan's schedule with no Length, waiting to be measured on the drawing. ESTIMATE SHEET, SPREADSHEET and SAVE ALL stop and list them in two groups:
"N members not priced - UNMEASURED, no length: B1, B3" - nothing has been measured for these. They weigh nothing and cost nothing in the quote.
"N members still being measured, priced at the length found so far: C1 (2 of 4)" - the first one has been measured, and the line is priced for its full quantity at that length.
What to do. Press Cancel, go back to the drawing, click each listed line in the Member Schedule and MEASURE (or COLUMN) into it until it reads "4 of 4" and settles. If you know a length without measuring, click the line, type the Length and press EDIT - that settles it by hand. Press EXPORT ANYWAY only for a deliberately part-finished take-off.
Catch. A file exported anyway says so on its face: the lines print in red under the estimate sheet's summary, under the spreadsheet Estimate's summary, in its Member Schedule Note column and on the marked drawings' schedule page. The Live Summary also shows "UNMEASURED = N members, no length, not priced" the whole time - a quote with that line on it is not finished. PDF DRAWING does not ask, but its schedule page carries the same lines. You can only ADD a member with a blank Length while a drawing is loaded; without one the form asks for a Length.
"Fabrication hours now come from each member's weight" on an old job
What it means. Fabrication hours are always worked out from each member's weight (with waste and cleats) and its own Fabrication Hours Per Ton - they are never stored or typed. The file you opened carried hours that do not match that: an older job saved before the change, a member whose size or length changed after it was added, or a figure typed into the spreadsheet's Fabrication Hours column (R). The notice names up to three members, "B1 was 9.99 h, now 6.12 h", then "N more moved too".
What to do. Compare the TOTAL with the quote you sent. If the labour should stay as it was for a member, click its line, raise its Fabrication Hours Per Ton in Item Variables, and press EDIT. Then save again - the new file opens without the notice.
Catch. It shows on OPEN > SPREADSHEET, OPEN > ESTIMATE SHEET, a marked drawing PDF dropped back in, and RESTORE. A difference of a hundredth of an hour is ignored. Purlins carry no hours and are never named. A file saved by this version never shows it.
Invisible characters - zero-width spaces, direction marks, soft hyphens, often pasted in from an email - are dropped.
Line breaks and tabs become a space.
A letter with an accent the font lacks loses the accent (ő becomes o), and Ł, Đ, ı, Ħ and Ŧ become L, D, i, H and T. Unusual dashes and the minus sign become "-".
Anything still unprintable - Chinese or Japanese characters, emoji, flags - becomes one "?" each.
What to do. Usually nothing: the save goes ahead and the figures are untouched. If the "?" matters on a sheet going to a client, retype the Project Name, Quote No. or member name in plain letters and save again.
Catch. Only what is printed on the PDF changes. The screen, the spreadsheet, RAW TEXT and the take-off stored inside the PDF keep the text exactly as typed, so reopening the PDF brings the original name back. File names keep it too, apart from the few characters a file name cannot hold (see File Names). Older versions of the app refused to make the PDF at all ("WinAnsi cannot encode"); that no longer happens.
What it means. RAW TEXT opens the job in a new browser window. Many browsers block new windows a page opens. When that happens the window never appears and the page says "The browser blocked the Raw Text window - allow pop-ups for this site and press RAW TEXT again."
What to do. Look for the blocked-pop-up sign at the right of the browser's address bar, choose to always allow pop-ups from this site, and press RAW TEXT again. In the browser's settings this is under Site settings (or Privacy) > Pop-ups.
Catch. Nothing is lost - RAW TEXT is only a printable copy. If you cannot change the setting, SAVE > SPREADSHEET or ESTIMATE SHEET carry the same figures.
What it means. The calculator itself works offline once the page has loaded - typing, pricing, the Live Summary and the autosave. But the tools that read and write PDFs, spreadsheets and zips come from the internet, and the app checks each one is the exact copy it trusts before using it. If one cannot be fetched (or the copy is not the trusted one), the button that needs it says so and does nothing else:
Message
What it stops
Fix
"Loading the PDF viewer…" then "The PDF viewer failed to load. Check your internet connection and try again."
Loading a drawing set
Reconnect and pick the PDF again - it tries afresh.
"The PDF reader failed to load. Check your internet connection and try again."
OPEN > ESTIMATE SHEET
Reconnect and open the file again.
"PDF library failed to load. Check your internet connection and try again."
SAVE > ESTIMATE SHEET and PDF DRAWING
Reconnect, then reload the page and RESTORE the job.
"Could not generate the estimate PDF: the estimate sheet template could not be fetched - check your internet connection."
SAVE > ESTIMATE SHEET
Reconnect and press it again. The blank estimate sheet is fetched from the website every time.
"Spreadsheet library failed to load. Check your internet connection and try again."
SAVE and OPEN > SPREADSHEET
Reconnect, then reload the page and RESTORE the job.
"Loading the zip library…" then "Nothing was saved - the zip library did not load. ..."
SAVE ALL
Reconnect and press SAVE ALL again, or save each file with its own SAVE button.
"The Excel writer did not load (offline?). CSV export still works."
"Could not load the Excel reader (offline?). Save the list as CSV and import that instead."
Nesting: dropping an .xls or .xlsx cutting list
Reconnect and drop it again, or use a CSV.
When it happens. No internet, a site or office network that blocks the download, or (rarely) the download site serving an altered copy, which the app refuses.
Catch. The PDF-writing and spreadsheet tools are fetched once, when the page opens - if they missed, reconnecting is not enough: reload the page. Your work is safe: it is saved in this browser as you go, and the reload offers it back on the restore list. The viewer, the PDF reader, the zip tool and the Nesting Excel reader are fetched when first needed and try again on the next attempt.
MEASURE or COLUMN won't start, or clicks on the sheet do nothing
What it means, and what to do. Read the notice or the red note - it names the cause:
When to use it. When MEASURE or COLUMN will not light up, or a click on the sheet puts nothing down.
"Set this sheet's scale first - pick it in the SHEETS bar." - pick the sheet's ratio, or Custom… to calibrate.
"Pick a Type before measuring", "Pick a Size...", "Pick a Weight (kg/m)...", "Select a coating...", "Enter the Bolts count..." - fill the named field and press the tool again. A drawn line becomes a member, so it needs everything a member needs.
"Enter a Length (m) before placing a column" - a column is one click, so its length comes from the form.
"Sheet items are sized by Width x Length, not a measured length." - a SHEET (plate) is typed and ADDed, never measured.
"Painting area data isn't available for this section size. Choose Galvanizing or Raw..." - a CUSTOM section has no paint area.
"Put the selection down first (Esc), then MEASURE." - a mark is selected; press Escape.
The scale check strip is showing - while it waits, clicks on the sheet only place its two points. Finish it, or press SKIP.
"Those two clicks are in the same place - click the member's two ends." - nothing was measured.
Catch. The form is checked again on every click, so emptying a field after the tool is armed stops the next click too. Turning a tool off is never blocked.
"Enter a Length (m) for this member." when I want to add from the schedule
What it means. A member can be added with a blank Length (as an UNMEASURED line, to be measured later) only while a drawing is loaded. Without a drawing, a blank Length would be a member that weighs nothing, so ADD refuses it.
What to do. Load the drawing set first (Drawing, or OPEN > PDF DRAWING), then ADD the schedule rows. Or type the Length.
What it means. Something the member needs is missing or is not a plain number. The note is under the field to fix:
When to use it. When ADD (or EDIT) seems to do nothing.
"Pick a Type to start this item." / "Pick a Size for this Type." / "Pick a Weight for this Size." / "Select a coating."
"Enter the custom weight (kg/m) for this member." - a CUSTOM VALUE X section needs its kg/m in Custom Weight.
"Enter the sheet Width (m)." / "Enter the sheet Length (m)." - for a SHEET.
""Quantity" must be a plain number greater than zero. You entered: "4 off"." - type digits only: 6.5, not 6.5m; 5000, not 5,000.
""Waste %" must be zero or more." - rates, percentages and site quantities cannot be negative.
"Please enter a value for "Margin %"." - a rate box has been left empty.
"No bolt figure for this connection (WB 900 and deeper, any WC, or a portal connection past 460UB / 380 PFC). Enter the Bolts count yourself." - there is no measured figure for these, by design.
"Painting area data isn't available for this section size (Custom sections aren't covered)..." - choose GAL or RAW.
"Click a line in the Member Schedule first - EDIT commits the current values to that item." (or REMOVE) - EDIT and REMOVE work on a clicked line.
"Enter a Project Name before exporting - it names the file and heads the sheet."
Catch. One note is advice only and does not stop ADD: "... is not in your supplier pool - the nearest stocked section is ..." (orange). (A PURLIN's coating is simply set to RAW at ADD, whatever the box showed.) ".5", "5." and "+5" are accepted and tidied.
What it means. The size you picked is a real size (it weighs what it should) but the shop's supplier does not stock it. The orange note names the nearest stocked section with the same outside size, its kg/m and the weight difference, and says LIGHTER when it is lighter than specified.
What to do. Nothing has to change - it is advice. To swap, use the Nesting page's supplier pool panel, which rewrites every quoted member of that size at once, or KEEP AS SPECIFIED.
What it means. "Nothing to undo on the drawing." - there are no drawing steps left (30 at most, kept until the page is reloaded). "Nothing to undo - the Member Schedule has changed since the last drawing action (a typed ADD, EDIT or REMOVE, say), and undoing past that would lose it." - a typed change came after the drawing steps, so they were dropped. "Finish the drag first, then UNDO." - let go of the mark first.
What to do. Put the mark right by hand: SELECT it and drag, or DELETE it. A REMOVE can still be undone from its toast for 6 seconds.
Catch. OPEN, RESTORE, RESET ALL and loading a different drawing set also clear the UNDO steps. With the scale check open, the first UNDO takes back the check's last point, or closes the check.
"The mark was not moved - the sheet was redrawn during the drag"
What it means. The sheet re-drew itself (a zoom, a resize of the window) while you were dragging a mark or strike, so the drag could not be finished safely. The mark or strike is left exactly where it was - nothing is re-priced.
What to do. Drag it again. The same is said of a strike: "The strike was not moved...".
What it means. Each OPEN checks the file is its own kind before touching the job, and says why it is not:
When to use it. When an OPEN or a dropped file is refused.
"That file is not a PDF. Choose a PDF drawing set." / "That PDF could not be opened. Try re-saving it from the original." / "That PDF could not be shown..." - the drawing set.
"No Steel Quote take-off found in that PDF..." - OPEN > ESTIMATE SHEET takes only estimate sheets and marked drawings saved by this app. An ordinary drawing goes in through OPEN > PDF DRAWING.
"Could not open the file: no MemberData sheet found..." / "Could not read [file]. Try choosing it again." - OPEN > SPREADSHEET takes only the take-off spreadsheet this app saves.
"That file is not a Steel Quote variables file. Use SAVE > VARIABLES to create one."
"Loaded 12 variables from [file]. Skipped (not a number): ..." - the named rates were left as they were.
Catch. A file that fails changes nothing - the job and the drawing on screen stay as they were. A PDF re-saved through another program can lose the take-off stored inside it; open the spreadsheet instead. The Nesting files and RAW TEXT are not save files and cannot be reopened.
"N members carry drawing marks - load the matching PDF"
What it means. The job you opened or restored was taken off a drawing, but the drawing itself is not stored in the spreadsheet or the estimate sheet. The marks are kept and wait for their drawing.
What to do. Load the same drawing set (OPEN > PDF DRAWING, or drop it on the Drawing page). The marks, scales and strikes go back on their sheets. On a phone the note says to open the job on a desktop instead - the phone has no drawing page.
Catch. It must be the same drawing set. A different set (or a revision) is asked about first: START CLEAN, KEEP or Cancel.
"Rates missing from the file were filled from the job's rates"
What it means. A member in the file had a rate missing or blank - an older file, or a cell cleared in Excel. So that it is not priced at $0, the job's own rate was filled in, and the notice names the rate and up to three of the members.
What to do. Check the named rate suits those members. If not, click each line, set the rate in Item Variables and press EDIT.
What it means. Item Variables (waste, cleats, the $/t rates, galvanising, painting, bolt price, fabrication hours per ton) are copied onto each member when it is ADDed. Changing them later prices the NEXT member you add; members already on the schedule keep the rates they were added with. Project Variables (drafting, fabrication $/hr, margin, the site cost rates) apply to the whole job at once.
What to do. Set the Item Variables before you start taking off. To re-price a member already added, click its line, change the rate and press EDIT.
Catch. Clicking a line shows THAT line's rates in Item Variables, marked with a note; CLEAR, ADD or clicking away puts your live rates back.
What it means. Figures are worked out at full accuracy and rounded where they are shown: weights and money to the cent, the TOTAL to the dollar - except that the SUBTOTAL adds up the lines as shown, DRAFTING starts from the TOTAL WEIGHT as shown (rounded to the dollar before the ÷ 1000) and MARGIN from the SUBTOTAL as shown. A total rounded from unrounded parts can sit a cent away from the sum of its rounded lines, and the fabrication hours shown times the $/hr can sit a few cents off the Fabrication cost. A half always rounds up, as Excel's ROUND does.
What to do. Nothing - it is expected. The screen, the estimate sheet and the spreadsheet agree with each other.
What it means. The job is saved in this browser as you work (the green tick at the foot of the rail). Each tab keeps its own save. When the page opens, a list of saved jobs appears with RESTORE, DISCARD and START FRESH.
What to do. Press RESTORE beside the job. If you pressed START FRESH, reload the page - the save is still listed until you DISCARD it or eight newer saves push it off.
Catch. The save lives only in this browser on this computer: another browser, another computer, a private window or cleared browsing data will not have it. SAVE ALL (or SAVE > SPREADSHEET) at the end of each session gives you a file you can open anywhere.
"Copy failed - the browser blocked clipboard access."
What it means. Nesting > EXPORT > copy puts the order list on the clipboard, and the browser refused. "Copy is not available in this browser." means the browser has no way to do it.
What to do. Allow clipboard access for this site in the browser's settings, or use EXPORT > Excel or CSV, or print the order sheet.
When to use it. When the Nesting page shows a message instead of, or above, the results.
"Add a cutting list to nest." - the cutting list is empty: add members in the Workspace, or drop a file.
"▲ Changed since this nest (...): ..." with RE-NEST - the schedule, lengths or settings changed after the nest ran. The results are still printable, but they are out of date; press RE-NEST.
"Could not be nested (N)" - pieces longer than any length you can order or have in stock, or a member still unmeasured ("unmeasured - entered from the schedule, not yet measured on the plan").
"Choose a type and size." - adding or pasting stock bars with no material picked.
"... mm is no longer than the end trims - lengths are in mm" / "... mm looks like metres" / "Length ...: write millimetres as 8000 or 8,500" - a stock length that cannot be a bar in millimetres; see Length (mm) and Qty.
"Nest failed: ..." / "Compare failed: ..." - something in the list could not be nested; check the lengths and settings and try again.
"Undone: ..." / "Nothing to undo..." / "Finish the drag first, then UNDO." / "Scale check closed - nothing was undone..." / "That could not be undone."
"No Steel Quote take-off found in that PDF..." / "Could not open the file: ..." / "Could not open that PDF: ..." / "Could not read [file]..." / "That file is not a Steel Quote variables file..."
Sections rolled hot at the mill: UB, UC, PFC, TFB, equal and unequal angles (EA, UEA), flat bar, round and square bar, and SHEET (plate). In the app they are priced at the Hot Rolled Sections Price Per Ton and show as HOT ROLLED in Quantities. A CUSTOM section of kind HOT ROLLED is priced the same way.
An I-section beam, deeper than it is wide. Written UB-310 in Material Size (the nominal depth in mm), with its kg/m chosen in Weight - so 310UB40.4 is UB-310, 40.4. Bolt counts come from the shop's cleat schedule.
UC - universal column
An H-section, about as wide as it is deep, mostly used for columns. Written UC-100 to UC-310, with the kg/m in Weight (310UC96.8 is UC-310, 96.8).
PFC - parallel flange channel
A channel with parallel flanges, written by depth x flange width (PFC-200x75). Each size has one weight.
TFB - taper flange beam
A small I-beam with tapered flanges: TFB-100 and TFB-125.
EA / UEA - equal and unequal angles
L-shaped sections. EA is an equal angle, written leg x thickness (EA-50x6 is 50 x 50 x 6). UEA is an unequal angle (also called UA), written long leg x short leg x thickness (UEA-100x75x6). Both are hot rolled.
FLAT - flat bar
Solid rectangular bar, written width x thickness (FL-100x10). Its weight is worked out from its size, not looked up.
RND / SQ - round and square bar
Solid bar: RND-20 is 20 mm round, SQ-20 is 20 mm square. Weights are worked out from the size.
SHS - square hollow section
Square tube, written side x side x wall (SHS-100x100x5.0). Priced at the Hollow Sections Price Per Ton with RHS and CHS, shown as HOLLOW in Quantities.
Rectangular tube, written depth x width x wall (RHS-150x100x6.0). A hollow section.
CHS - circular hollow section
Round tube, written outside diameter x wall (CHS-168.3x6.4). A hollow section.
WC / WB (WCWB) - welded columns and beams
Sections made by welding plates together, for sizes beyond the rolled range: WB-700 to WB-1200 (welded beams) and WC-350 to WC-500 (welded columns). Together they are WCWB, priced at the Fabricated Sections Price Per Ton and shown as FABRICATED in Quantities. WB 700 and 800 have bolt figures; WB 900 and deeper, and every WC, need the Bolts count typed in.
Flat plate, picked by thickness (SHEET-3MM to SHEET-150MM) and sized by Sheet Width x Sheet Length in metres, not by a measured length. Hot rolled. It cannot be measured off a drawing - type it and ADD.
Cold-formed C or Z sections that carry roof and wall sheeting (girts on a wall). Written C/Z-20015: 200 mm deep, 1.5 mm thick. Priced at the Purlin Price Per Ton. Purlins take no waste, no cleats and no fabrication hours, and their bolts default to 4 x M12. They are always RAW: the form sets the coating to RAW at ADD (a GAL or PAINT pick is replaced, without a note).
A section not in the tables. Pick CUSTOM, then HOT ROLLED or HOLLOW (which rate it is priced at), and the Weight becomes VALUE X: type its kg/m in Custom Weight. A custom section has no paint area, so it can be GAL or RAW but not PAINT.
The mass of one metre of a section, from the published supplier tables. Weight = quantity x length x kg/m. For a SHEET the figure is kg per square metre.
Tonne ("Ton" on screen)
1,000 kg. The rates labelled "Price Per Ton" are dollars per metric tonne.
Cleat
A plate welded or bolted to a member to connect it to the next. The app does not price each cleat: it adds the Allowance For Cleats % (10% to start) of each member's weight-with-waste, priced at the hot rolled rate, and shown as CLEATS in Quantities. The cleat schedule also sets the shear bolt counts.
Extra material for drops and offcuts, as a percentage of each member's net weight (Waste %). "With Waste (kg)" is the weight it is priced on. Purlins carry no waste.
A chemical anchor or hold-down (HD) bolt set into concrete on site to hold a base plate down. Counted on the Site Costs page and priced each at Chemsets / HD Bolts Price Each.
Metric bolt diameters in mm. The picker offers M12, M16, M20, M24, M30 and M36. Filled in for you: M20 for members up to and including 460 deep, M24 above, M12 for purlins. Every size costs the same Bolt Price Each; the summary shows the total as BOLTS = N off.
A shear (simple) connection is a cleat plate at each end; the bolt count comes from the shop's cleat schedule. A portal connection is a moment connection at a portal frame's knee or apex - tick Portal and the count adds flange bolts (for PFC to 380 and UB/UC to 460UB). Past those sizes the count is typed by hand.
The outside surface of a member in square metres, from the published surface-area tables (m² per metre) times its length and quantity, plus the cleats %. A PAINT member is priced at Painting Price Per m2 on that area. Plate is both faces plus its edges.
No coating - nothing is added for paint or galvanising.
Fabrication hours
Workshop hours, always worked out from weight: each member's weight with waste and cleats, in tonnes, times its Fabrication Hours Per Ton. Costed at the Fabrication Price Per Hour. "Hours P/T" on the estimate sheet is the job's hours over its tonnes.
The estimate rows a take-off cannot measure: chemsets, rolling, transport hours, crane hire hours, scissor / boom hire, track trolley hire and installation hours. Entered on the Site Costs page and added to the SUBTOTAL.
The list of every member on the job with its size, length and quantity, read or measured from the drawings. In the app it is the Member Schedule; SAVE > SPREADSHEET saves it as the "Take-off" file.
Schedule
Two things. The Member Schedule is the app's list of members, one line each. The plan's own printed schedule is the table on the drawing that lists the members; schedule-first take-off enters it row by row, and STRIKE rules each row off.
Two meanings. A member mark is its name on the plan (B1, C2) - typed into Item. A drawing mark is the line or dot the app draws on the sheet for each measured instance, tagged with that name.
Unmeasured
A schedule line ADDed with no Length while a drawing is loaded, to be measured later. Its quantity is the target; the line reads "2 of 4 measured" as marks go in and "not priced" until it has a length. It settles when the marks reach the target.
When an instance of a member measures a different length from the rest of its line, it moves to a line of its own named after the first with a number: B1-2, B1-3. Further instances at that length count onto the split.
A straight line drawn through a row of the plan's printed schedule to show it has been taken off. A note on the plan only - never a member, never priced.
A drawing set is one PDF of drawings; each page is a sheet. Each sheet keeps its own scale, rotation, zoom and strikes. A revision of the same set can KEEP them by sheet number.
Fitting the pieces of the cutting list into the bars you can buy (or have on the rack) with the least waste. The result is an order list and a bar-by-bar cutting list.
The pieces to cut, by material, length and quantity. The Nesting page reads it from the Member Schedule, or from a file (a detailer's shaft or part list, a CSV or a Steel Quote spreadsheet).
A length a section can be bought in - UB and UC in 6, 9, 10.5, 12, 13.5, 15, 16.5 and 18 m, for example. "Lengths to order from" holds them per material; a row takes up to 20 m.
The bars and offcuts already in the yard. A nest uses them before ordering new lengths. Shared between the Nesting page and the standalone nesting calculator in this browser.
Cut off each end of every bar before the first piece and after the last, to square up a mill or damaged end (End trim per bar end, mm). Capped at 500 mm.
The sizes the shop's supplier stocks. A size outside it still weighs correctly, but is flagged with the nearest stocked replacement - same outside size, nearest wall either way - marked LIGHTER when it is lighter.
Item Variables are copied onto each member when it is added (waste, cleats, $/t, coatings, bolts, hours per ton). Project Variables apply to the whole job (drafting, $/hr, margin, site cost rates).
The one-page PDF of the job's quantities and costs, filled in by the app. It also carries the take-off inside it, so OPEN > ESTIMATE SHEET reopens the job.